Owyn Springer talked about the production of his 3D gun Romanian Fighter - PM md. 90 made with Maya, Rizom, and Marmoset Toolbag.
In case you missed it
You might find these articles interesting
Introduction
My name is Owyn Springer, I’m 21 and currently studying Game Art at Florida Replay in Valencia, Spain. My aim is to create compelling 3D Environments and Prop Art for the video game industry. I’m always looking for new workflows and disciplines to help me flesh out my skills as an artist and hopefully join the artists working in this incredible industry one day!
Background
I was first introduced to the concept of “3D modeling” after finishing high school and enrolling in a two year 3D Animation class here in Valencia. I immediately fell in love with the ability to create art through modeling and rendering, and have now been modeling for about 3 years.
Being an avid gamer, however, I began diving deep into the process involved behind the scenes and found myself on websites like 80lvl and Polycount, watched countless hours of GDC videos. I was really inspired by the artists I saw there and strived to learn all that I could from them. I think Game Art is special because it's one of the few forms of art that are interactive and allow you to create detailed and rich worlds both visually and narratively.
Romanian Fighter: Planning
I started this project as an assignment for the course I am currently taking. My goal was to improve my hard-surface modeling and to push my texturing skills to the next level. My main reference for the weapon was an image of a kitted out Romanian PM md. 90 I stumbled upon. I then gathered as many reference images as I needed for every part and added some attachments. I also like to gather some extra reference images specifically for texturing purposes.
A great resource any artist tackling weapon modeling should have bookmarked is Michael Kubas’ incredible FPP gun modeling guide.
Modeling
For this model, I decided to work in Maya as it is the program I’m most comfortable with. The first step to modeling anything is, of course, the blocking. Here it is imperative to lay out the proportions of your model correctly and make sure you maintain the silhouette and most importantly stay away from detail. It is very easy to get lost in the finer details and at this stage, it can be detrimental to your workflow later on, especially on a weapon with many individual parts. Once you have your basic shapes down you can start adding more details.
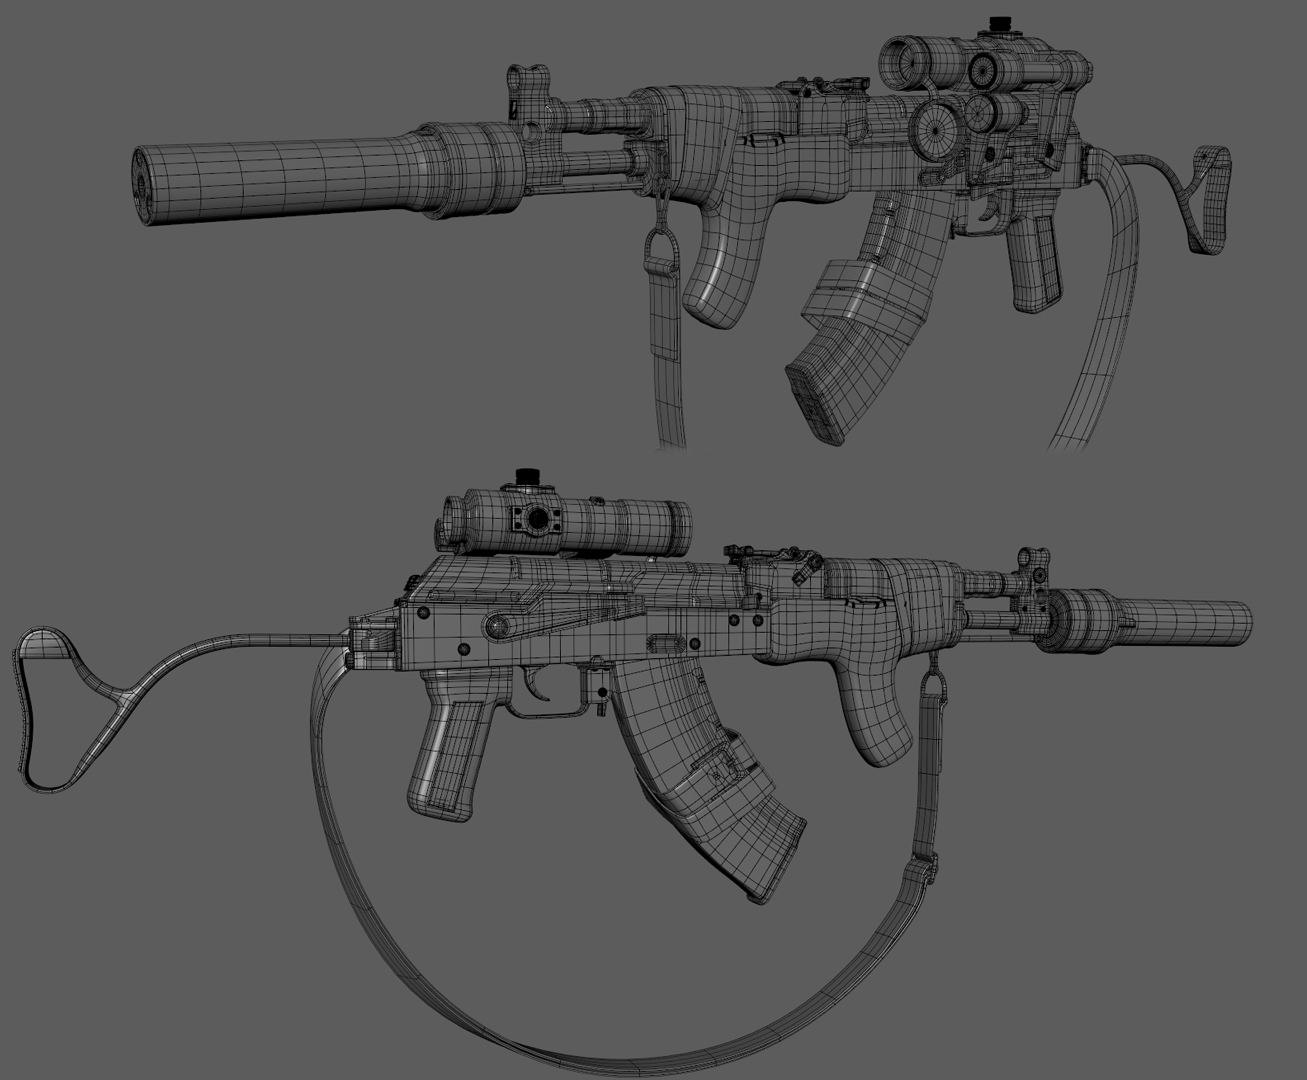
Once I had my blocking done, I moved on to creating the high-poly model making sure to maintain good topology for subdivision. Later on, you can optimize the basemesh and turn it into your low-poly.
When modeling the high-poly it's important to keep moving the camera around to see how the light interacts with the edges and contours of your model. A good rule of thumb for this stage is to exaggerate the roundness of edges. This will ensure that when you bake you will get a good result on the highlights of your model and prevent aliasing especially when the camera is further away.
Whilst working on the high-poly it is good to analyze where you can use other techniques and methods to save time or give yourself more control over the result in an efficient way, for example, the thumbscrew on the sight and the pattern on the grip. I ended up modeling those pieces without detail patterns so I could experiment with them later in Substance Painter and make sure they weren't turning into noise in the final render.
Floaters are something I learned to use while studying at Florida Replay. They have also been a great time saver and helped maintain my sanity when dealing with subdivision modeling. Just make sure they’re as close to the surface below as possible to avoid projection errors!
The low-poly mesh is usually the easiest part of the process. As I pointed out earlier, this involves removing any unnecessary geometry so that the model is optimized for game engines. I like to optimize as much as I can whilst maintaining a good level of quality. However, there are always areas where adding more geometry will give the model a more tactile feel. The mesh ended up being about 23.4K Tris in total.
UVs
For the process of UV unwrapping I used Maya’s built-in “UV cut and sew tool”, it is very intuitive, provides a lot of control, and saves you from having to clean up an automatic unwrap by smoothing groups. It's important to try and make your UV shells straight whenever possible to avoid aliasing when baking or texturing, even if it causes a little bit of distortion which is much less noticeable than aliasing.
It is important to mirror any parts of the mesh where it's possible in order to save on UV space and take advantage of the texture resolution.
In order to pack the UVs I used Rizom for the first time and was blown away by the quality and speed it offers, it's a very powerful program and so far has given me the best results. I made sure to leave a good amount of padding when packing, this is the number of pixels left between individual shells as well as the margins of the UV set, usually 8 for the margin and 16 for the shells. This helps prevent rendering problems in-engine.
Baking
Once your UVs are ready it’s time to move on to baking in Marmoset Toolbag! Before you do this, however, you need to properly set the smoothing groups on your model. I usually set them automatically with a tolerance of 45 degrees and make any modifications necessary.
Now it's just as simple as using the “Quick Loader” in Marmoset baker to import your high and low meshes and tweak with the skew and offset values to fix errors with projection. They have very good tutorials on this process on their own website that go more in-depth!
Textures
For me, texturing is the most enjoyable process of asset creation as it allows me to be creative and experiment a lot and therefore I like to take as long as possible at this stage. I find it doubly important here to take breaks and get feedback frequently, this will ensure that you don't get bogged down and frustrated.
I like to think about the general feel of the textures I want to get. For this asset, I decided on making it pretty worn as I felt it'd fit in the theme of ruggedness and rebellion associated with these weapons.
My method for texturing usually follows these principles:
- Starting off with building the base material layer by layer, create a base layer and then build on top of that with color variation, roughness variation, macro detail, micro detail, and later on add storytelling elements.
- Think about where dirt and dust would build up on the weapon in real life and how it would affect the way light reflects off of the surfaces.
- Imagine where that weapon has been, has it been dropped? What parts would make contact with the ground first if at all? Has it been cleaned and covered in dirt over and over? Where do the soldier’s arms or hands rub against the weapon, what would that do to the surface? These are things that may seem ridiculous but help give the asset a believable look.
- Don't be afraid to exaggerate, this may just be my opinion but at the end of the day you’re trying to create compelling art and sometimes this means taking liberties with reality. This is game art after all, not a 1:1 simulation of real life.
Some of the most challenging materials to tackle were the wood handguard and the bakelite mag, these are materials with an immense amount of nuance and detail in real life and therefore it is difficult to accurately recreate them in textures. I made sure not to be afraid of going through multiple iterations of them in order to achieve the final look.
At the end of the day, it's really all about layering and it's very normal to end up with over 20+ layers per material. It is also very important you know what each channel does and how it works: Roughness, Metallic, Base Color, etc.
A great tutorial for texturing is Simon Fuchs’ Handgun Tutorial.
Rendering
When rendering this weapon I chose an HDRI with a strong contrast in lighting condition. This meant I could count on it to highlight most of the roughness information in the textures and it saved me from having to add a bunch of fill lights.
I kept the setup pretty simple and used two directional lights, one coming from above and one from below. These were mainly for bringing out the specular highlights on the model to catch the eyes.
I didn’t add any post-processing effects on the cameras apart from a little bit of sharpness. Once I had the final renders I got them in Photoshop and added some bloom to the edge highlights to make them pop more. For the background, I actually grabbed an image from ArtStation that had nice values, blurred it, and played with the color balance. And then the renders were done!
Owyn Springer, 3D Artist
Interview conducted by Arti Sergeev
Keep reading
You may find this article interesting