Himanshu Dua
is a3D artist
from India
Skills
Styles
Tools
Creating Weapons for a Game in 3ds Max & Marmoset Toolbag
Introduction
Hey there! I'm Himanshu, a 22-year-old 3D artist hailing from India. I kicked off my journey into the exciting world of visual effects at the MAYA Academy under the Aptech banner, where I earned my diploma. It was like stepping into a whole new universe! Fast forward a bit, and I found myself working on some really cool projects. For the past year, I've been part of the awesome team at Lakshaya Digital (which is now part of Keywords Studio), a gaming outsourcing company. It's been a rollercoaster ride, let me tell you. Working here has been like attending a masterclass in the 3D world. I've been soaking up knowledge about the entire 3D pipeline - from concept to finished product. You name it, and I've probably had my hands in it - modeling, texturing, lighting, you get the drift.
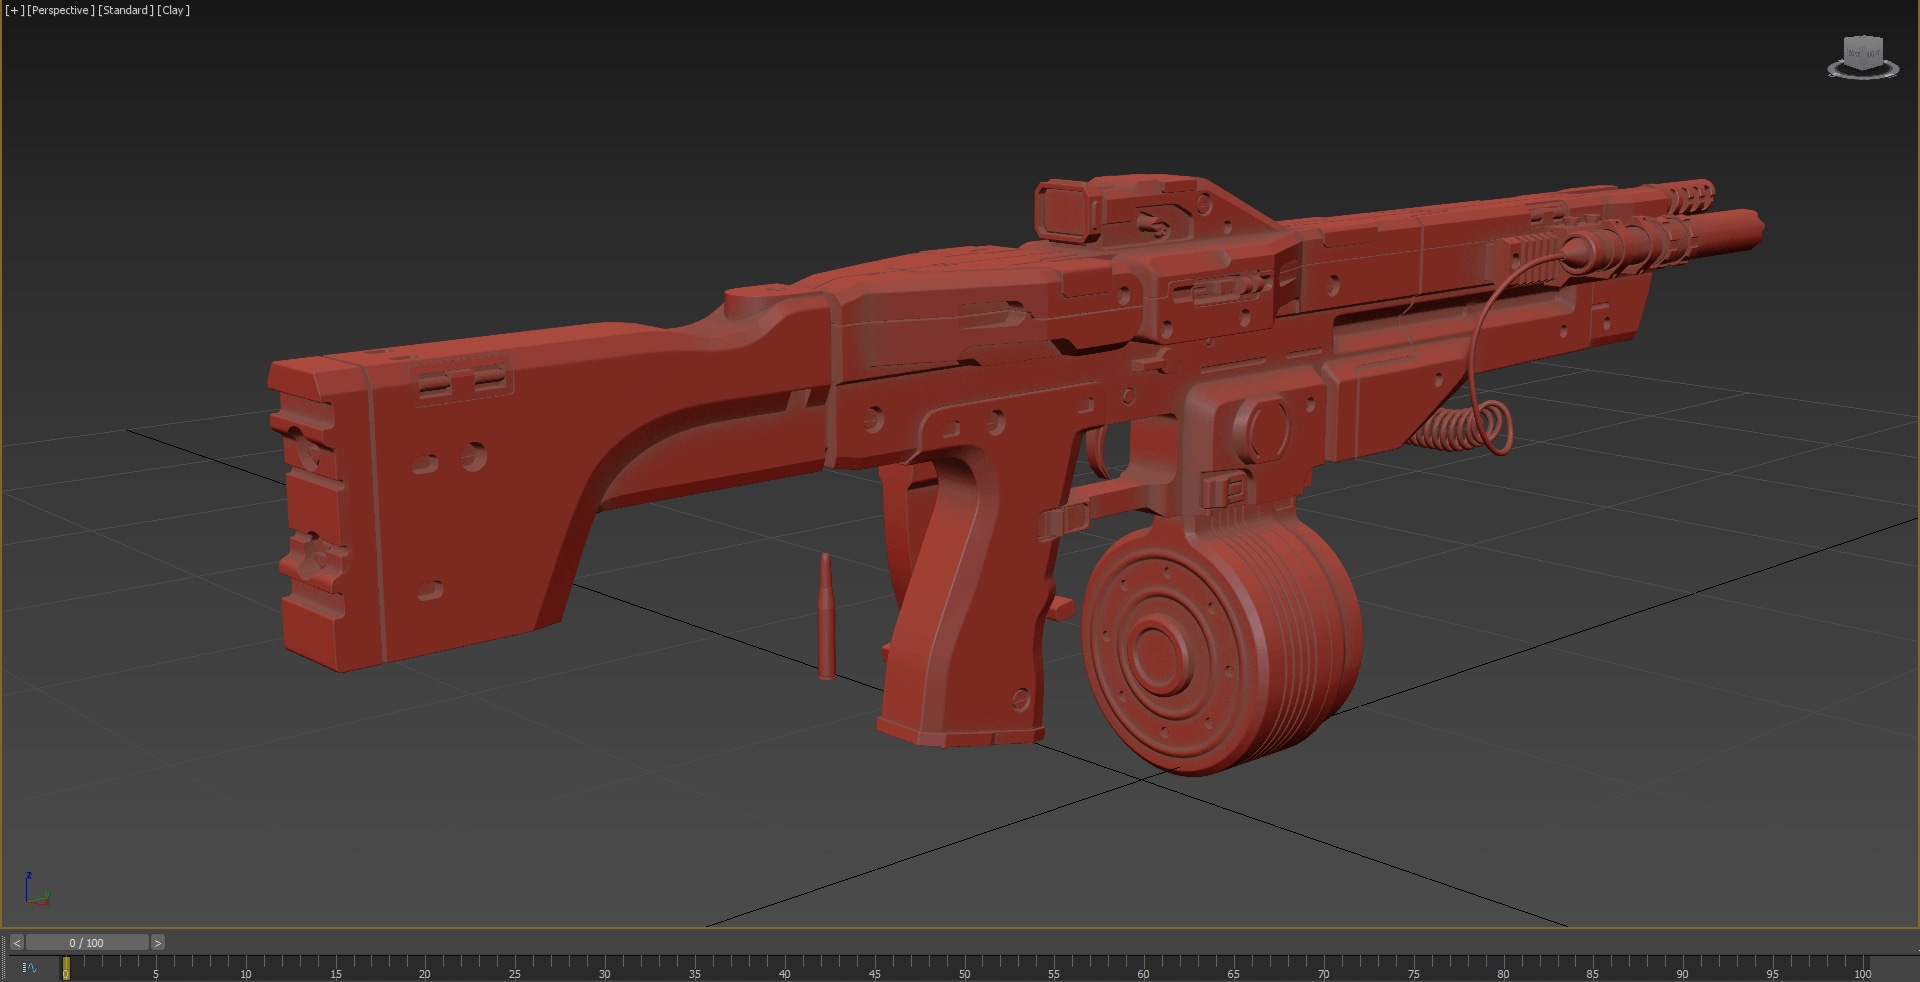
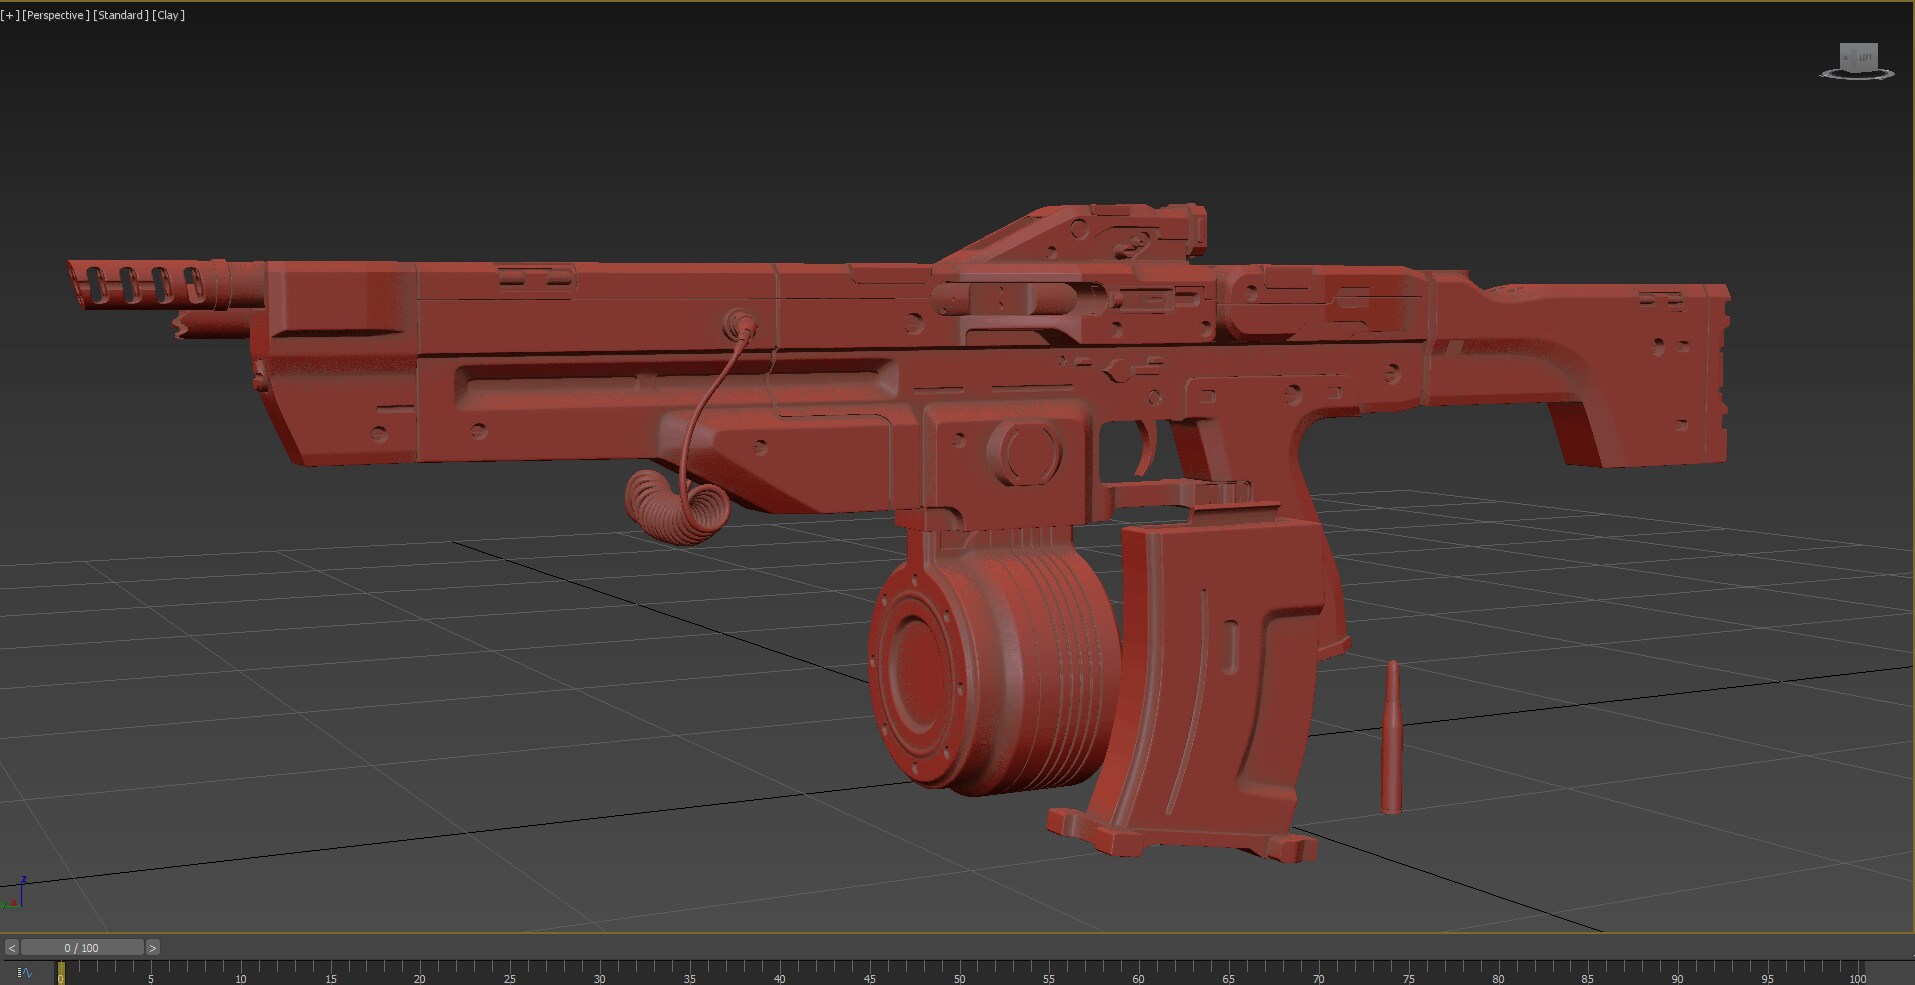
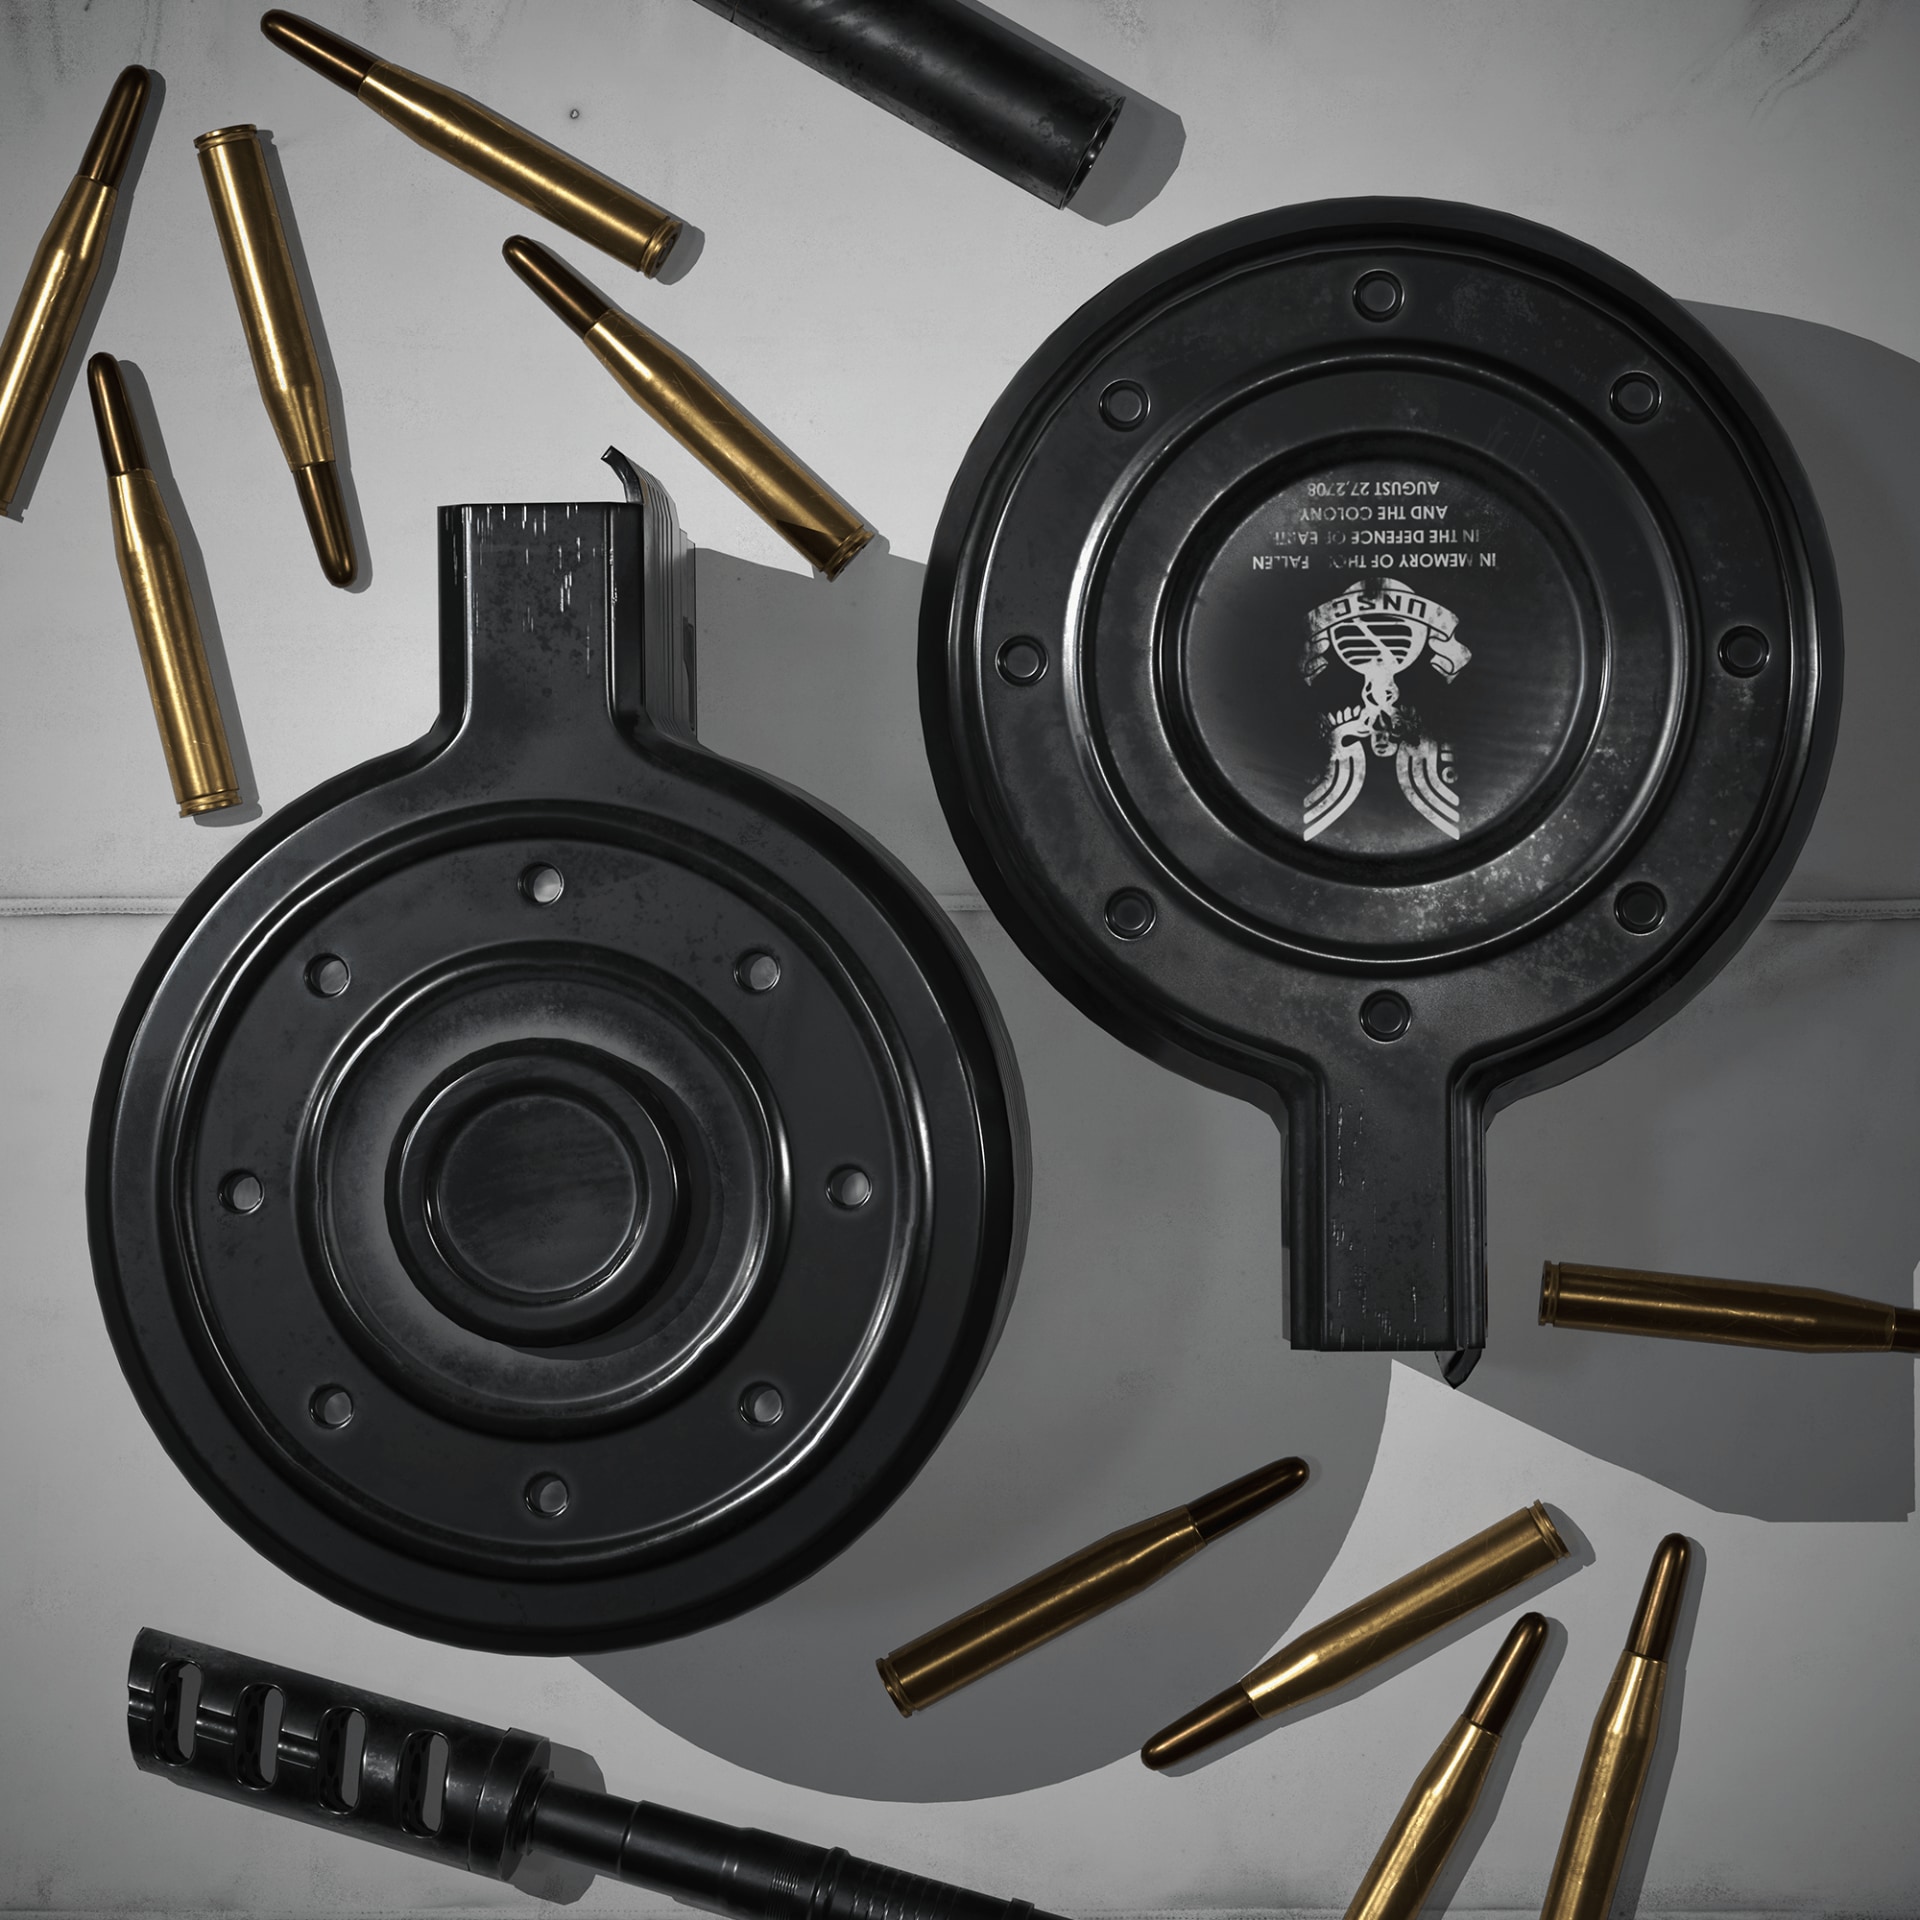
Now, let me spill the beans on how I recently crafted a brand-new 3D model. Buckle up!
Main Goal
Imagine my portfolio as a canvas waiting to be adorned, and the realization struck me – no weapon models? Time for a change. Determined to embark on this artistic conquest, I set out to choose the perfect weapon, a decision that proved to be no small feat. After countless hours reviewing concept art, a stroke of luck led me to the captivating work of Michał Kuś. Challenge accepted!
Now, to make things interesting, I set some ground rules. I'm talking about technical stuff –
Polycount —25K triangles.
Texture size —4K.
PBR pipeline.
Software
- PureRef.
- 3ds Max.
- Marmoset Toolbag.
- Substance 3D Painter.
References
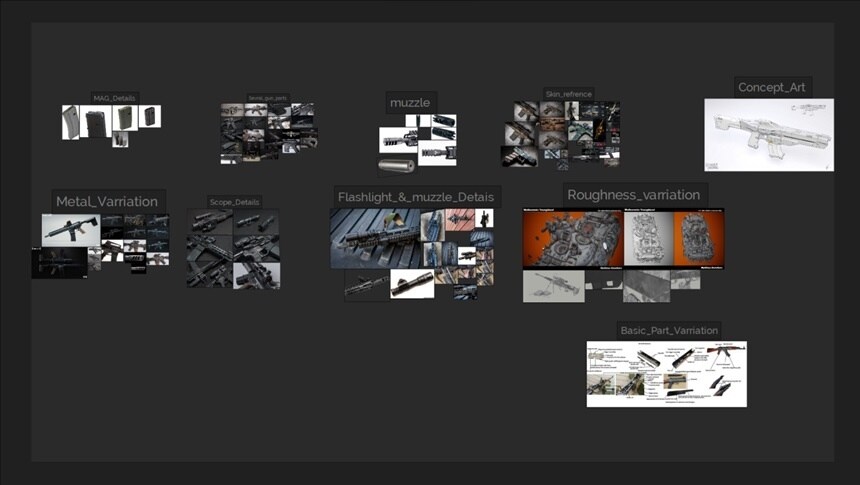
I don't usually spend much time collecting references, but when I do, I start by looking for something similar. If that doesn't work out, I focus on finding references for textures, wear and tear, and smaller parts of the models. I search everywhere I can think of, and for this stage, I use PureRef.
Blockout
To make a 3D model, I begin with blocking. This means I try to make the dimensions of the gun. First, I make a bounding box and fit the blocking mesh inside it. Once that's done, I add some details to make it look more real.
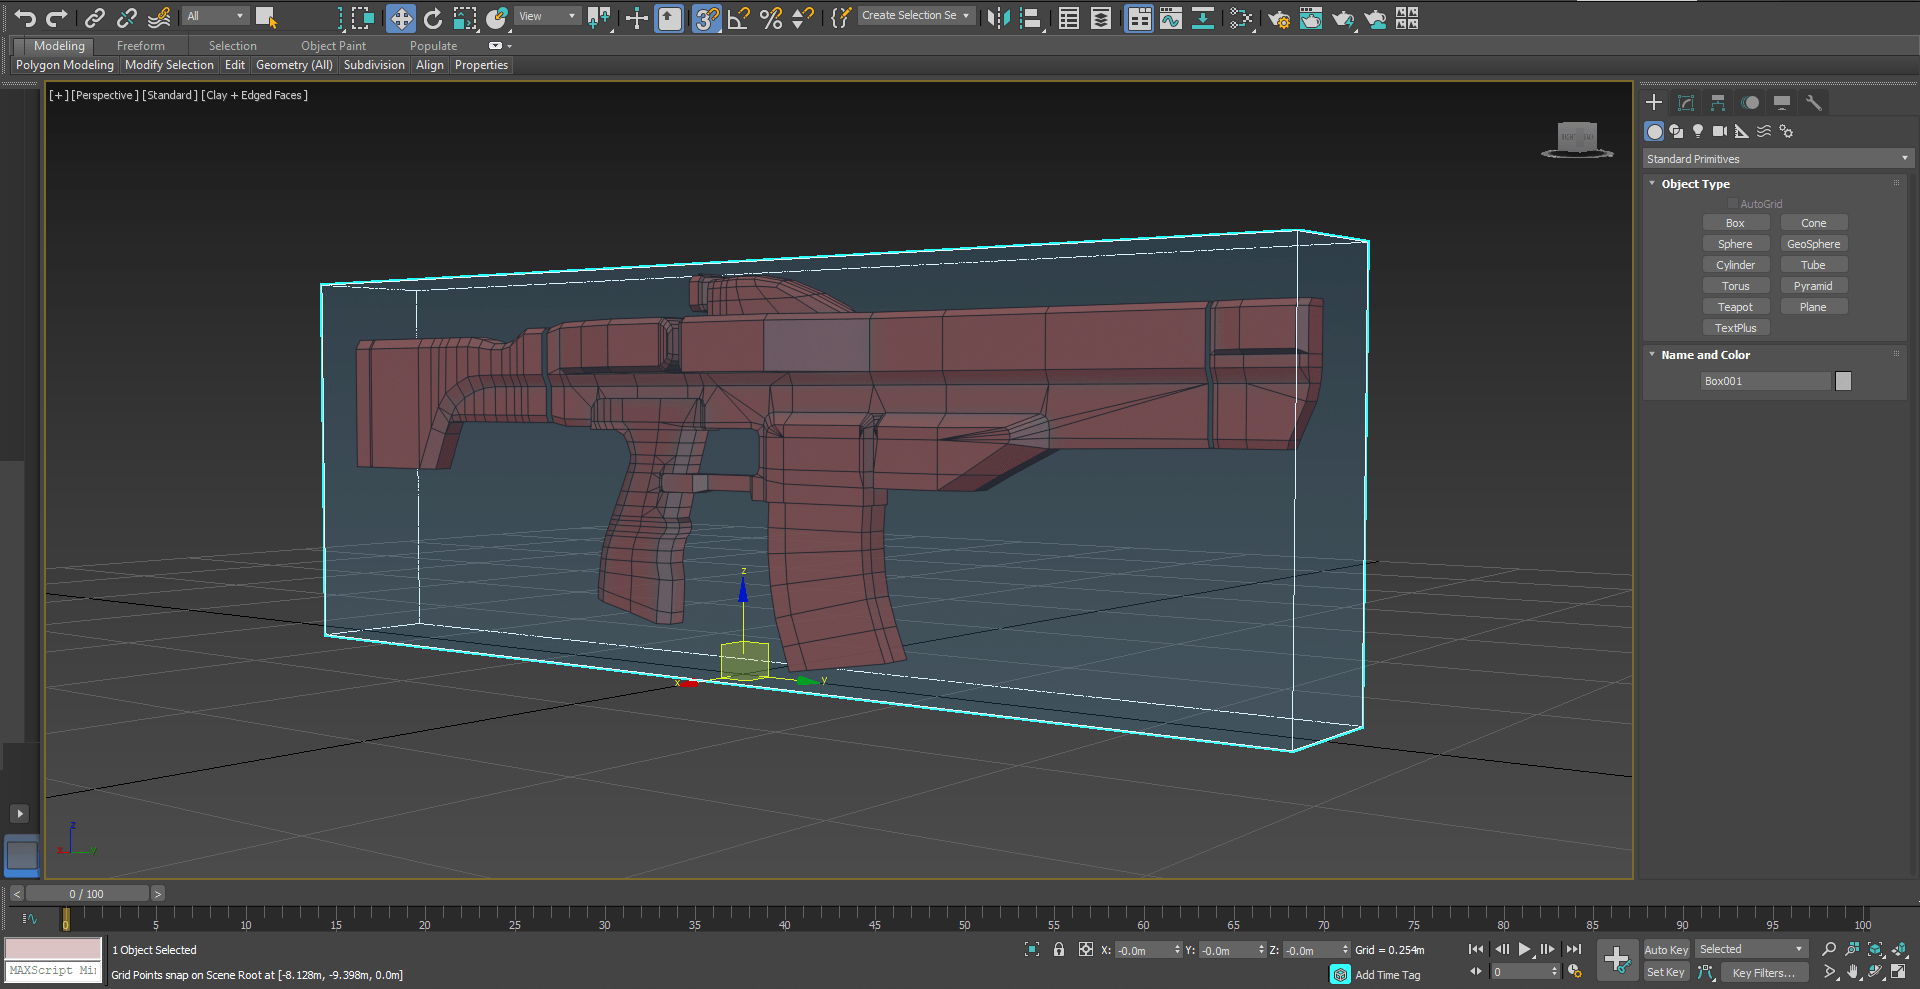
Normally, I don't really focus on loops and polycount during the blocking stage. In the blocking stage, my main aim is to get the right proportions and shapes. I use 3ds Max for this part.
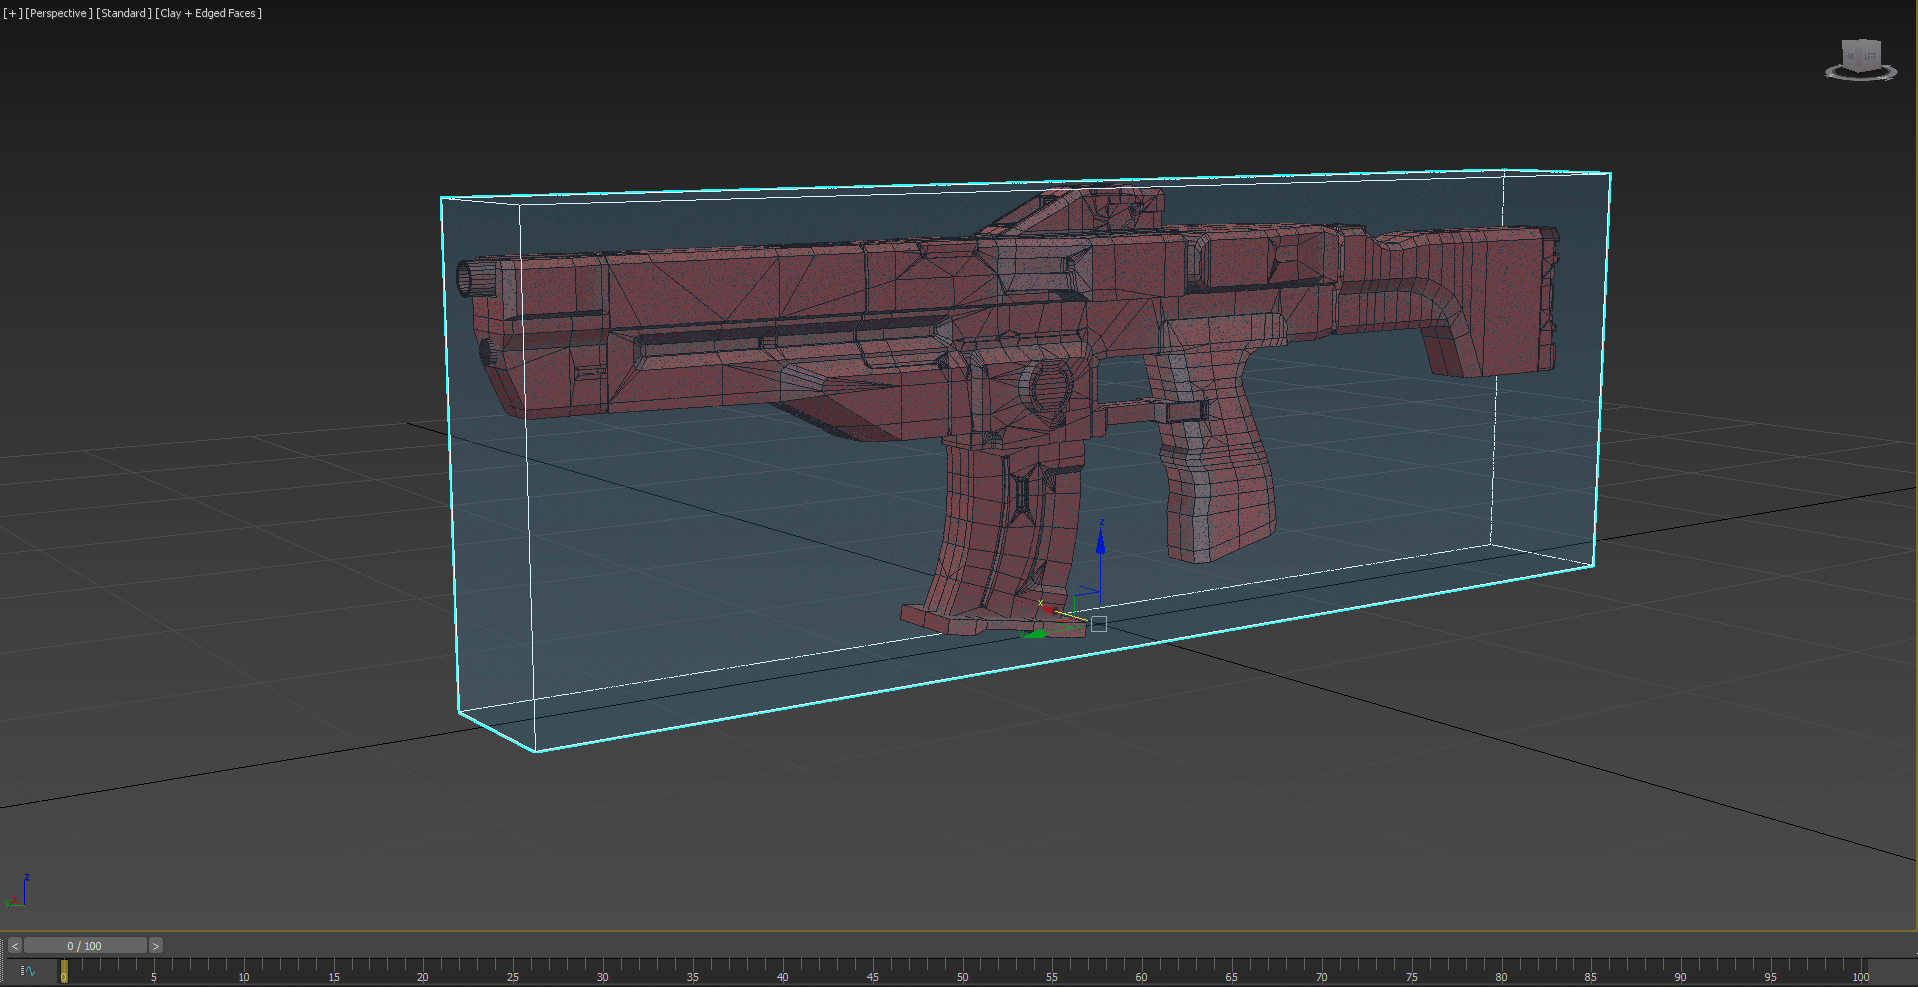
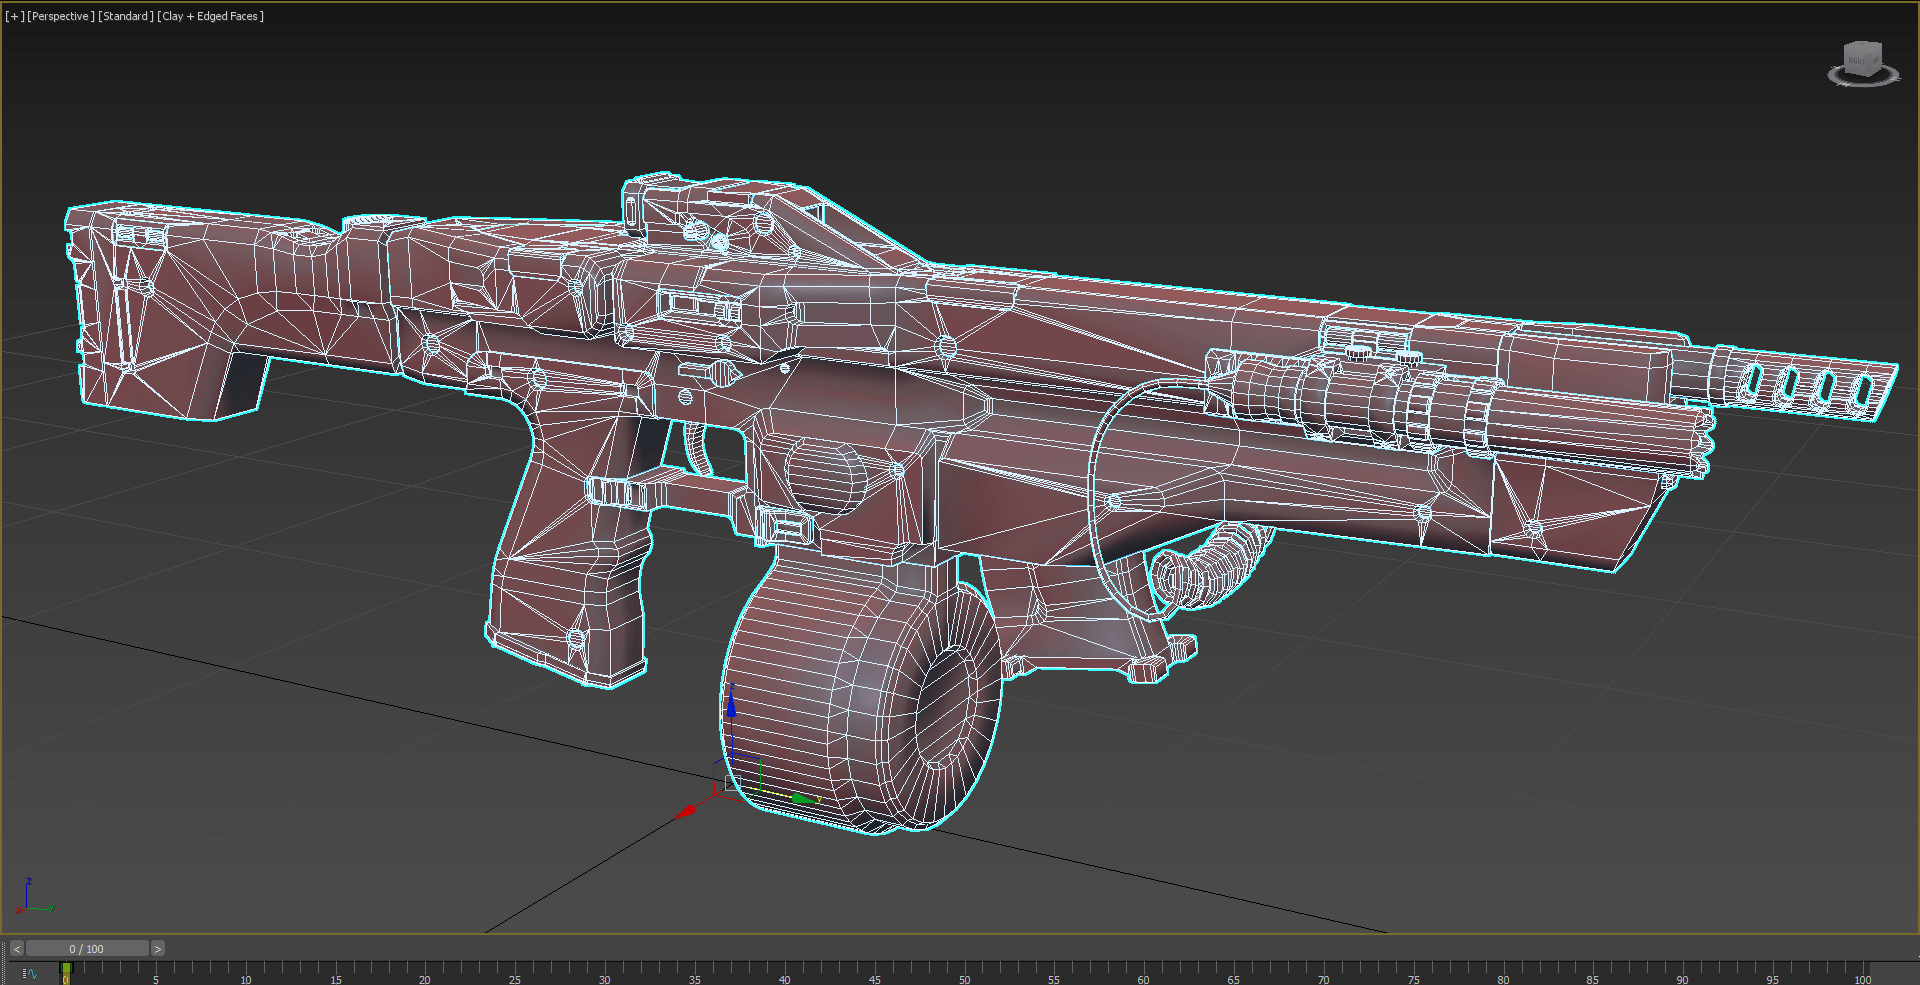
High and Low Poly
Now that I'm done with the basic shape in the blocking stage, it's time for the High Poly model – my favorite part in the whole 3D process. A good blockout makes this step easier. Many parts can quickly and easily be made to look detailed in the High Poly stage. The main aim here is to make the shading perfect. There are different ways to create a high poly model. You can use Subdivision modeling, adding support edges and using the Subdivision Surface modifier. Or, you can use the Remesher workflow, similar to ZBrush for hard surface modeling. I usually prefer the Subdivision workflow because it gives a cleaner result and better baking.

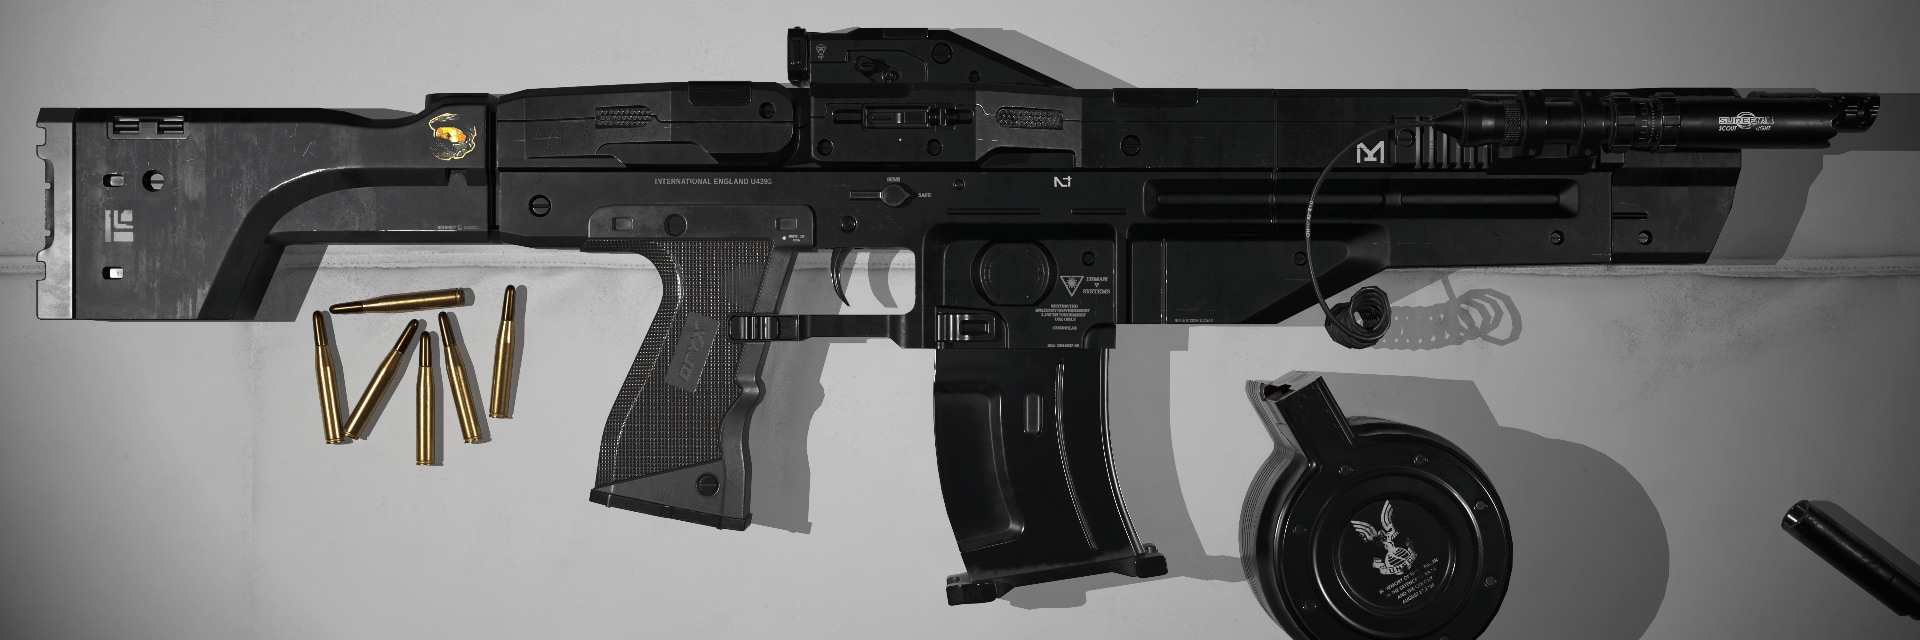
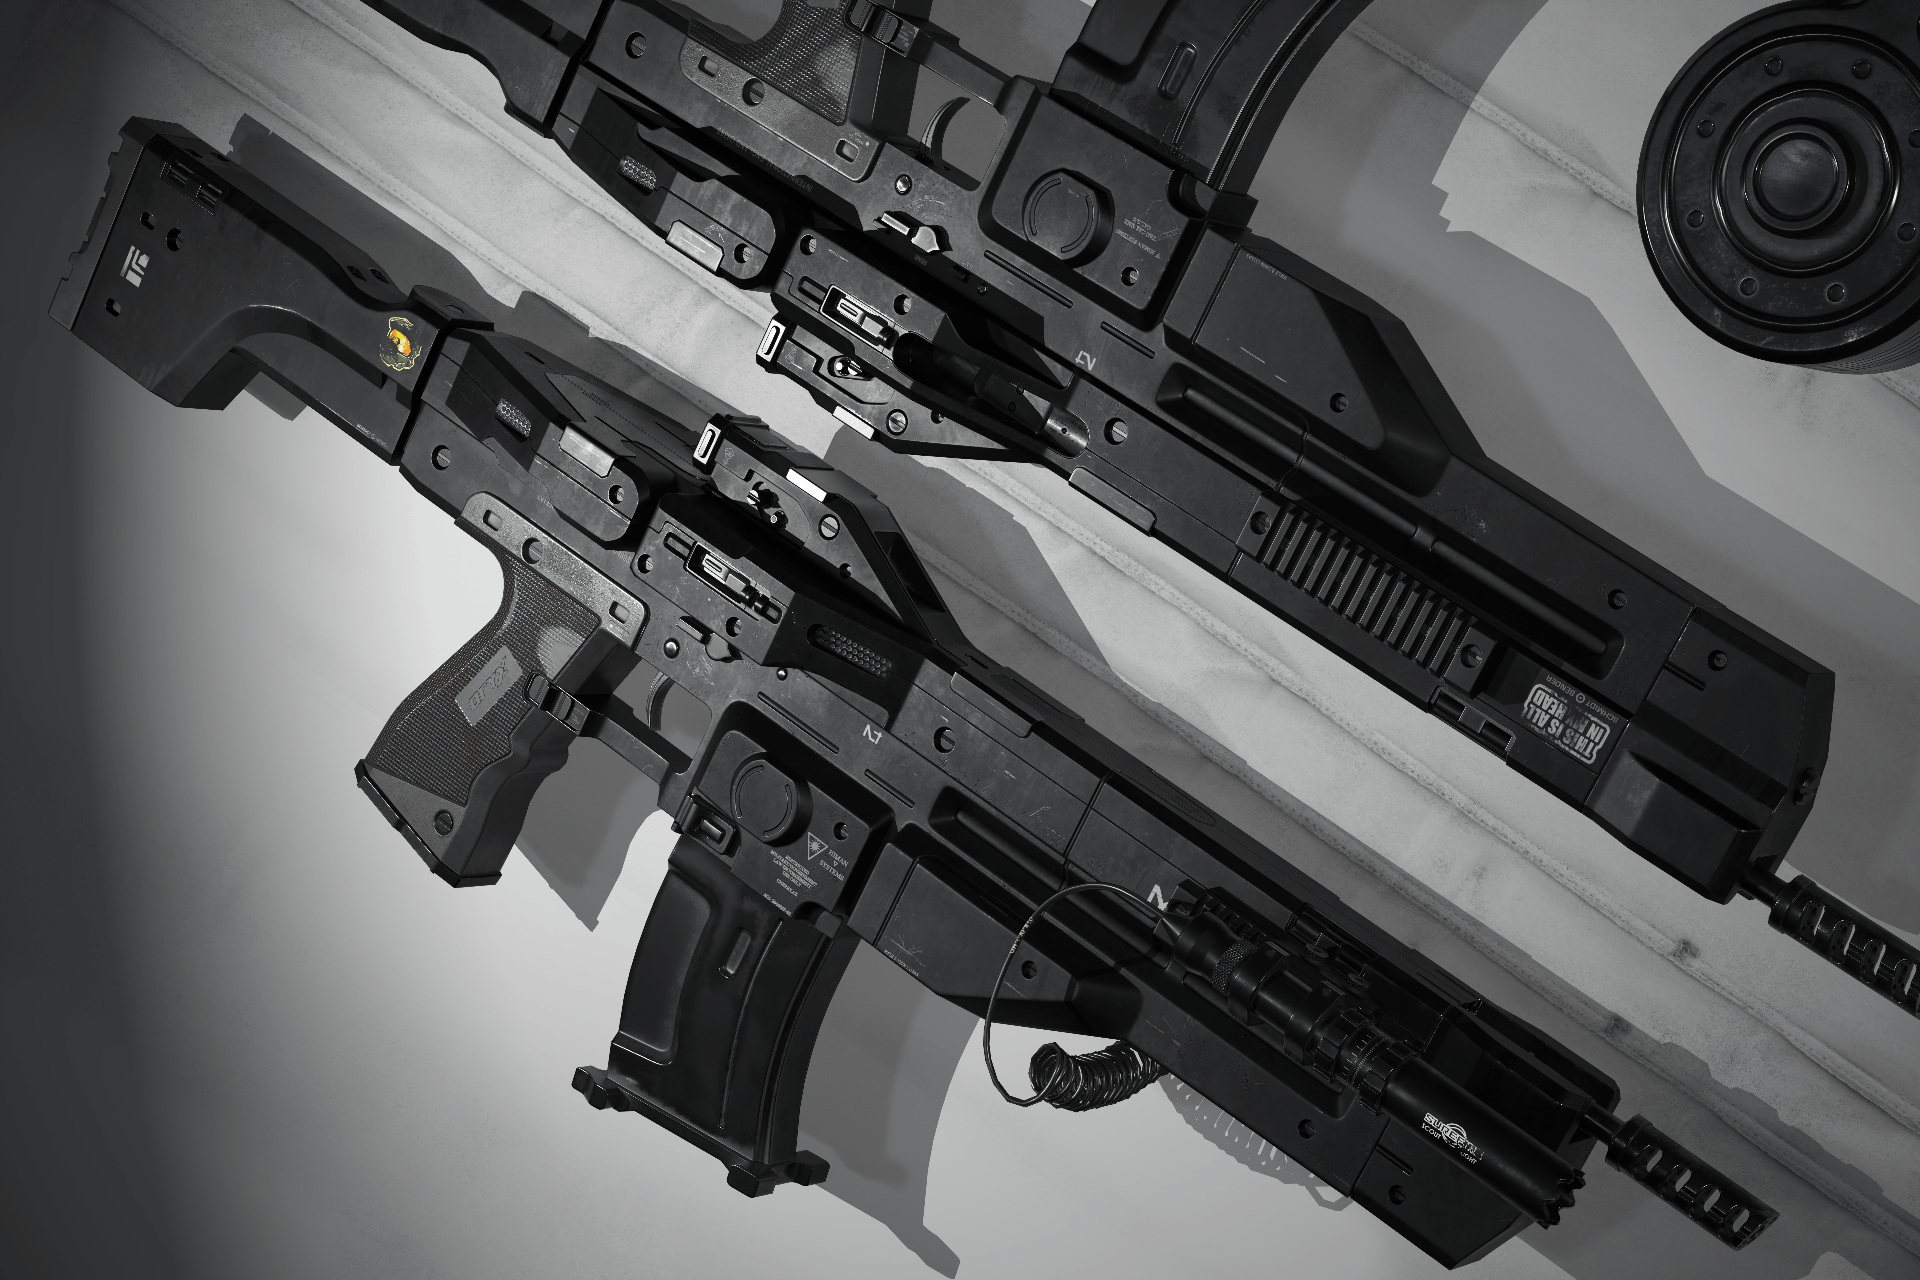
During the high-poly stage, I decided to include some variation in my model to make it look cooler.
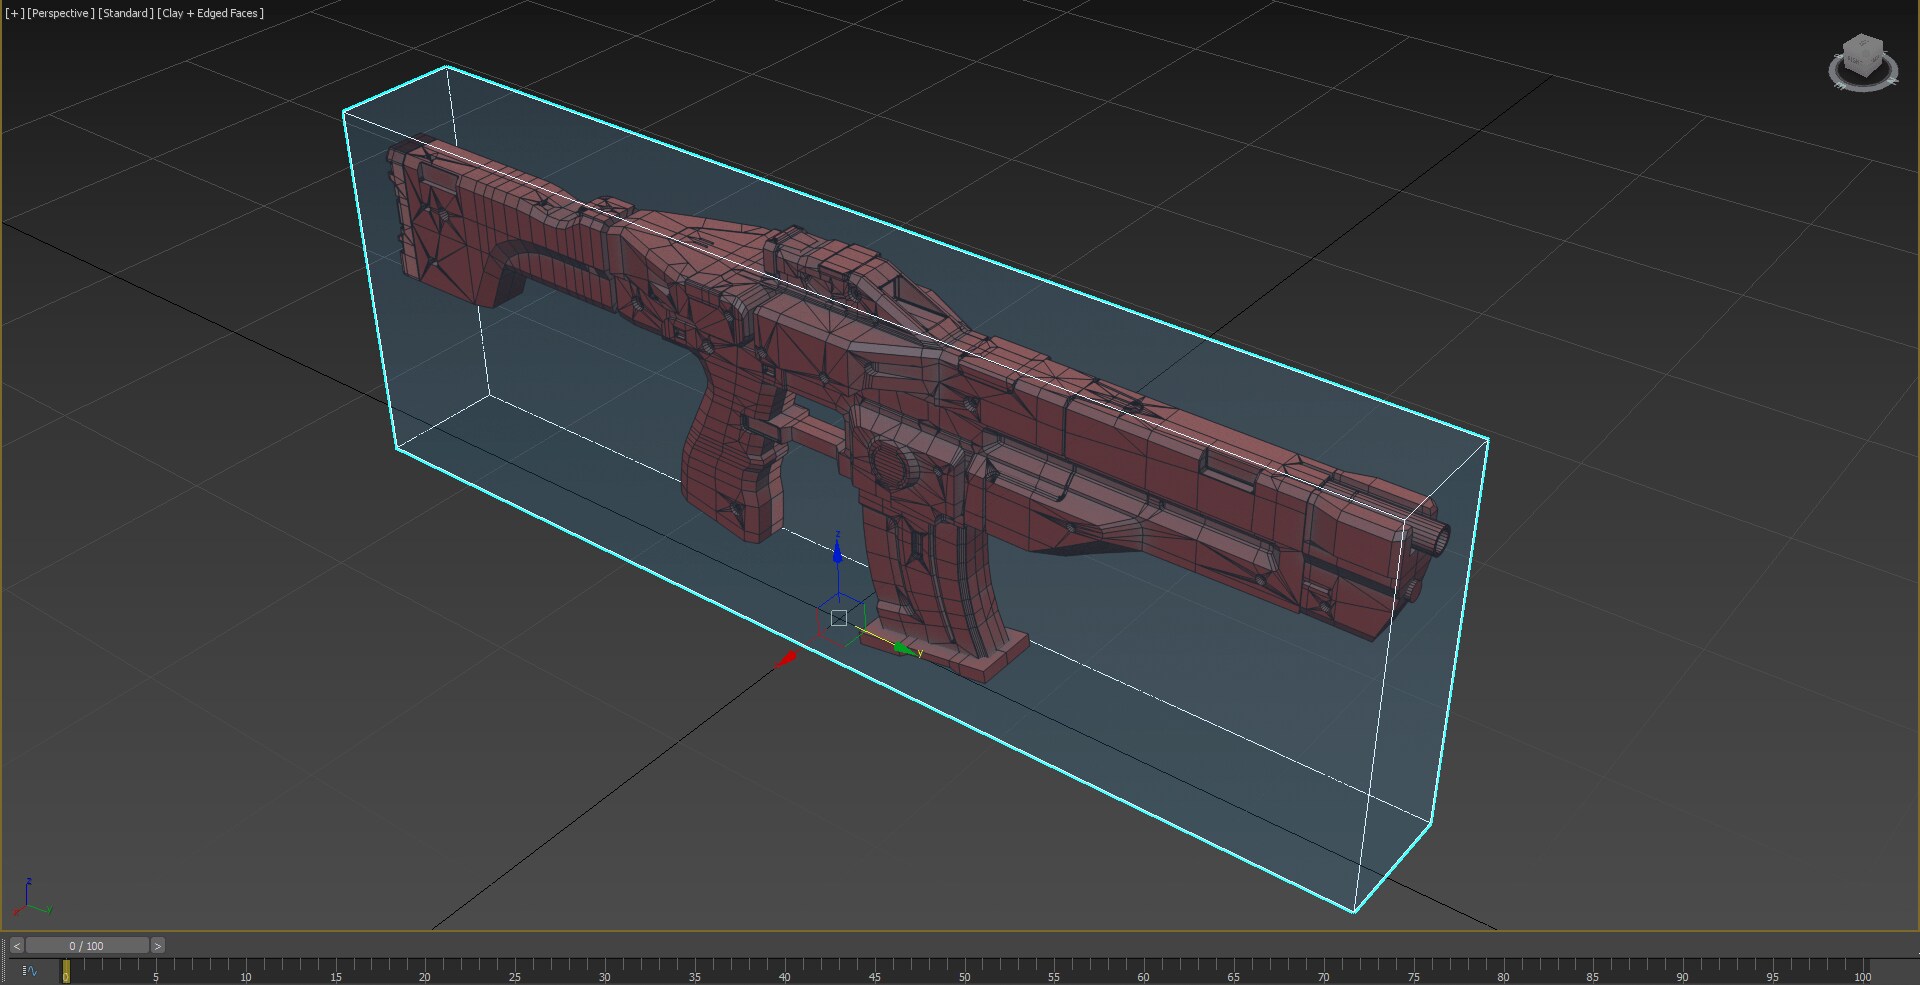
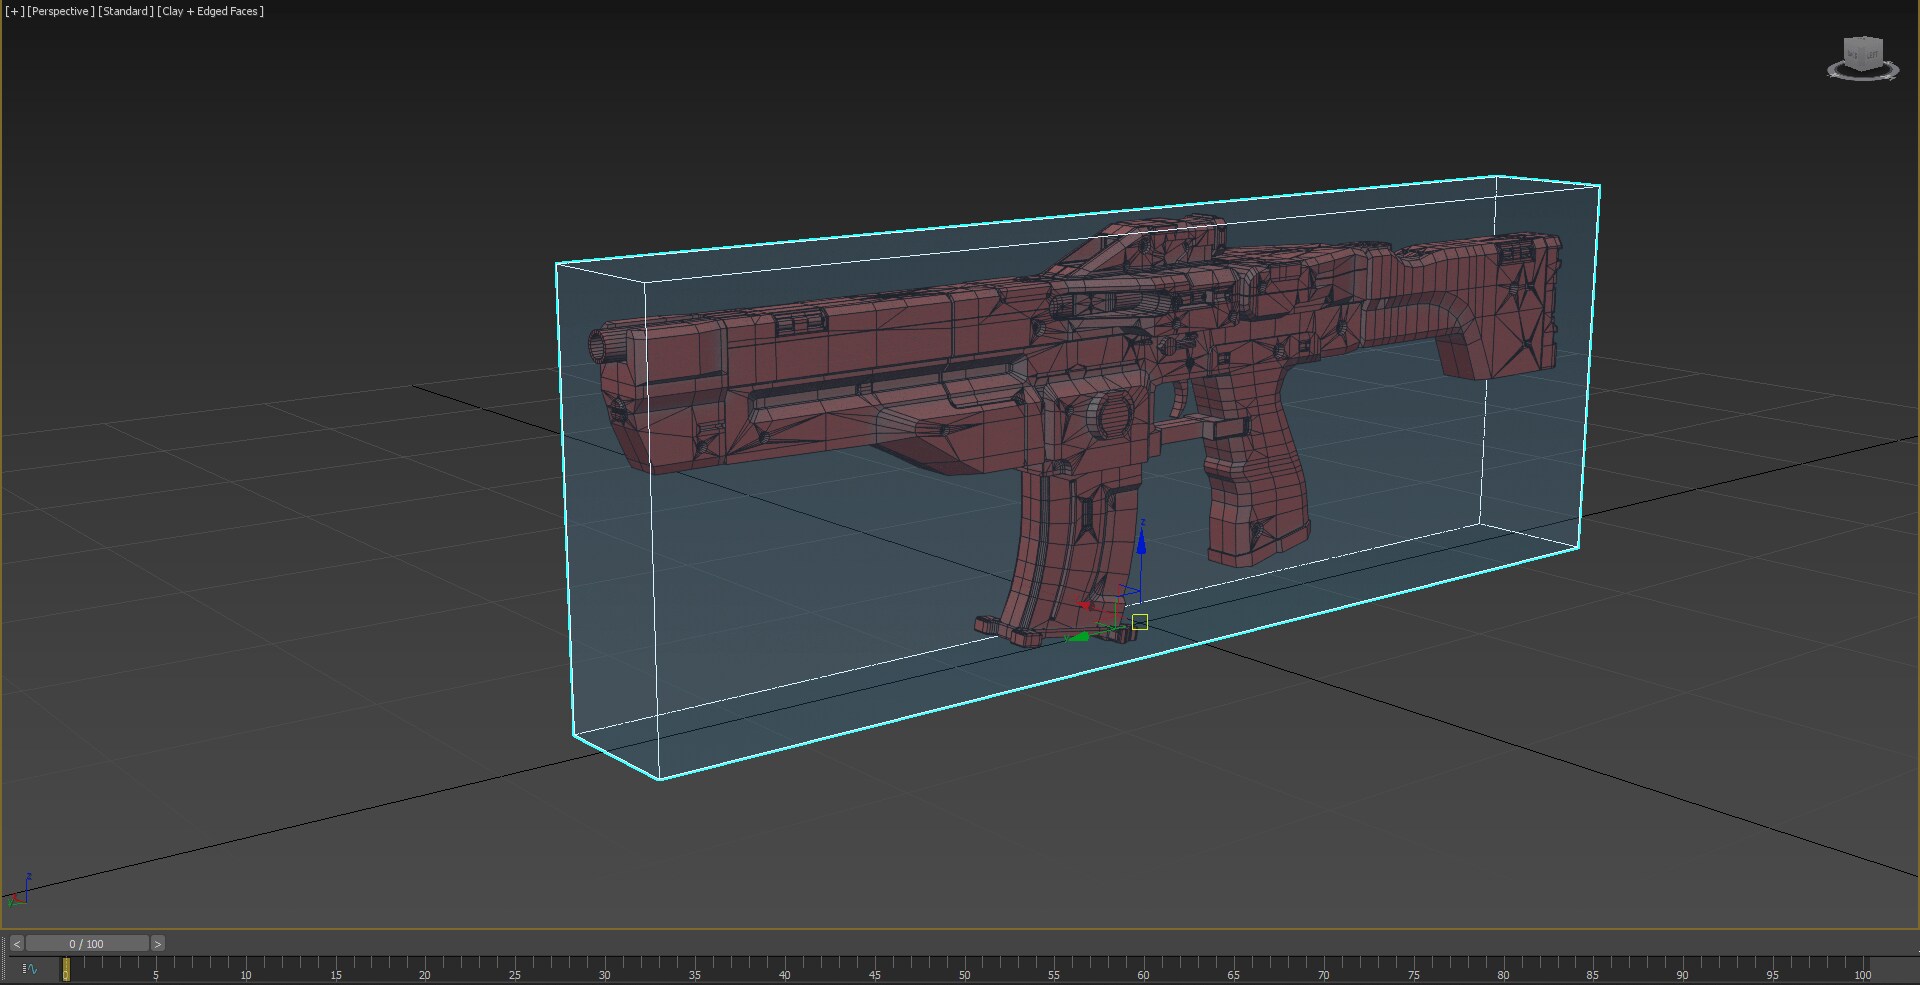
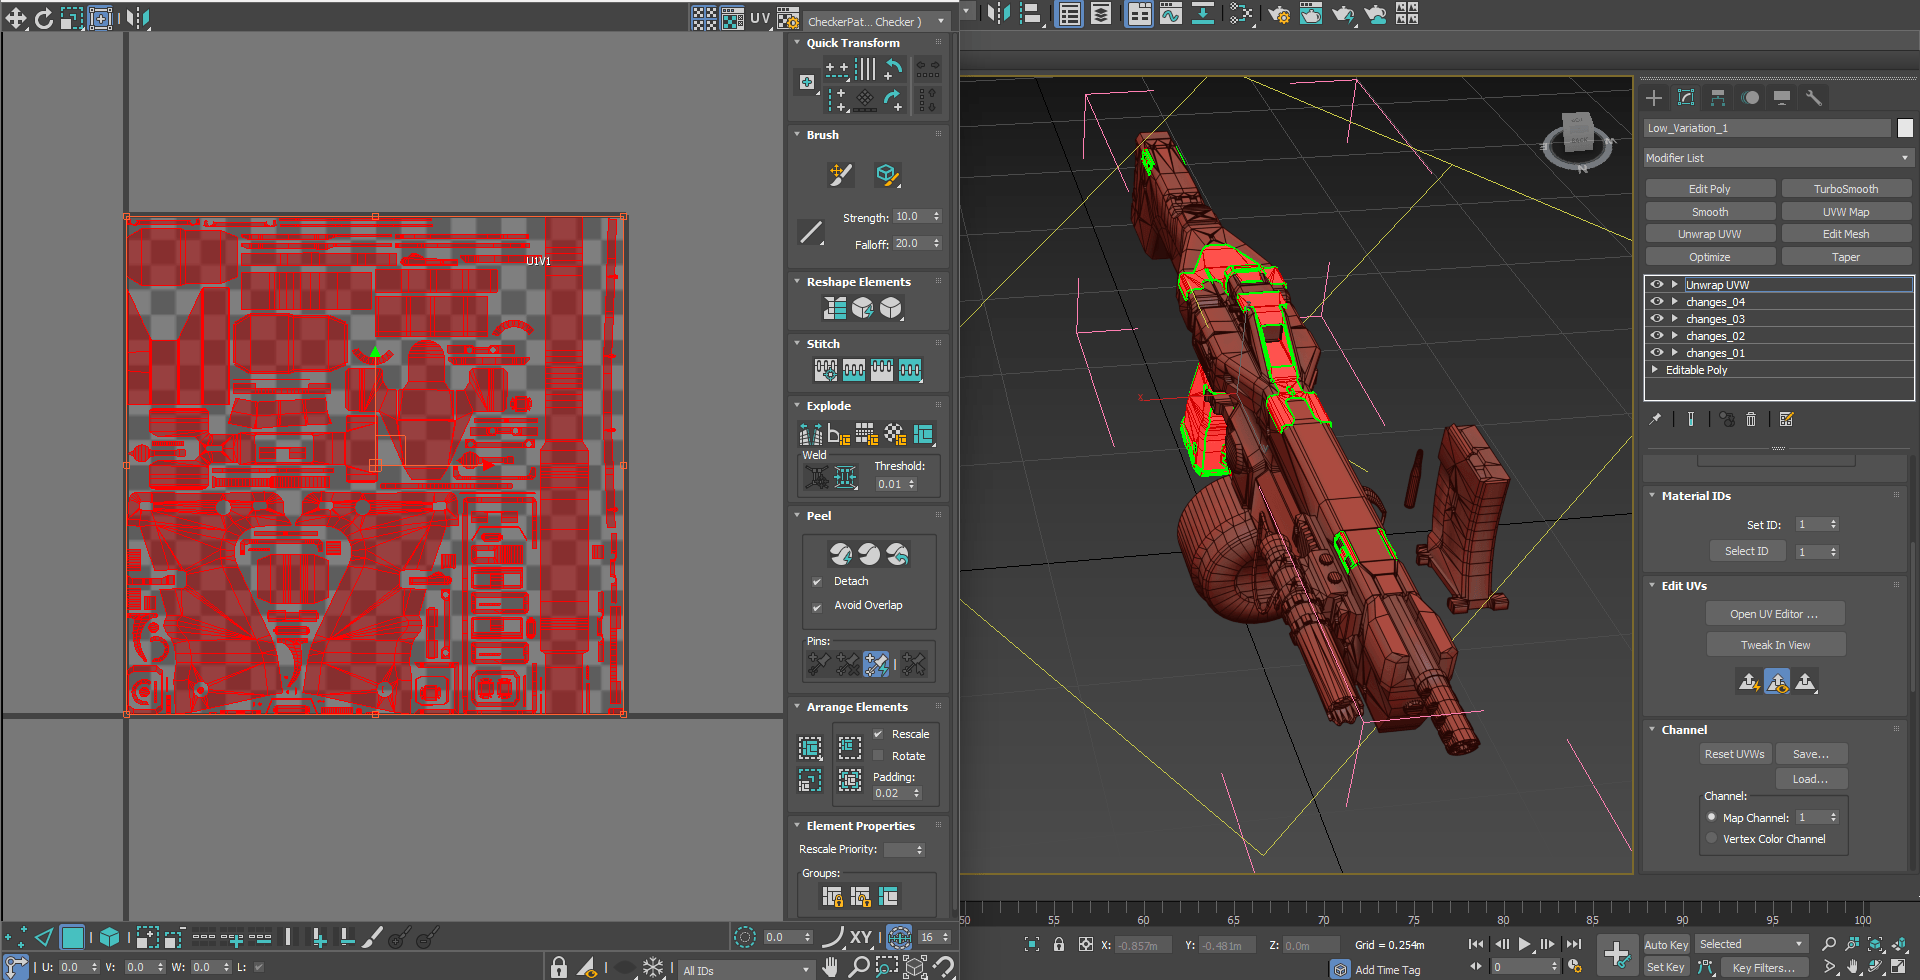
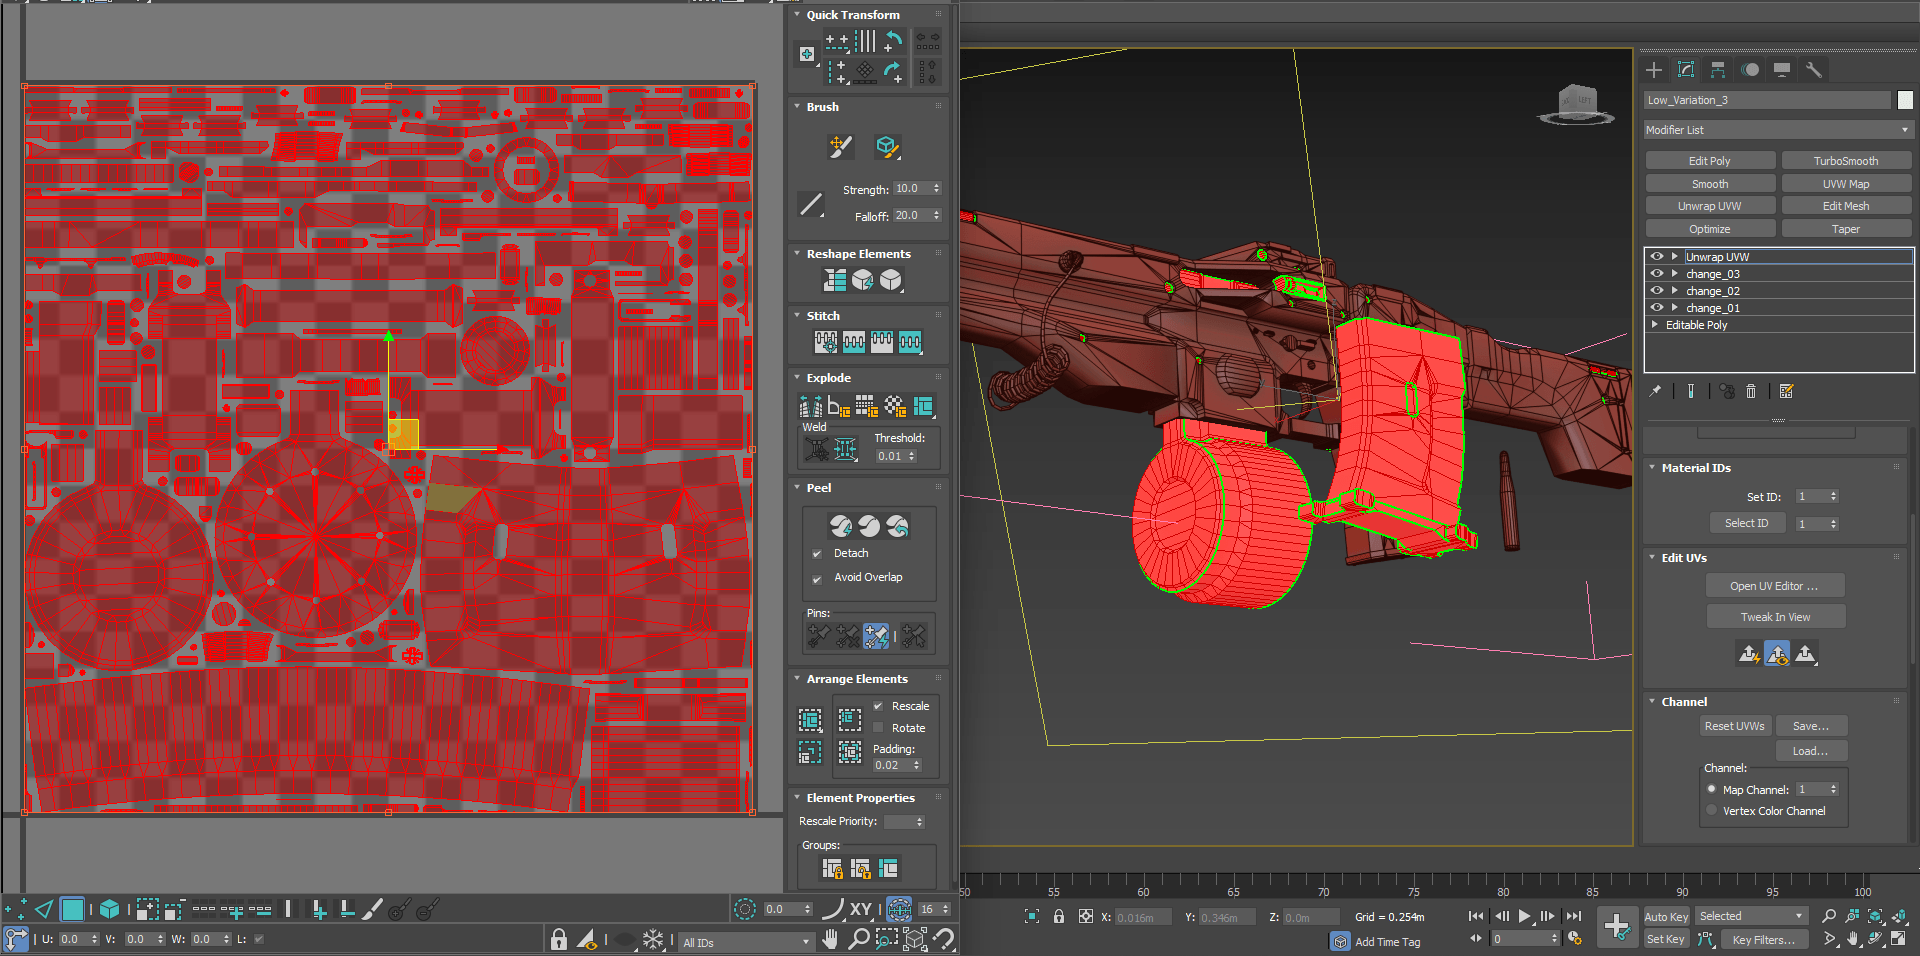
Low Poly and UVs
Once I'm done with the detailed high-poly version, I move on to the low-poly stage, which is one of the quicker parts of my progress. Usually, I take pieces from the high-poly model and remove some stuff, or I use the basic shape I made earlier in 3ds Max. Sure, I might need to clean up a bit, removing unnecessary parts, but that's usually quick and easy. Since I was working on a first-person gun for my portfolio, I didn't spend too much time making the polycount super low. I cared more about keeping a nice shape and silhouette.
Now, when you're at this point, figuring out where everything goes, it's important to know what textures you'll use. To save room, try to flatten out as many surfaces as you can and let them overlap. And, it's good to keep the number of sharp edges to a minimum because they can slow down the engine and create a lot of cuts in the UVs.
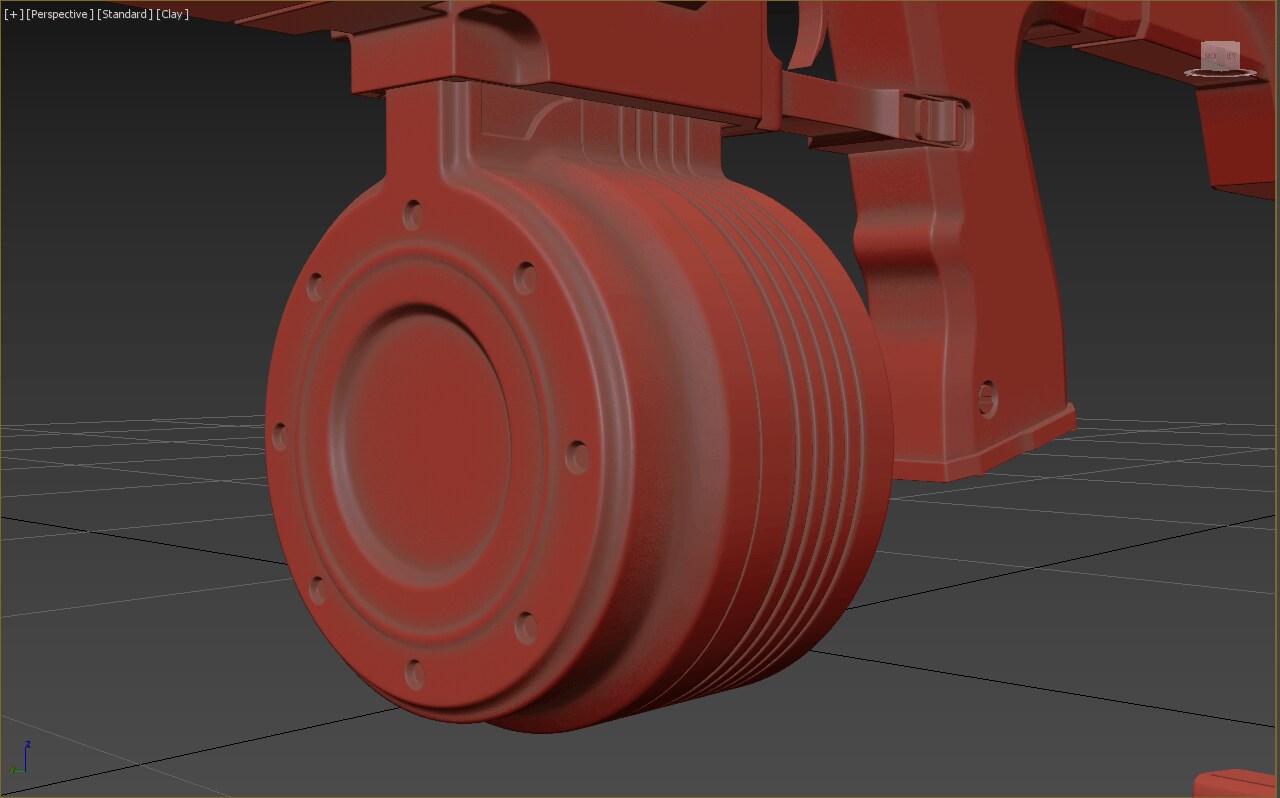
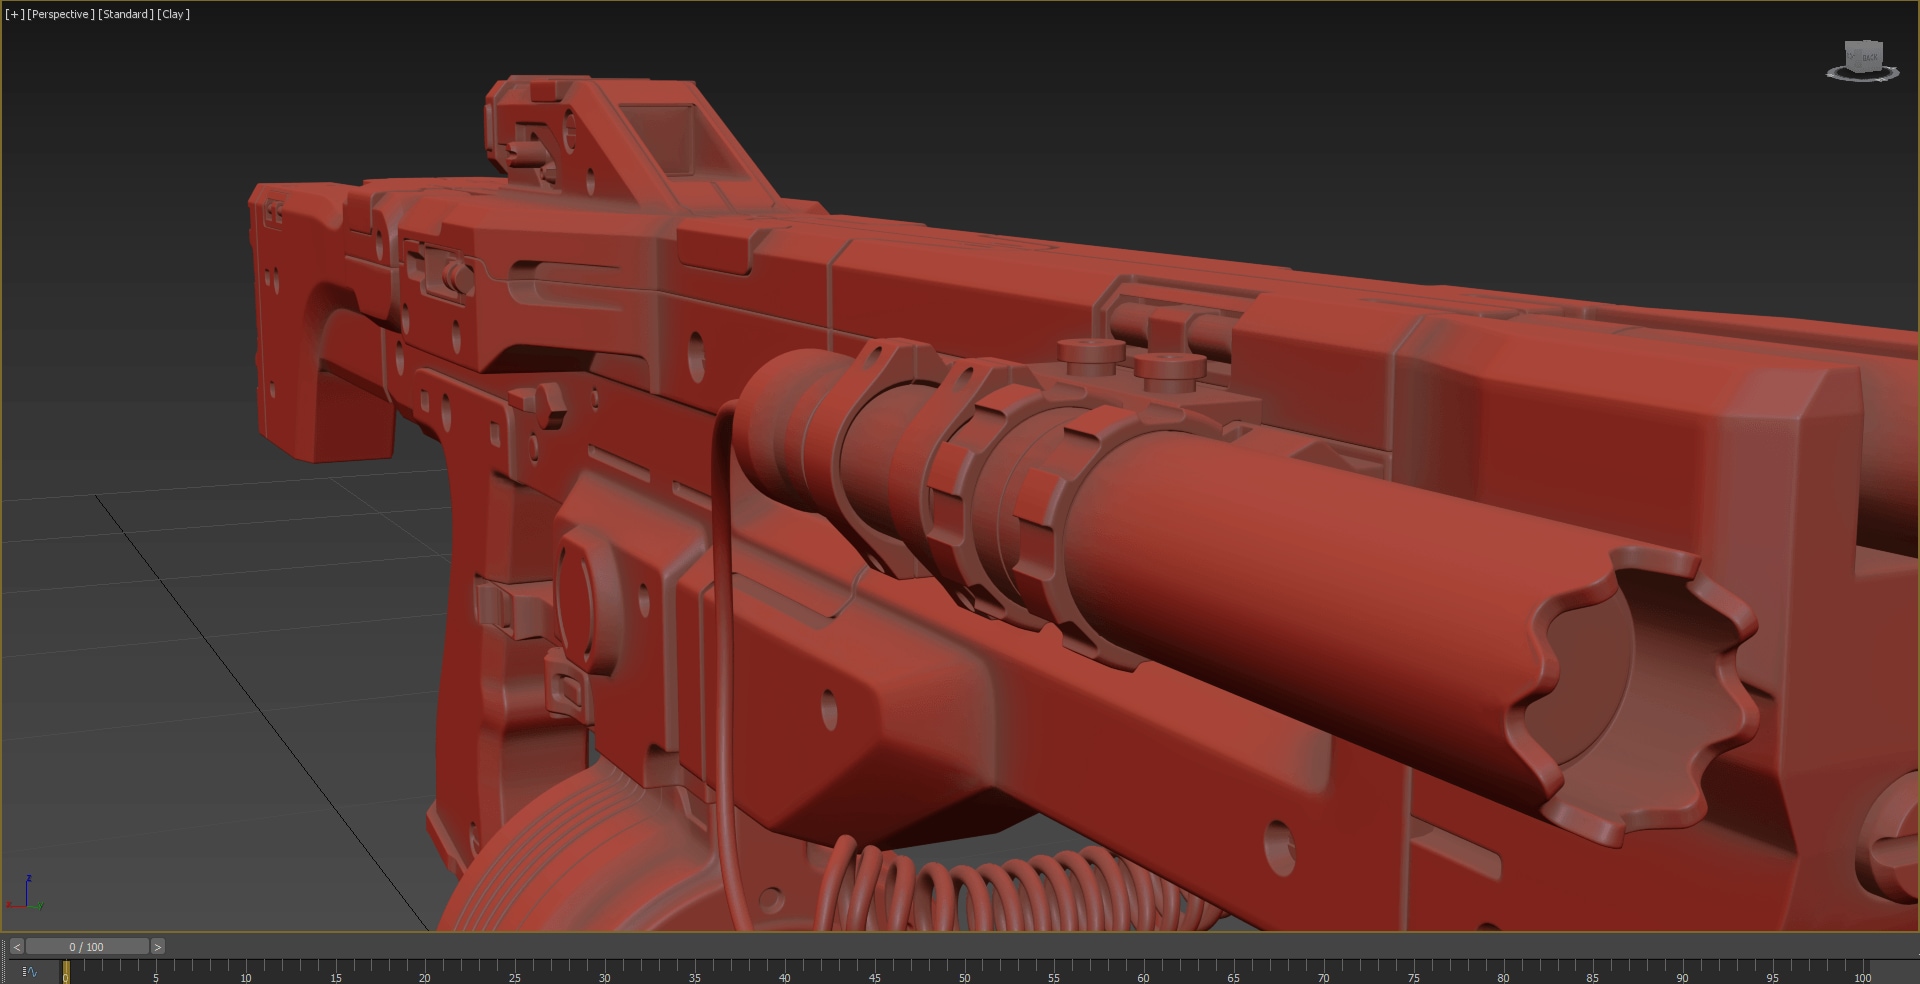
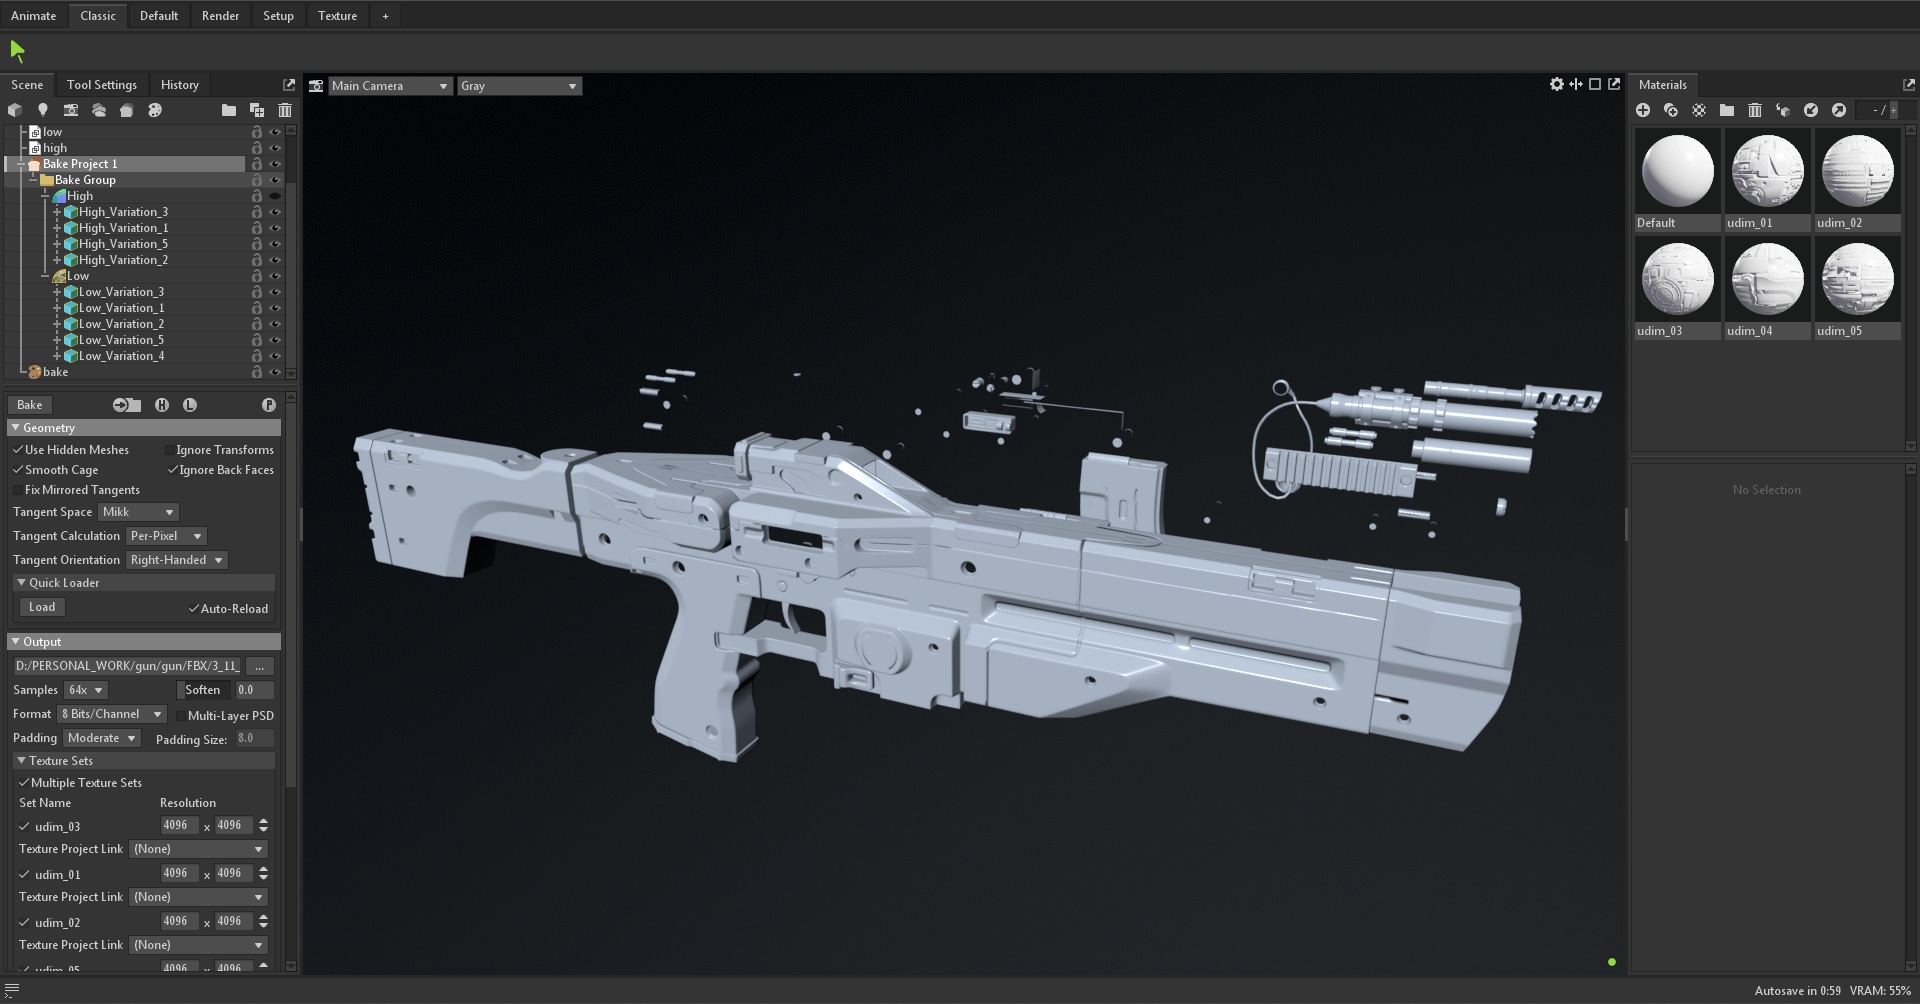
Baking & Texturing
These days, I use Marmoset Toolbag 4 to create my Normal and AO maps. In my view, this software is the best for controlling the cage and skew to get a good bake. I usually bake my maps in a 4K resolution because it's simple to decide to make the texture resolution smaller later on.
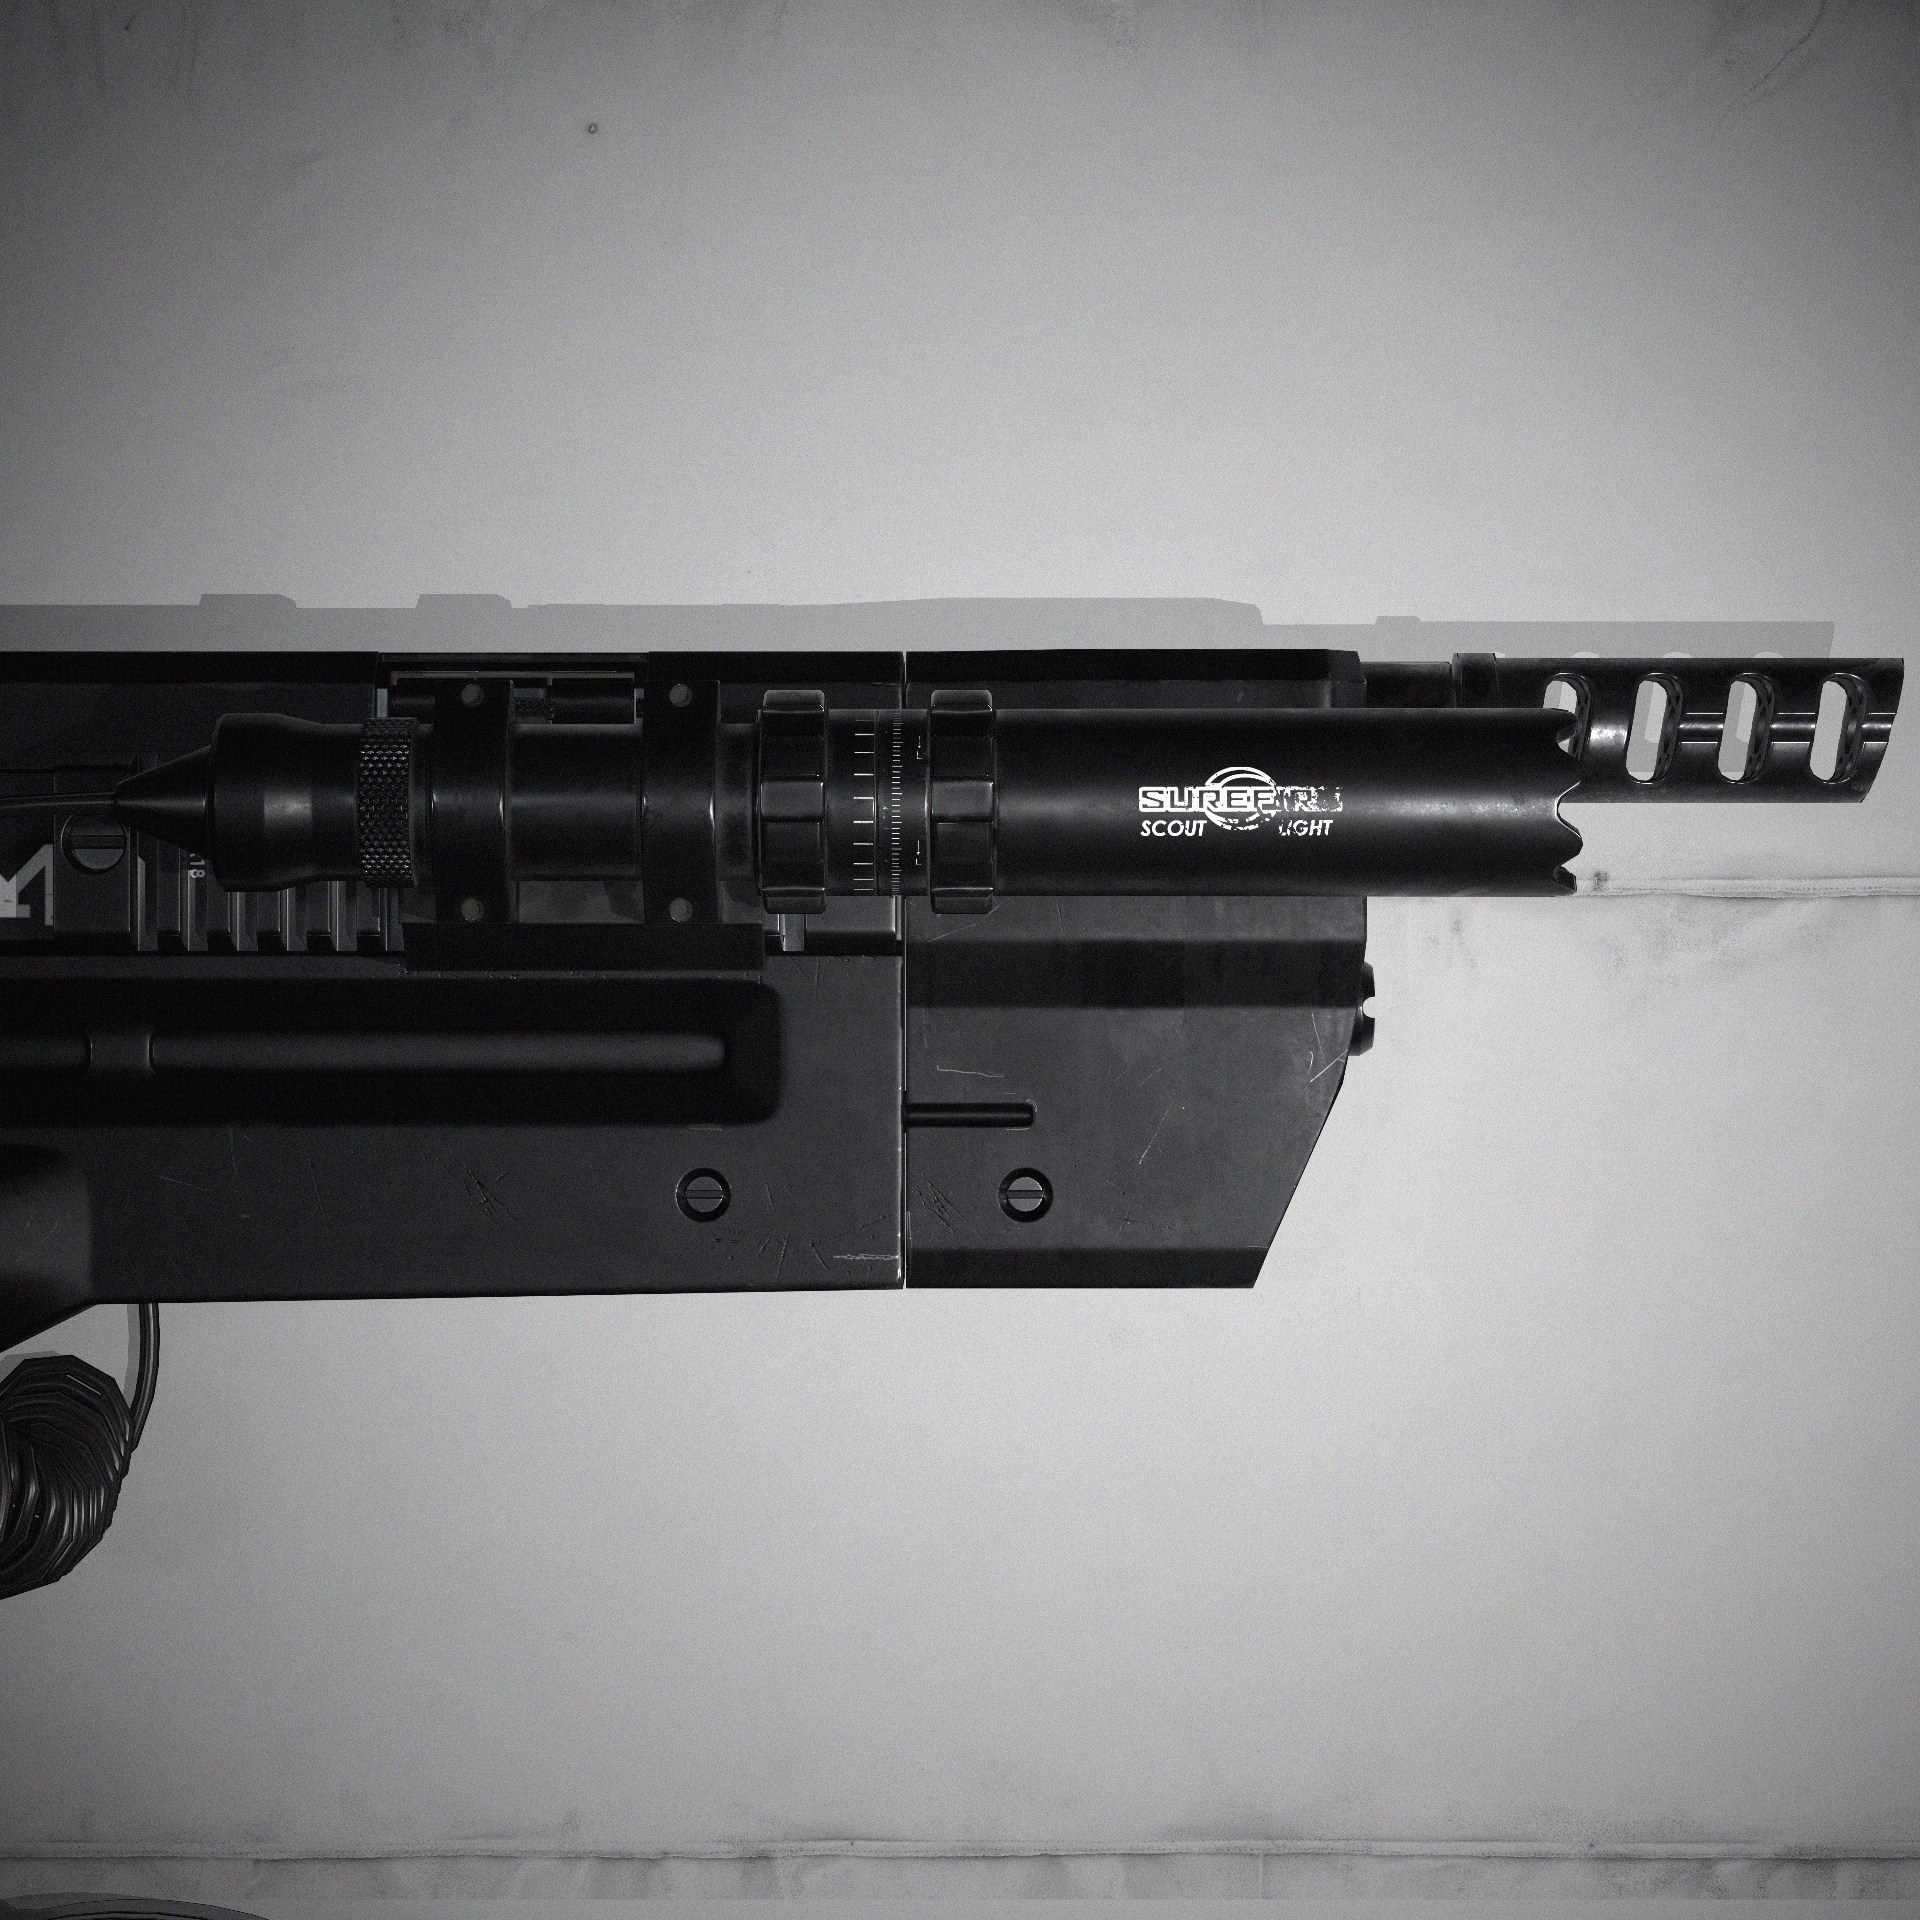
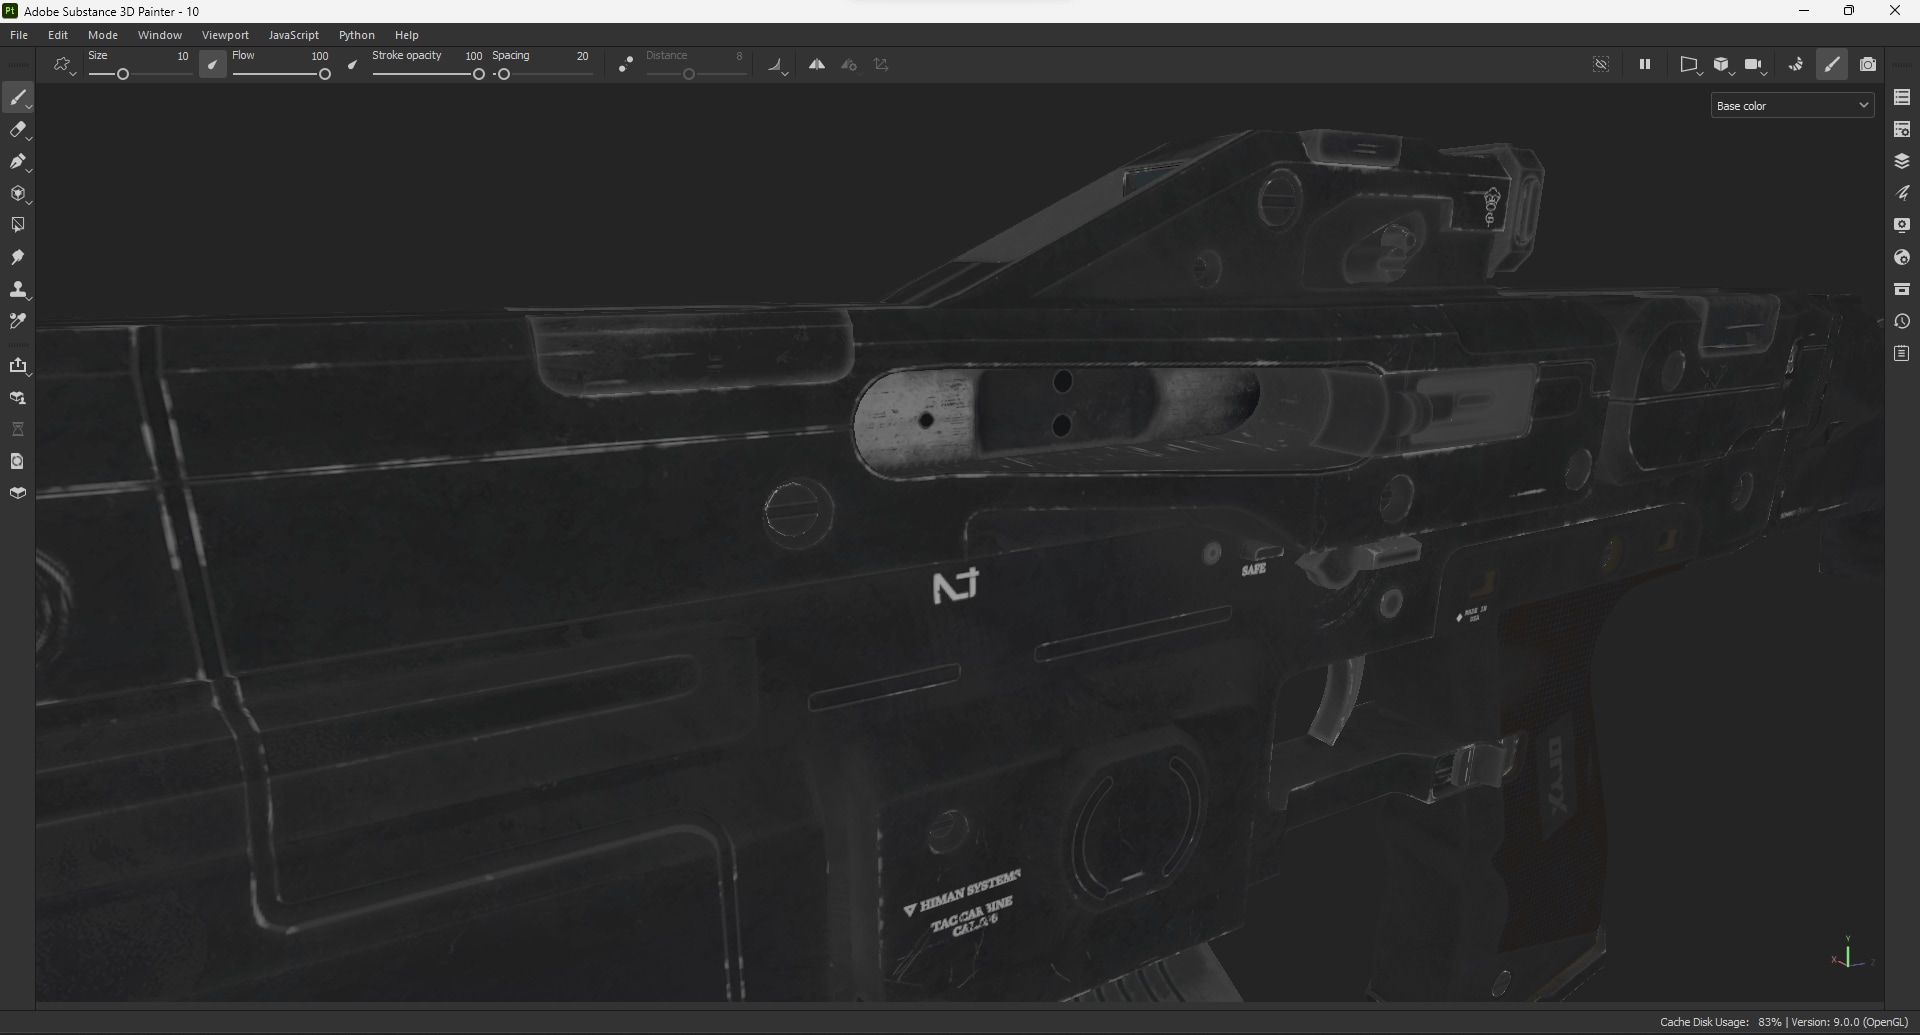
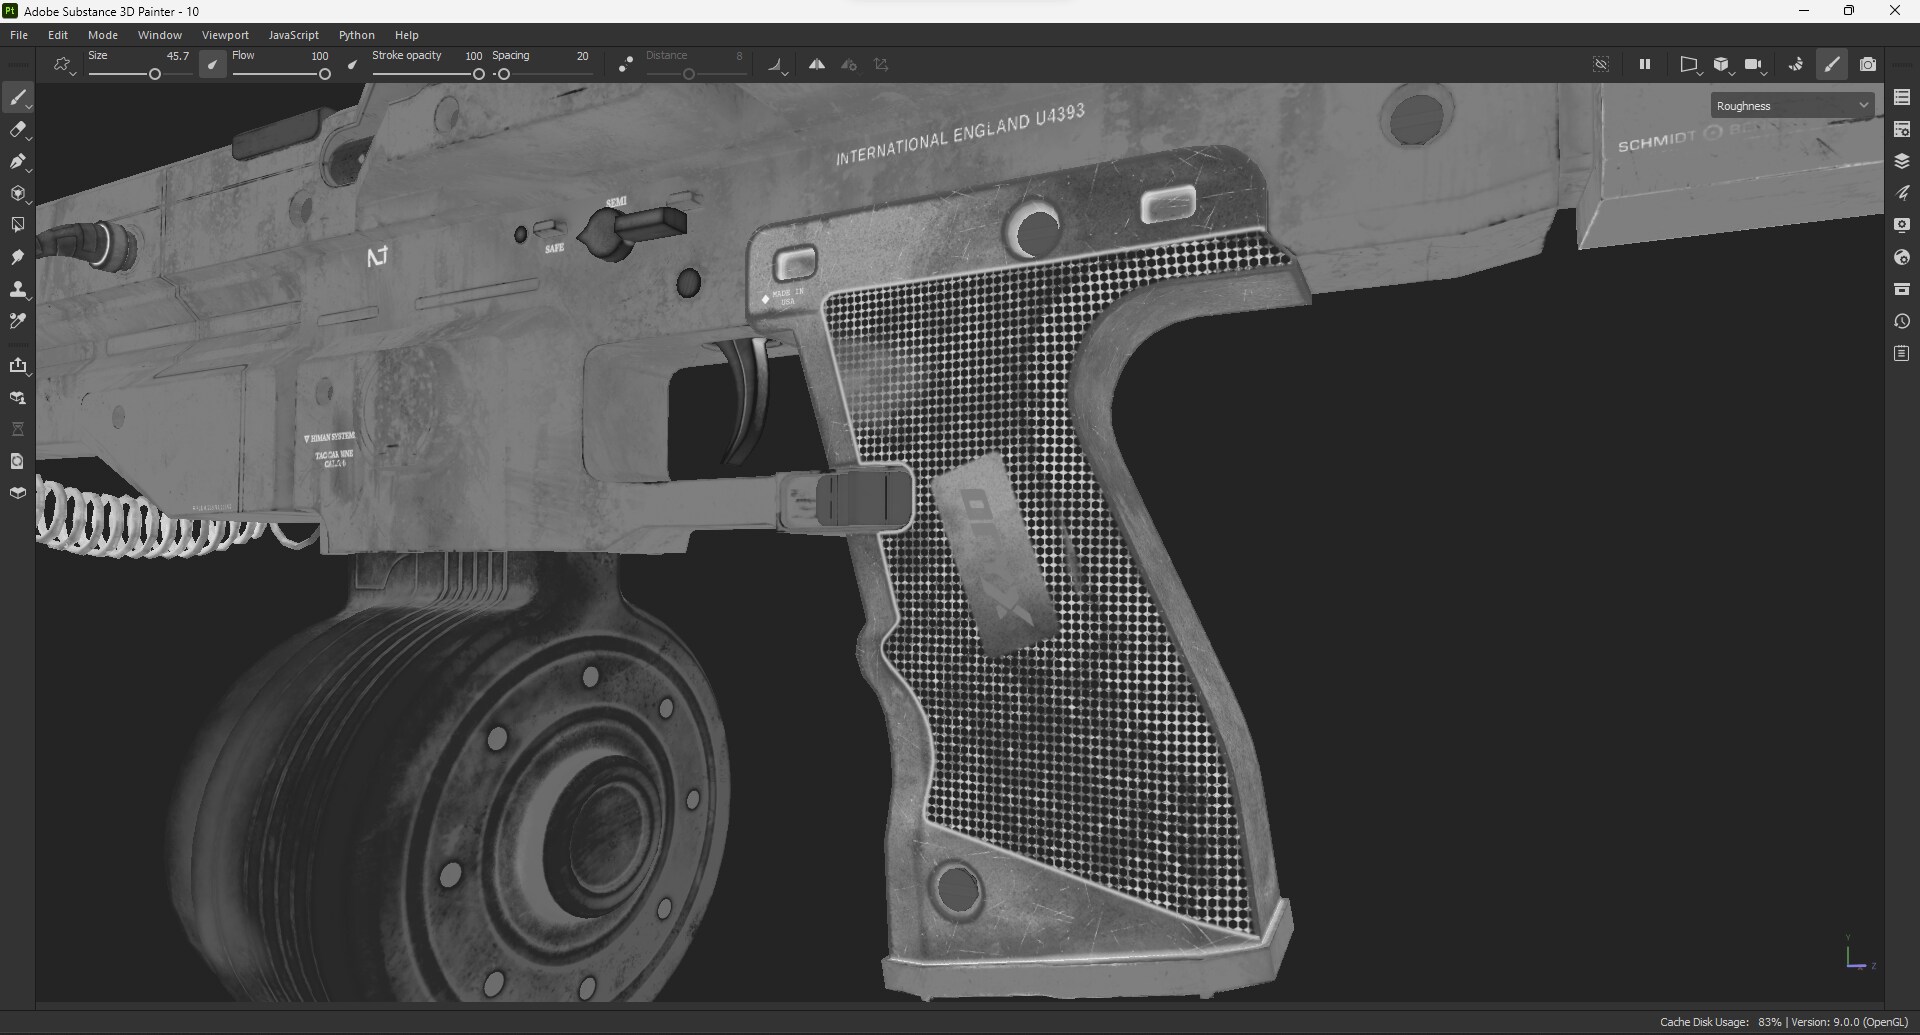
I put a bunch of time into adding textures to this model. To get really good textures, you need a super strong computer. I aim for everything to be in 4K so I can pay attention to all the tiny details. I have a GTX 1650 video card and 16 GB of RAM, but that's not enough for me to work comfortably in 4K. So, I made different metal materials in separate projects and then combined them in one project before exporting to Marmoset Toolbag.This time, I went with the PBR pipeline. I chose it because I wanted to focus on how rough the surfaces are. I tried to show lots of variations in how rough the metal looks to make it beautiful and realistic.
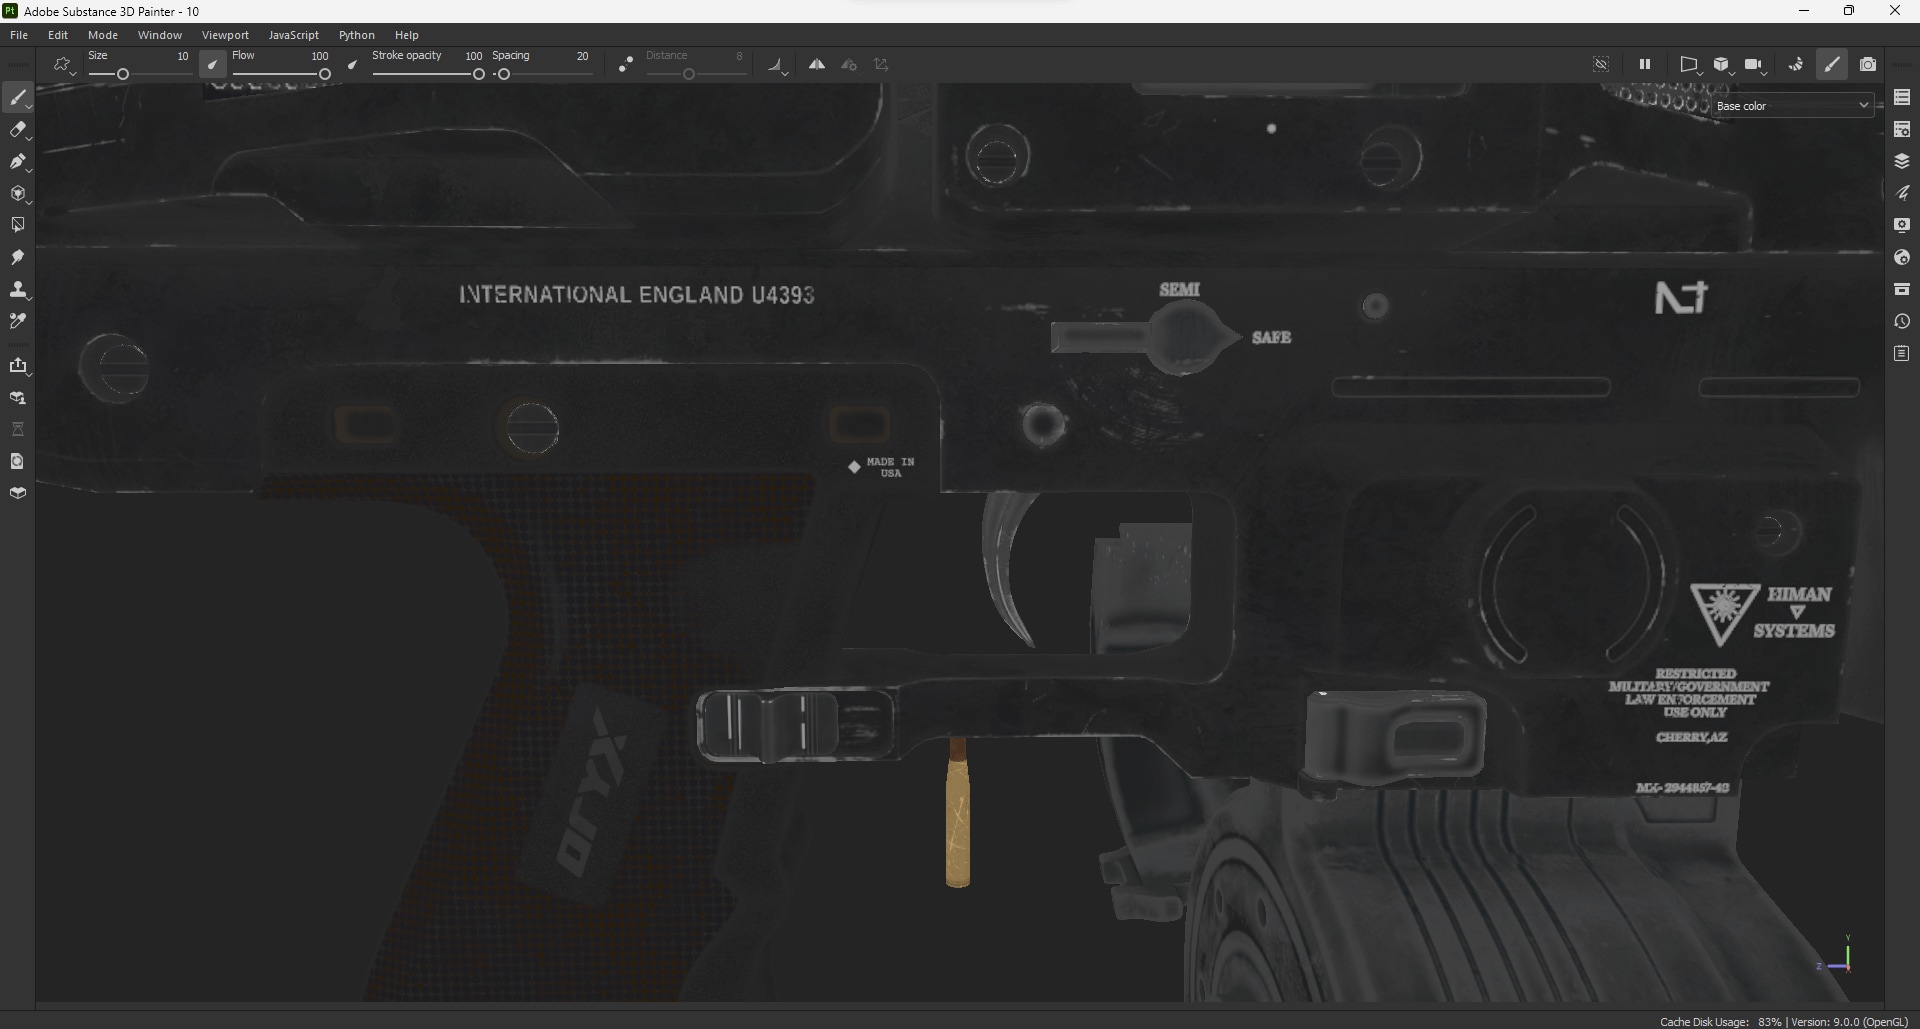
When I'm adding textures in Substance 3D Painter, I usually use Tomoco. It has a light that doesn't mess with the colors of the materials.
Honestly, there are no special tricks for making textures look good. It's all about practicing a lot, gaining experience, and putting in a ton of effort to make your results better.
Wrap-Up
Thanks for sticking around till the end of my article! Even though I didn't dive too deep into all the steps and details, I hope you were able to take something useful out of that article and enjoyed reading it.