Udaya Kumar
is aSr. Texturing Artist
from Chennai, India
Skills
Styles
Tools
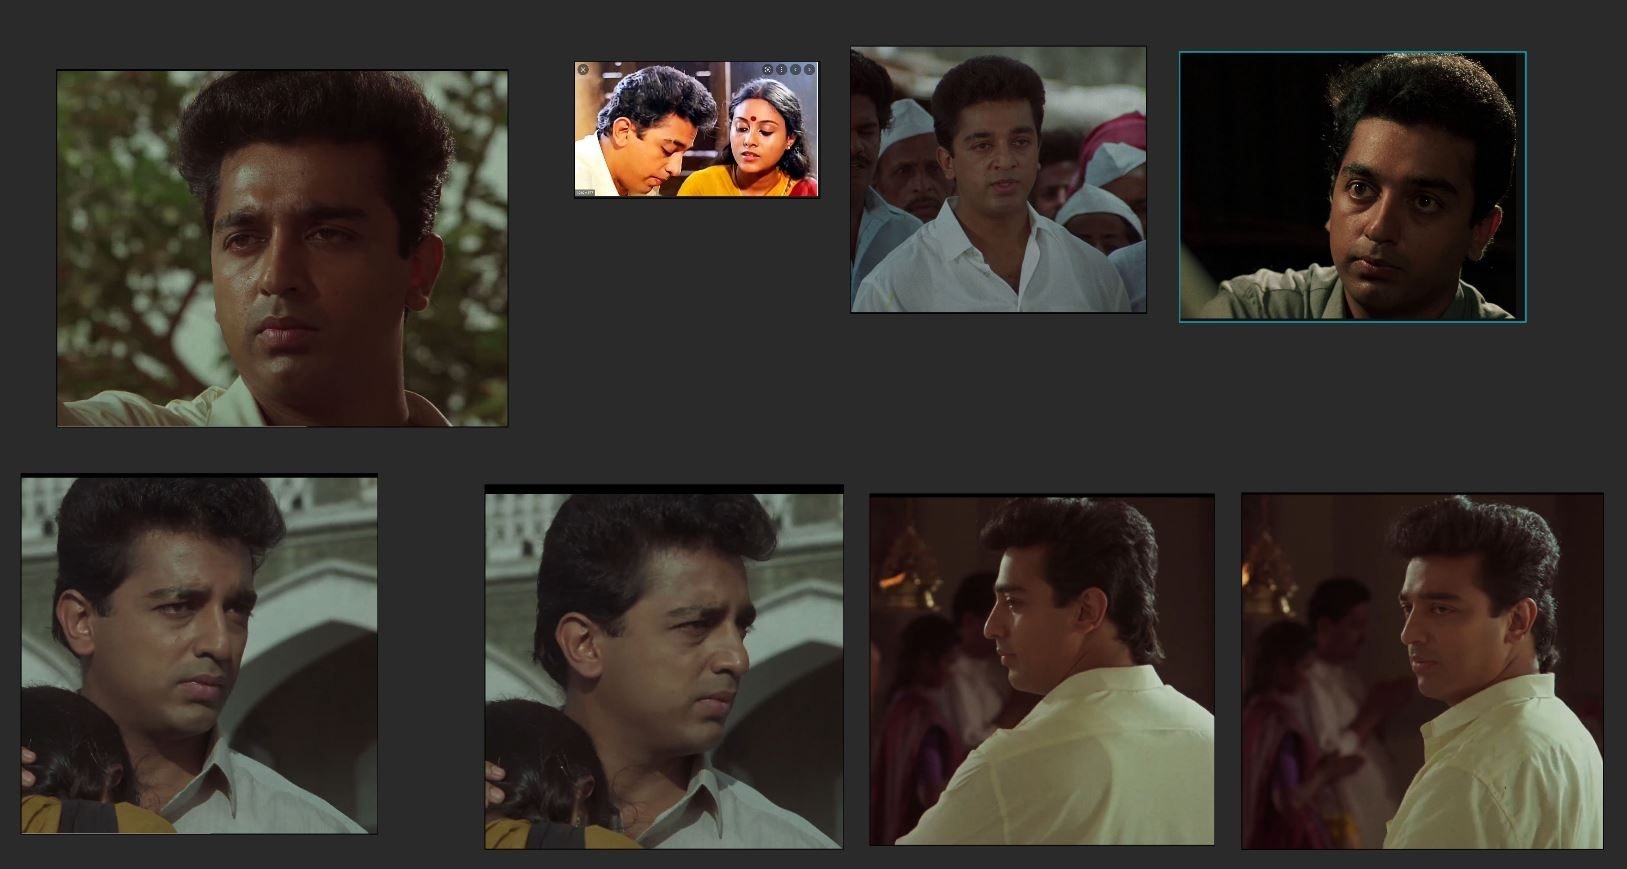
Creating Ulaganayagan Kamal Haasan on 3D Portrait
Introduction
Hello, my name is P.Udayakumar. I am fron India on TamilNadu,I’m currently working as a Sr.Texturing Artist at DNEG India. I’ve been working with DNEG for the past 5 Years and still going good.
I always loved to draw characters from my young age. My mother only identified my artistic talents and encouraged me a lot in believing in my artistic skills in drawing and painting. She is always my backbone for me. I graduated in BFA ,viscom at Kumbakkonam College of Fine Arts. I started my carrier as a Mattepainter artist and now my professional profile is Sr. Texturing artist at DNEG.My professional experience now spans 15+ years and more than 115 films, including, among many others, 2.0,Bullet Train, Tenet, Pacific Rim, Fast & Furious Presents: Hobbs & Shaw,Venom,Avengers-endgame,The-eight-hundred,Bohemian-rhapsody.
The Ulaganayagan Kamal Haasan Project
I was inspired to create a 3D portrait of Kamal Haasan after watching a Nayagan Flim about him. I was intrigued by his life story and his profound impact on the Indian film industry. I wanted to create something unique that would capture his essence and that would be a tribute to his legacy. I decided to use 3D modelling software to create a 3D version of his portrait and to bring the portrait to life by adding realistic textures and lighting. Additionally, I wanted to challenge myself and push my skills as an artist.
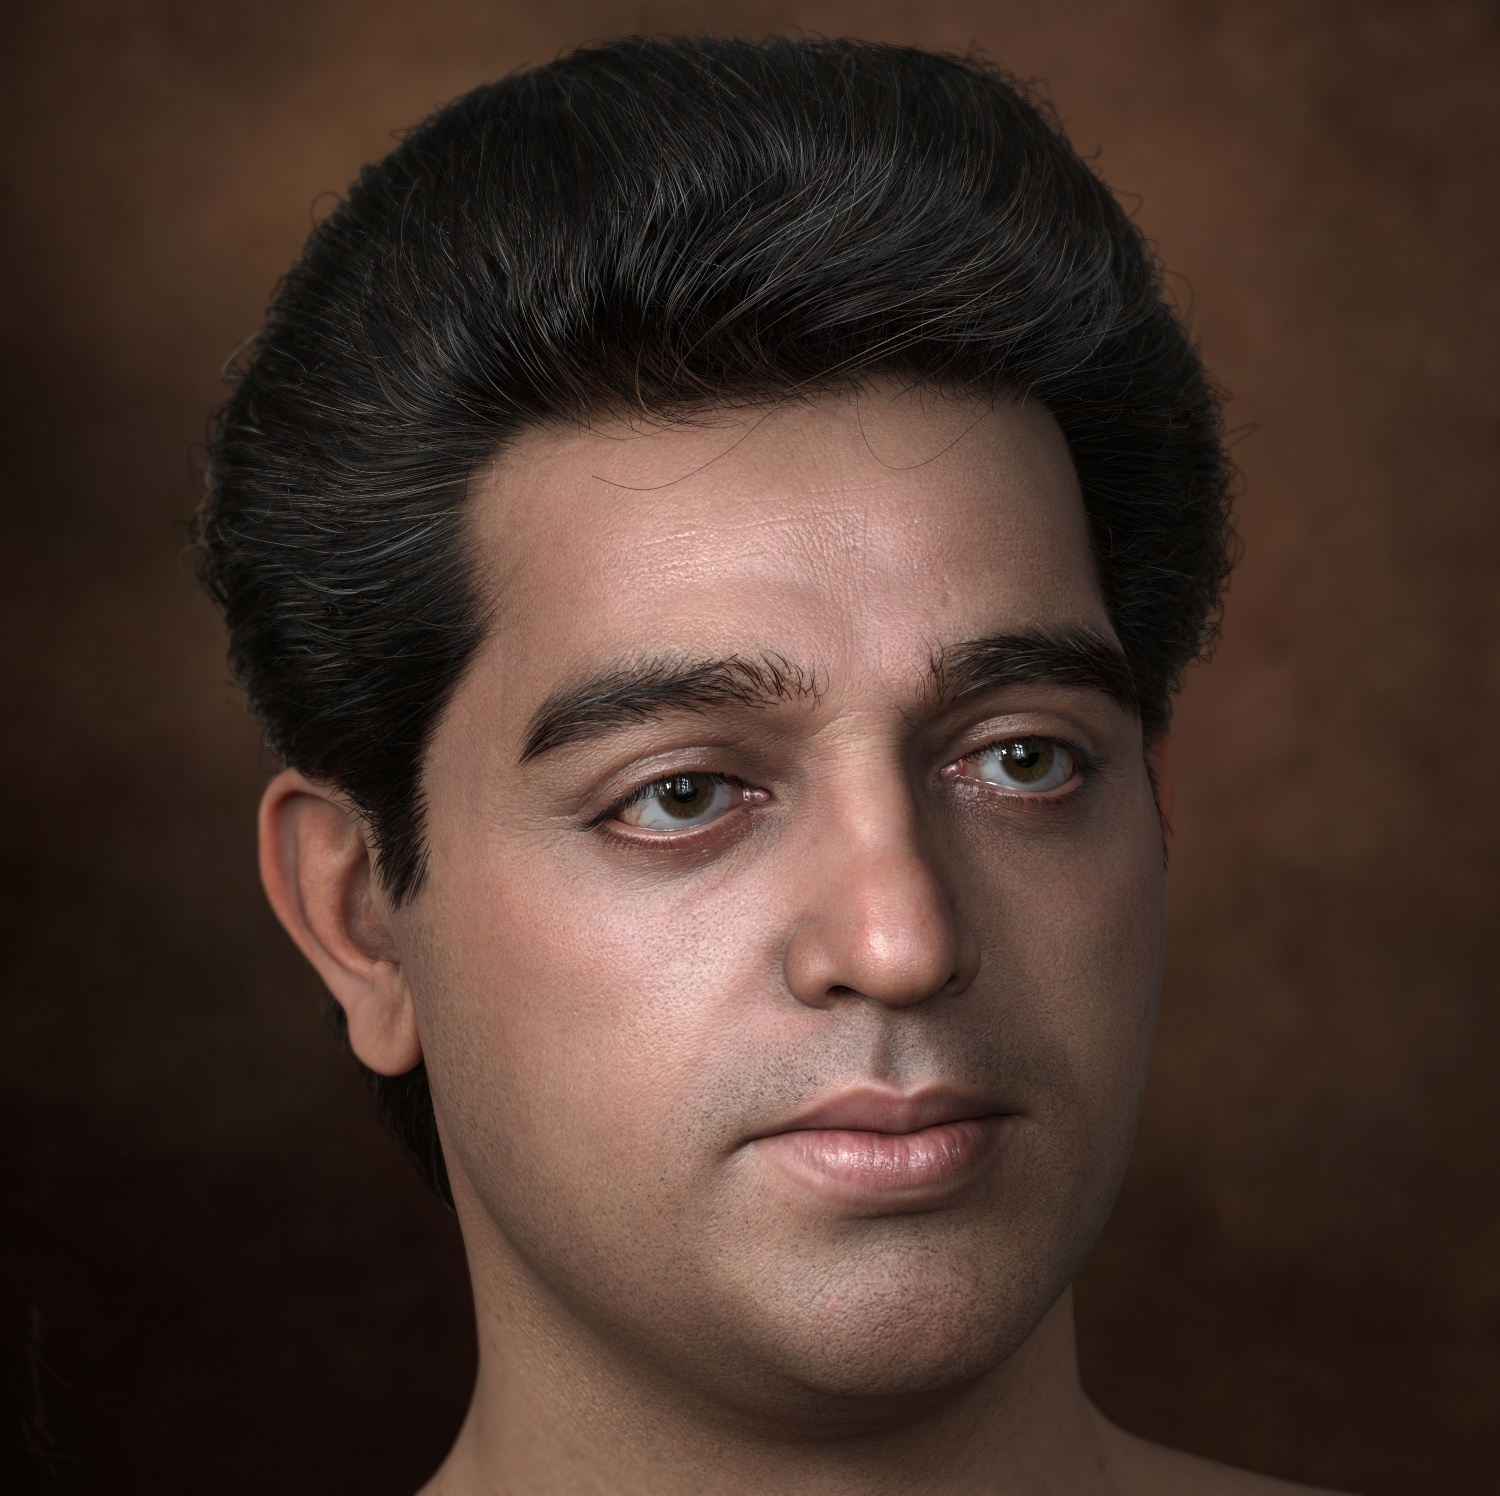
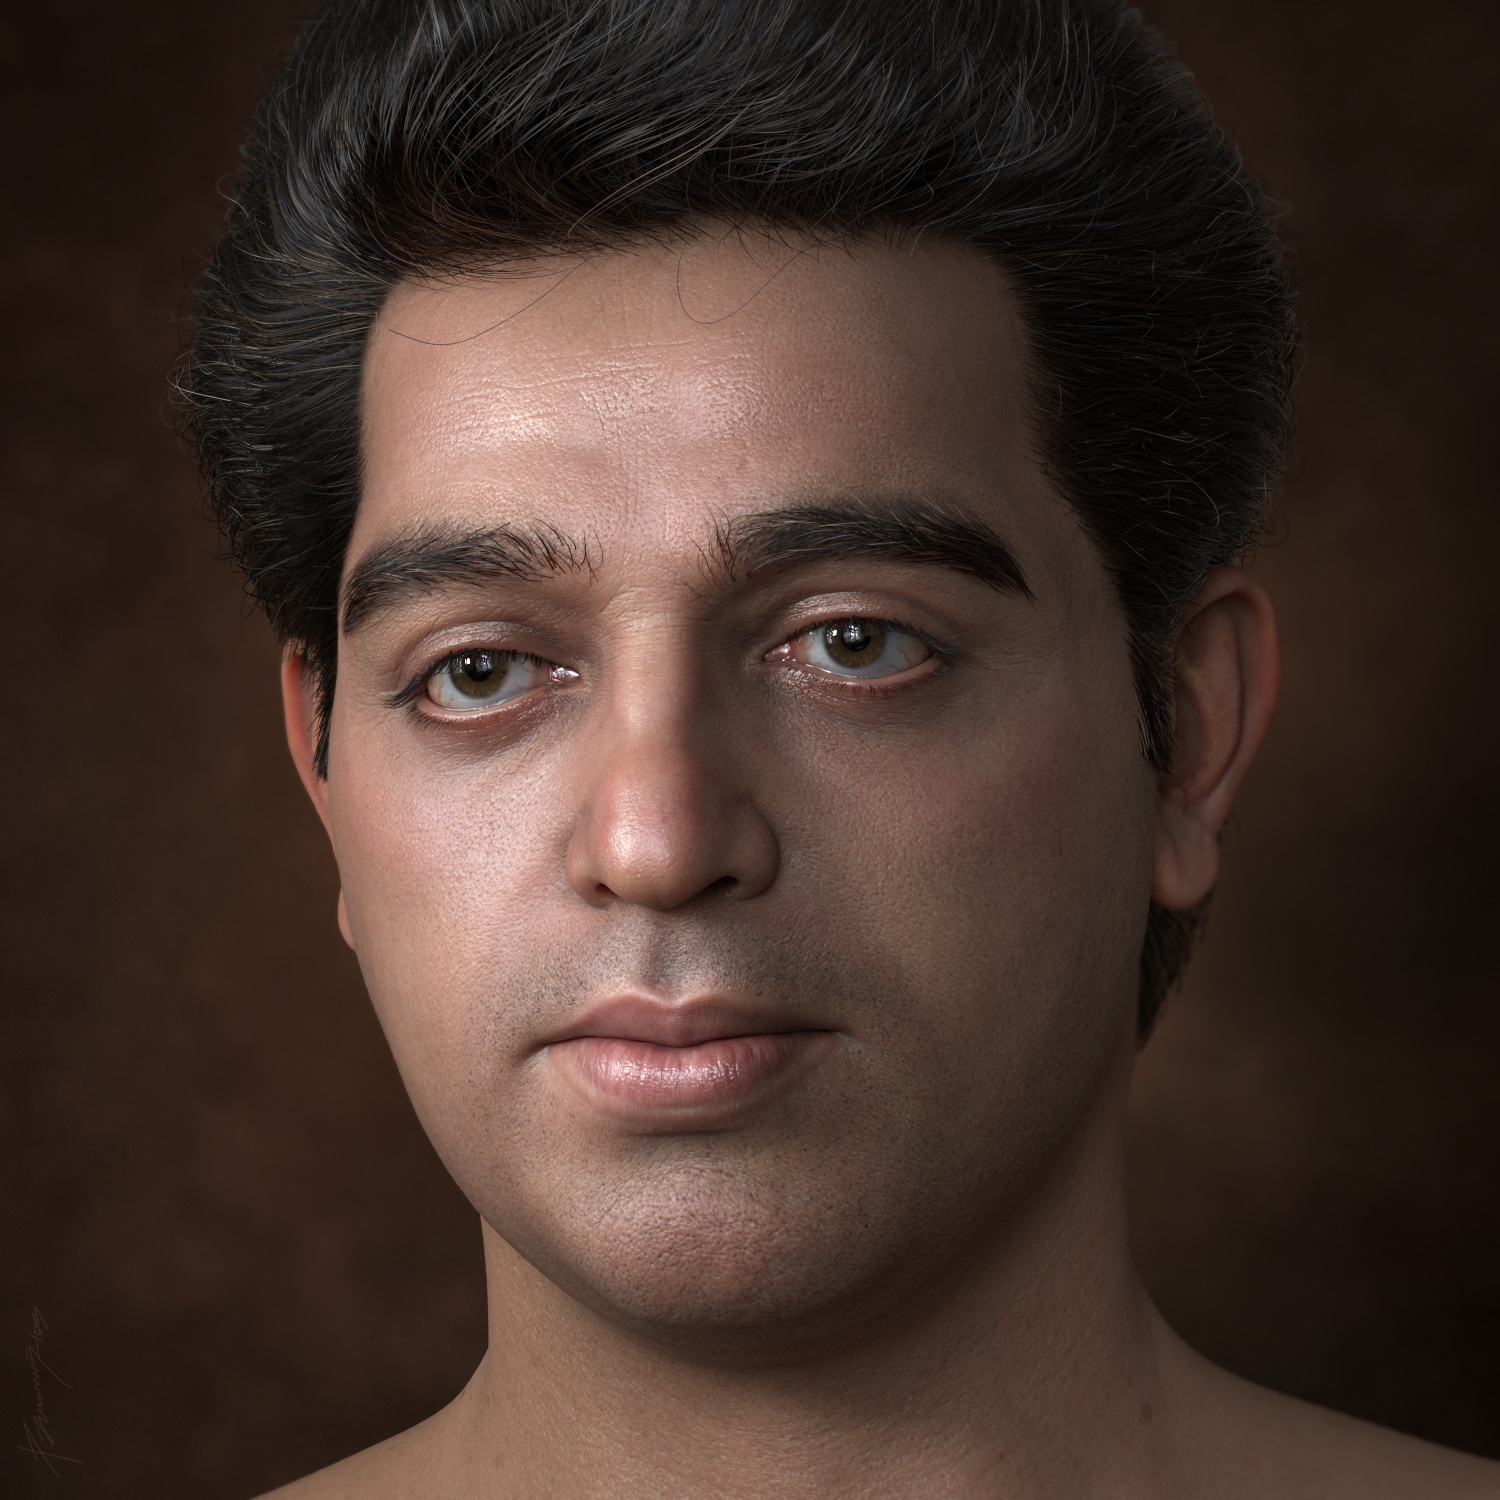
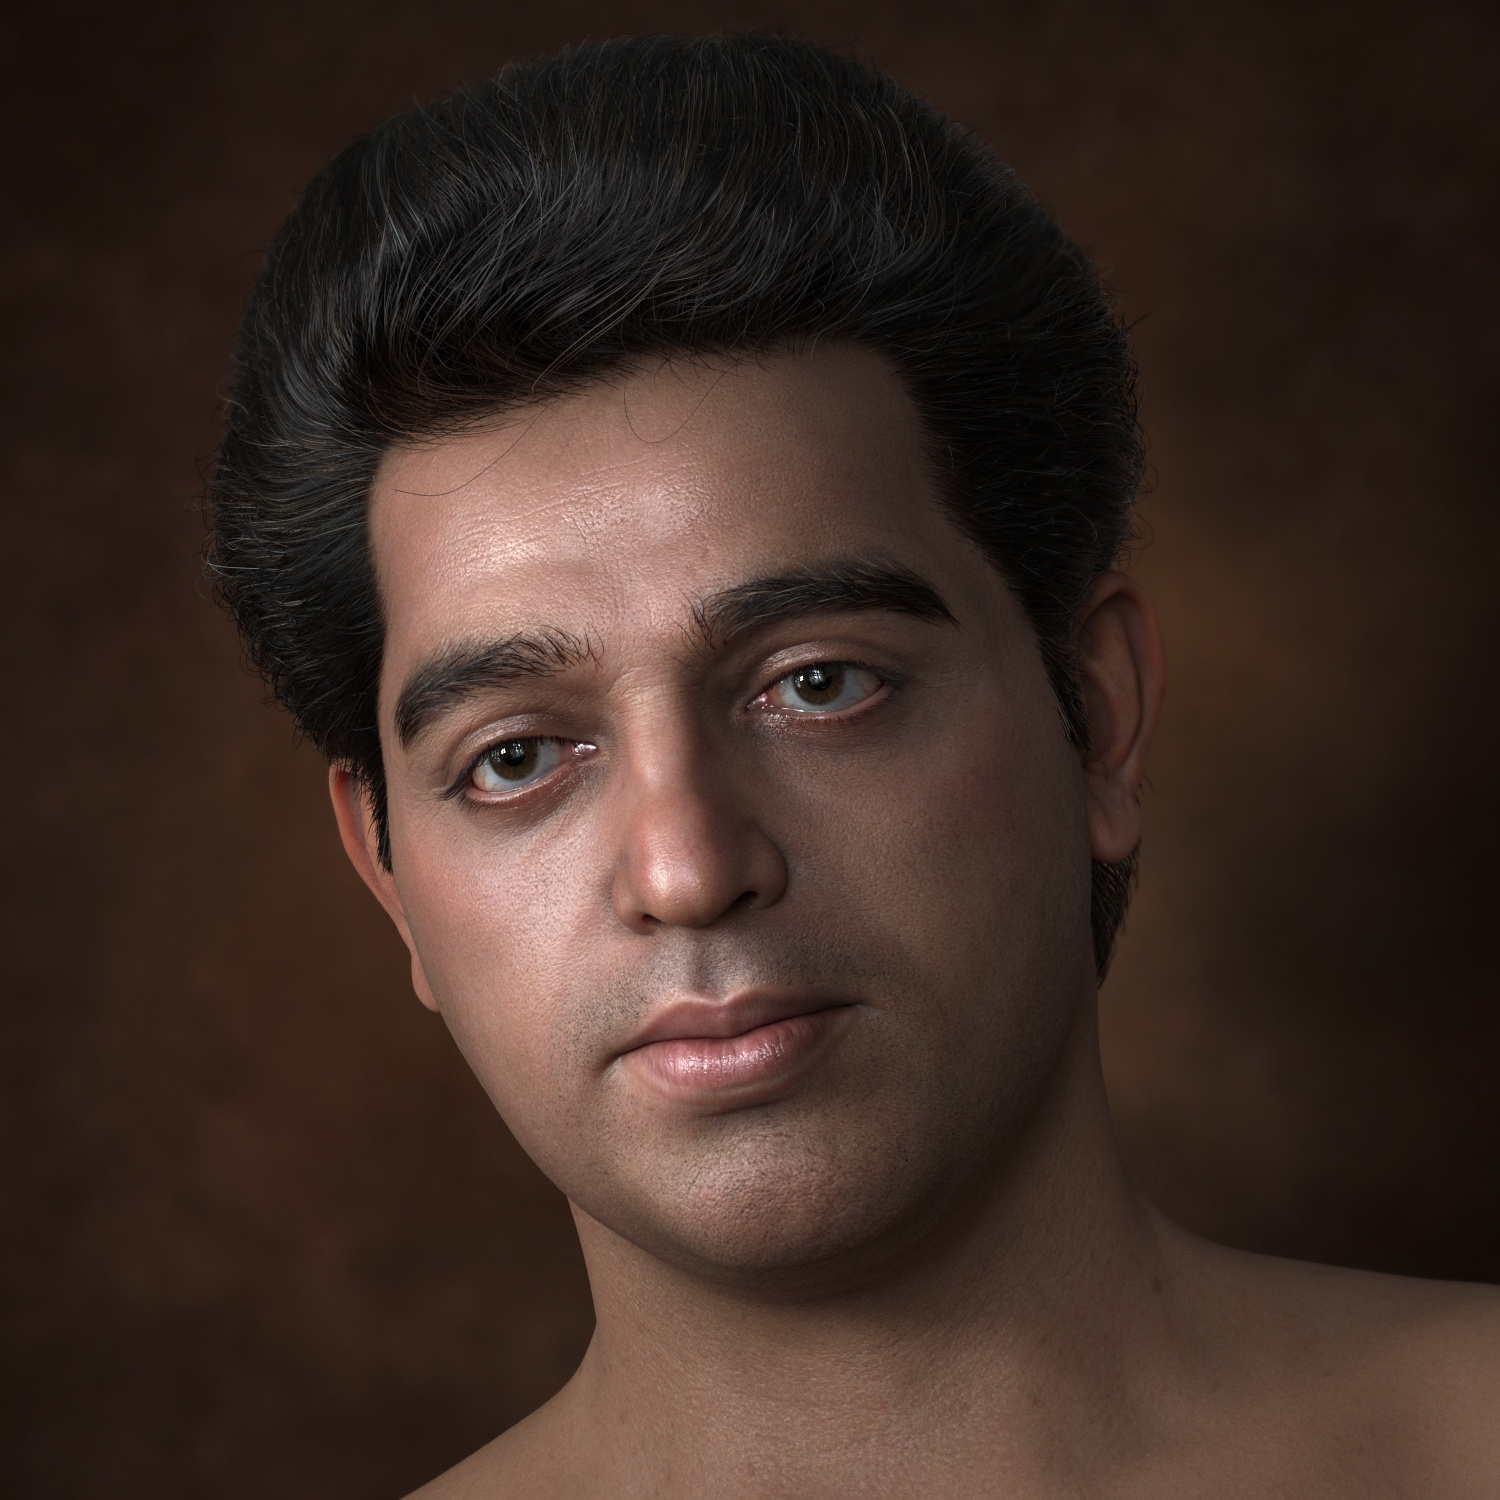
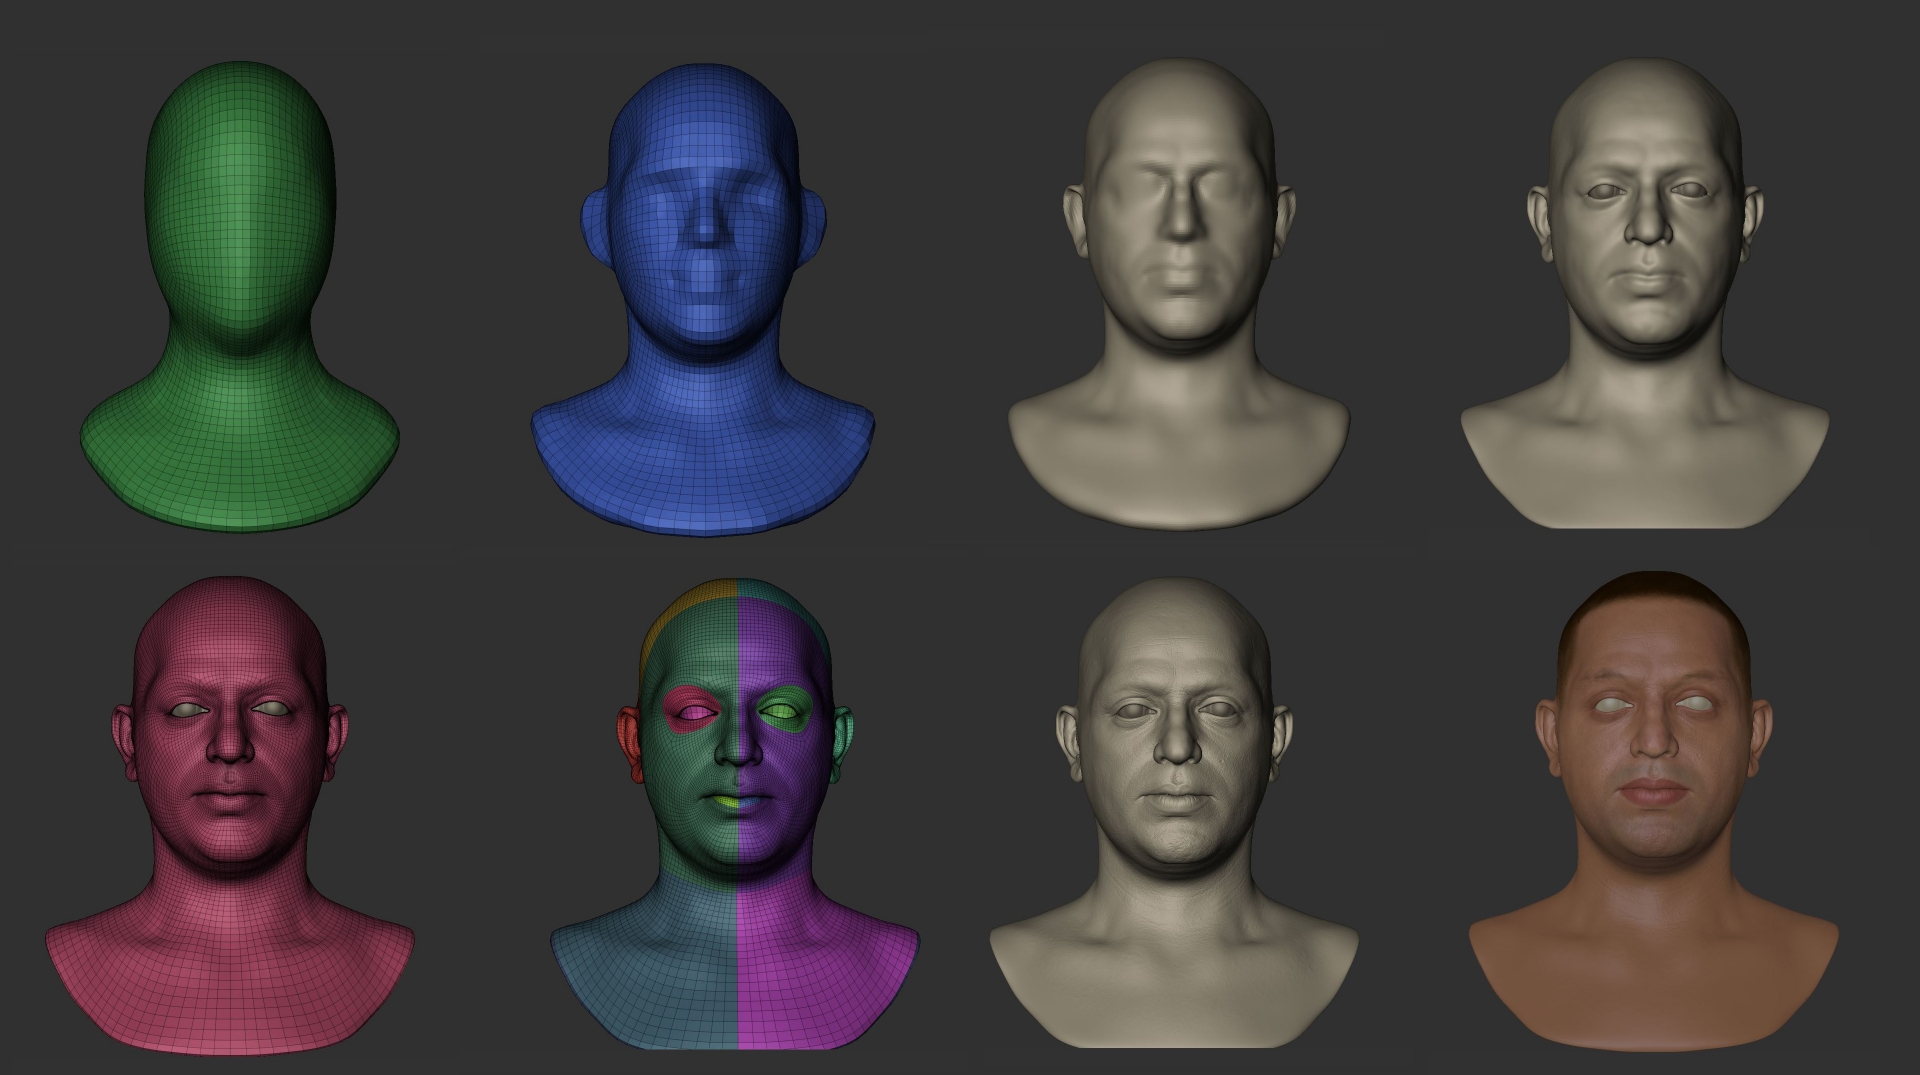
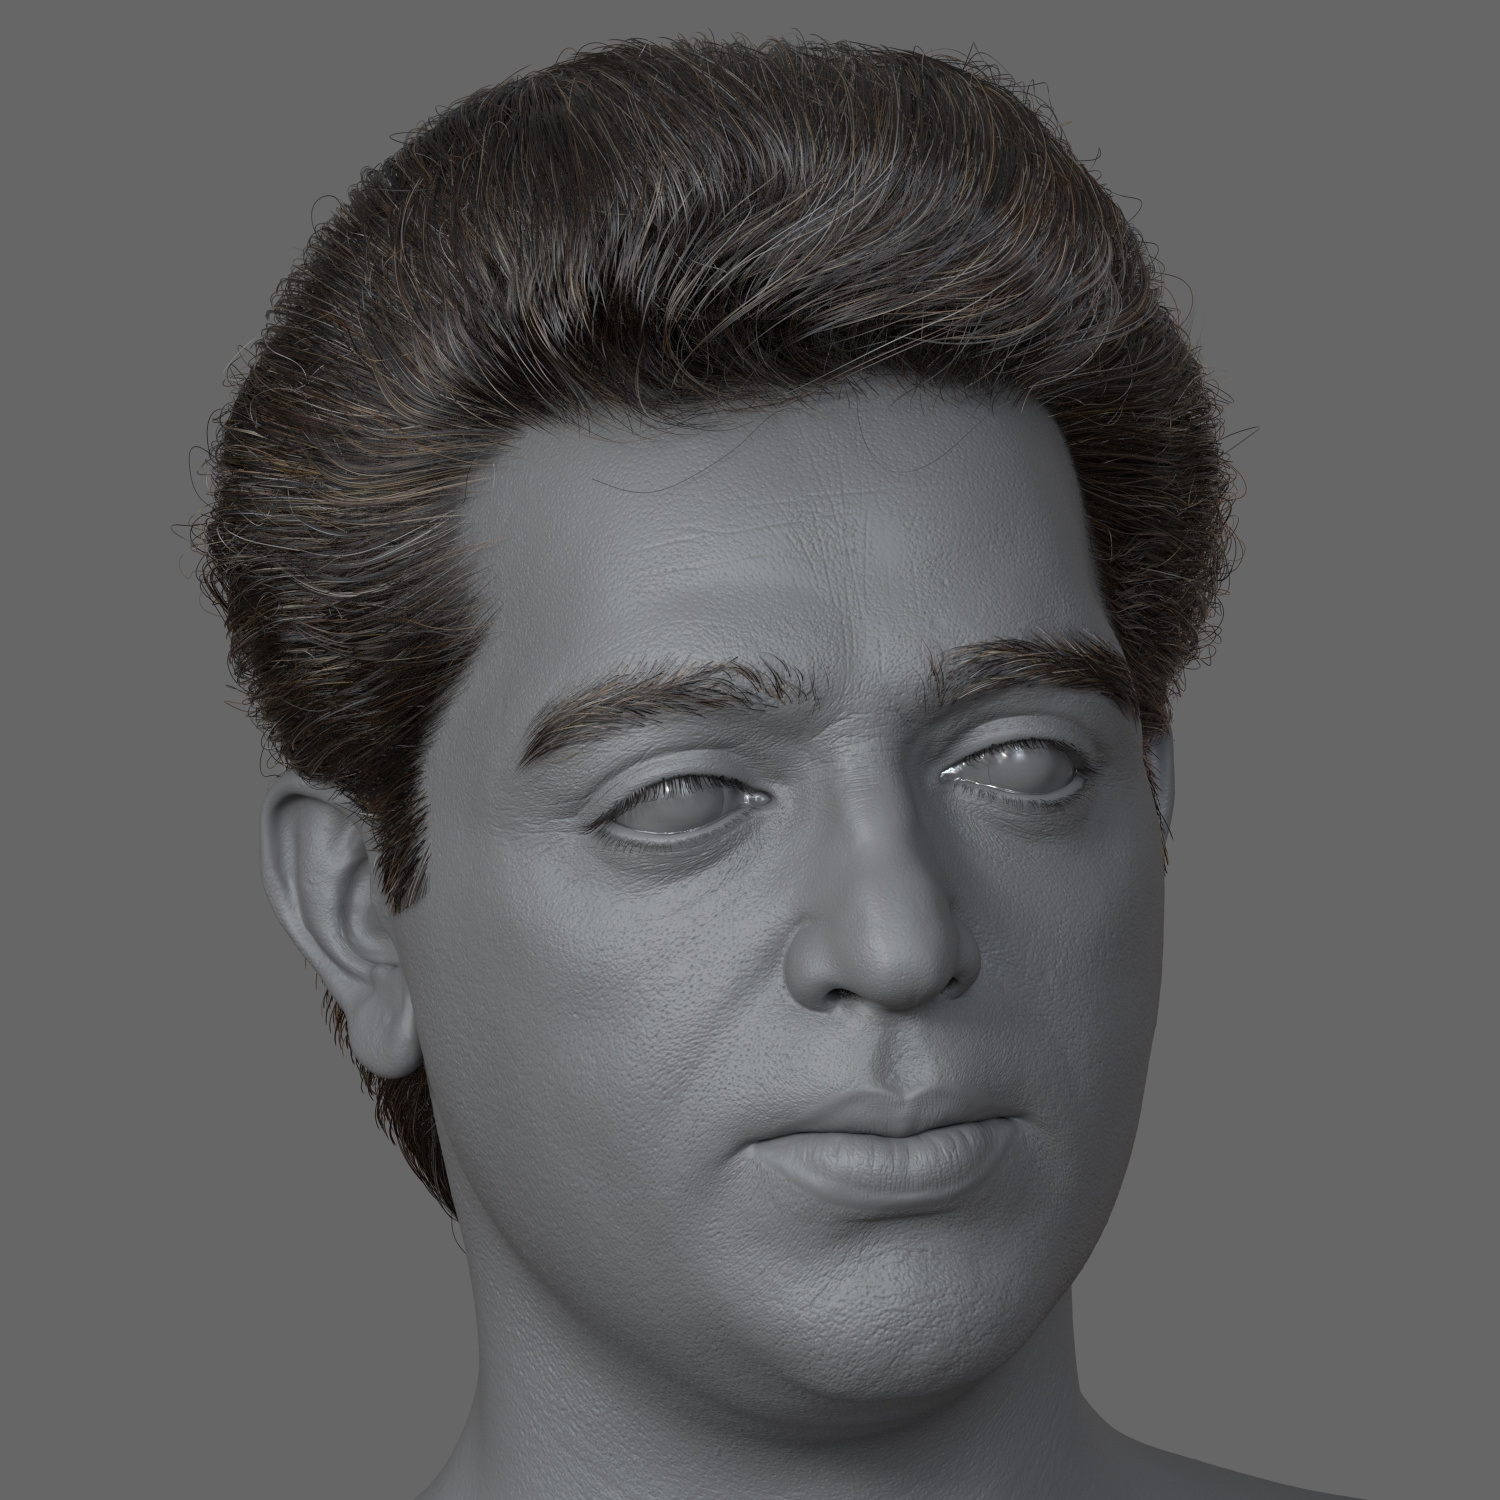
Sculpting
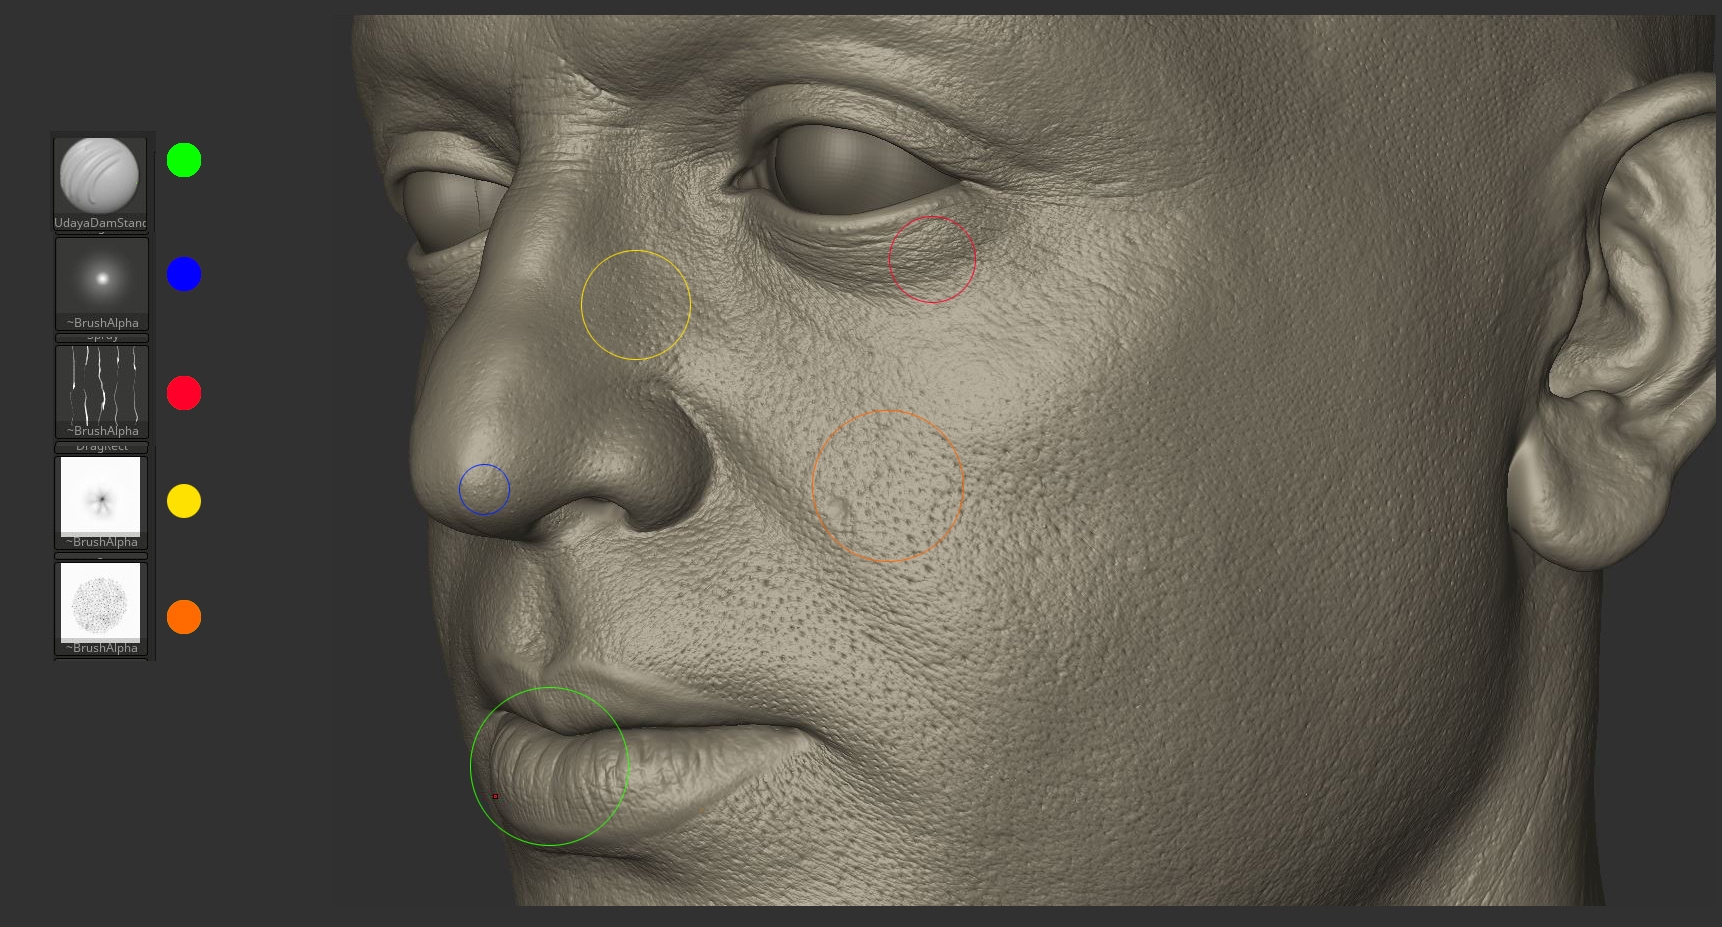
I had a base mesh Head that I can start sculpting from Zbrush Dyamesh first. After establishing the basic anatomy, and then likness features of head , like the squarish jaw, pronounced cheekbones, and deep-set eyes. It’s always a good idea to start as a caricature first,and then Used zwarp on zbrush ur dyanmesh to your proper nice wireflow mesh to transfer the basic shapes first ,And slowly reduce the intensity of exaggeration. I think this way is very effective to get the personality quickly.
Another important thing is to not go into details too fast. Focusing on the big shapes, proportion, and personality first.
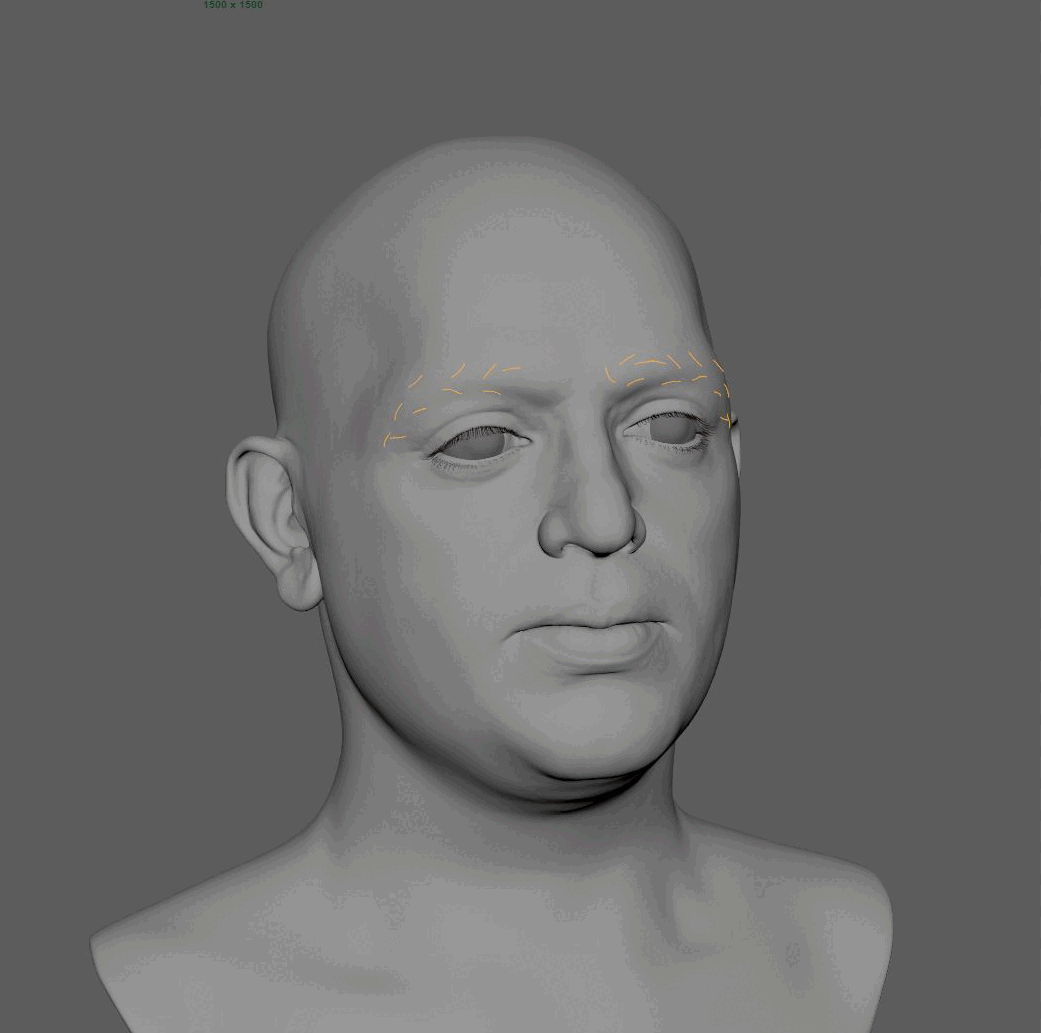
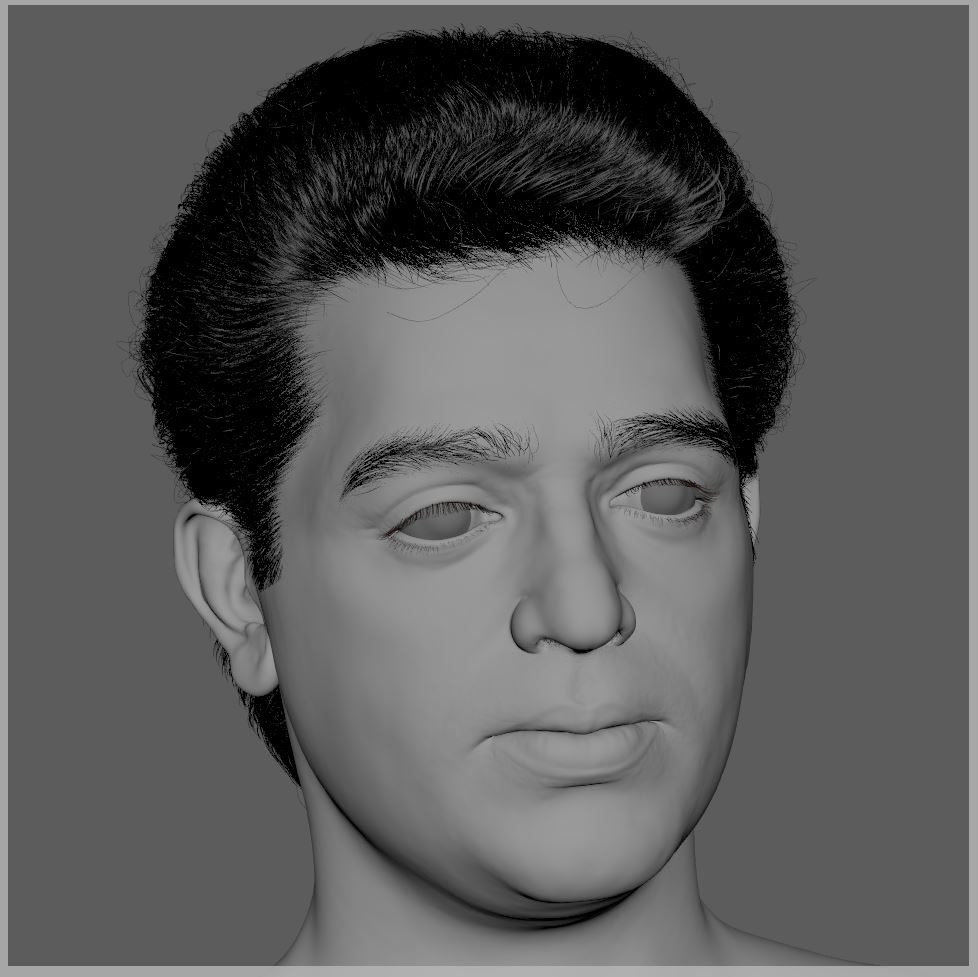
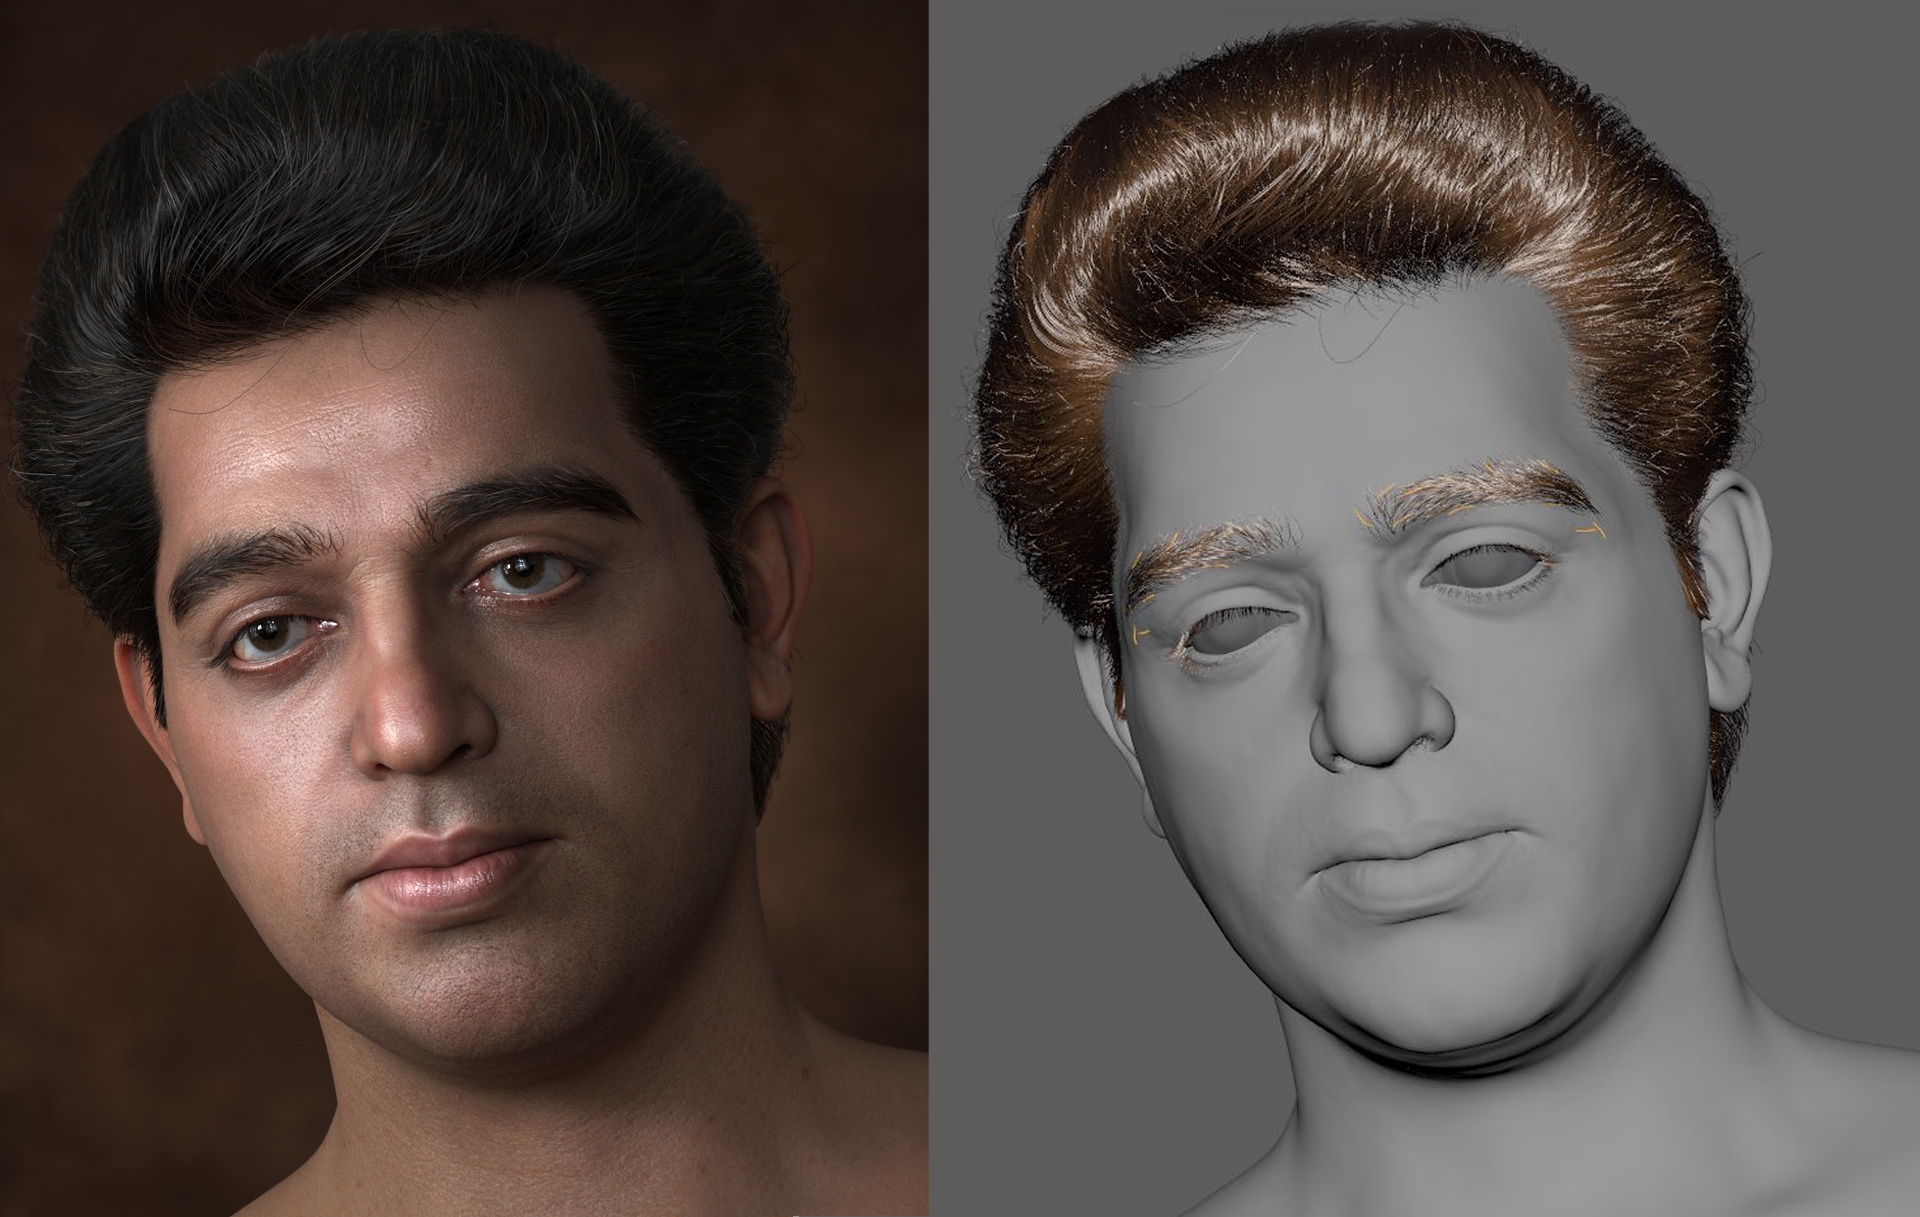
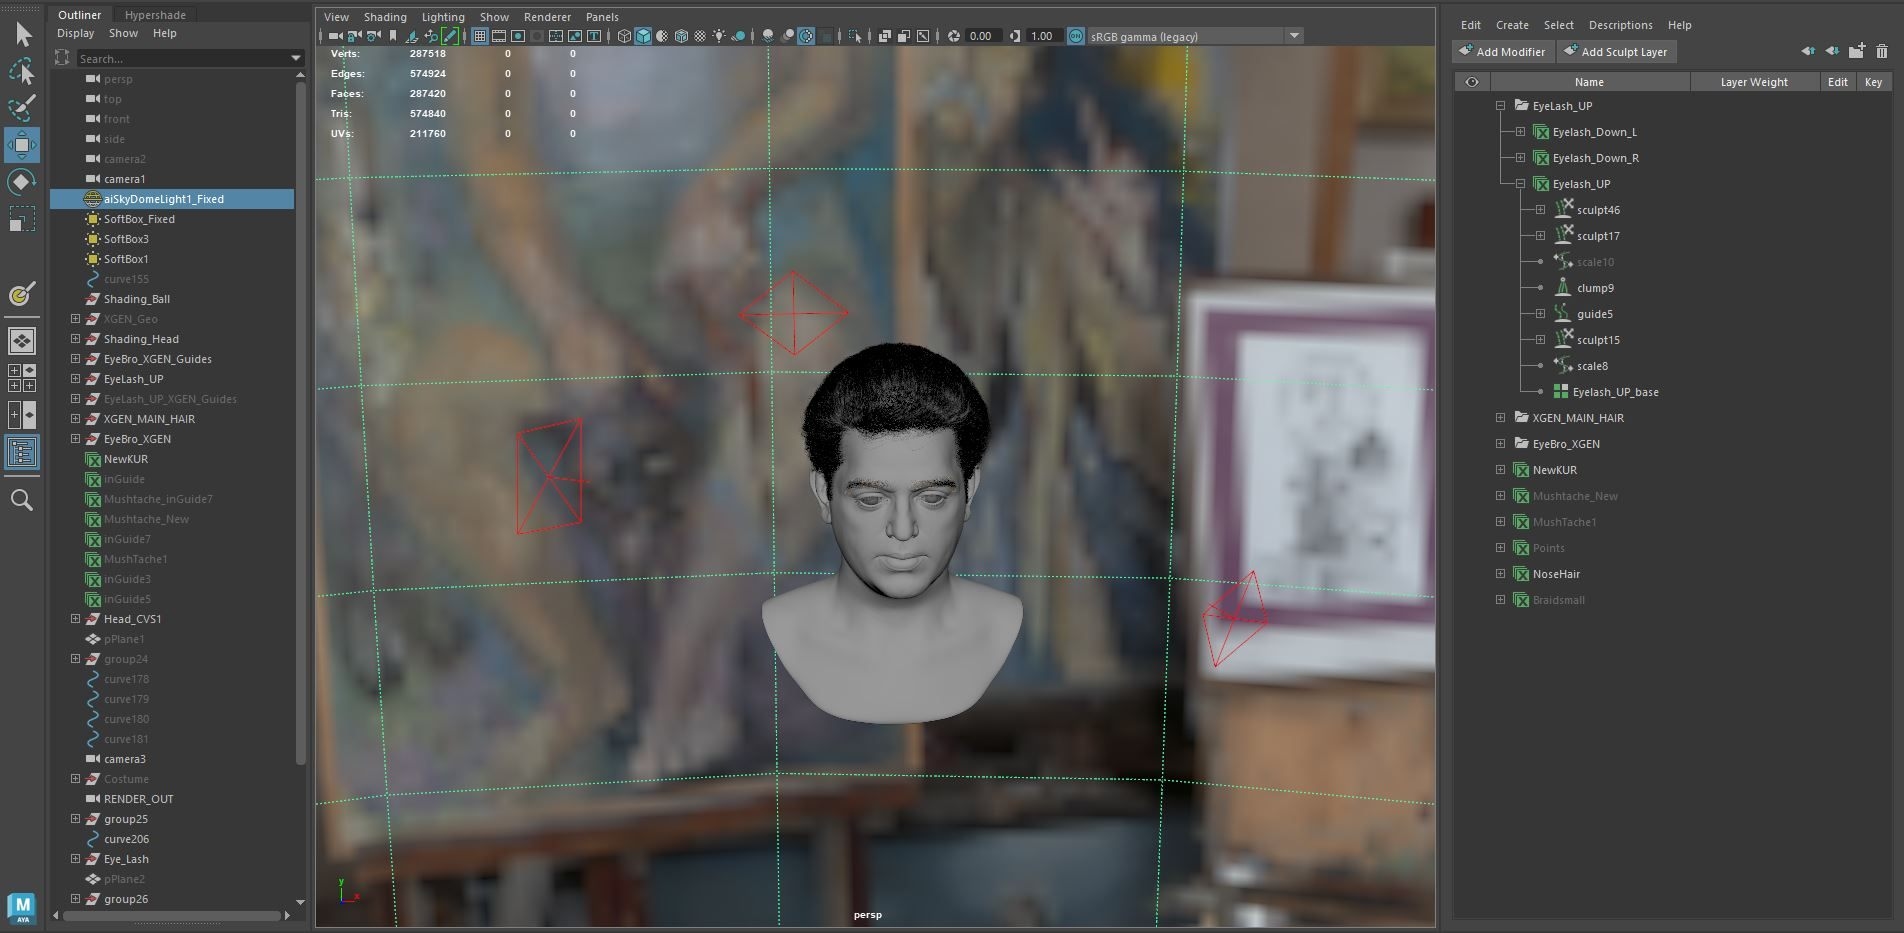
XGen Hair
Maya’s XGen Interactive Groom, though a relatively new tool, is easy to learn and use.
What’s nice is that each brush stroke appears in real-time,and control yourself for each single hair also.
I created the hair in XGen during the sculpting phase, prior to texturing. When creating hair on Ulaganayagan Kamal Haasan head, I imported a lower sub-divided version of Ulaganayagan Kamal Haasan ’s head mesh from Zbrush and used just the scalp mesh for the XGen hair base.
It is not necessary to use a highly subdivided mesh for hair as you can always adjust hair density in XGen and the lower poly will be easier for XGen to deal with.

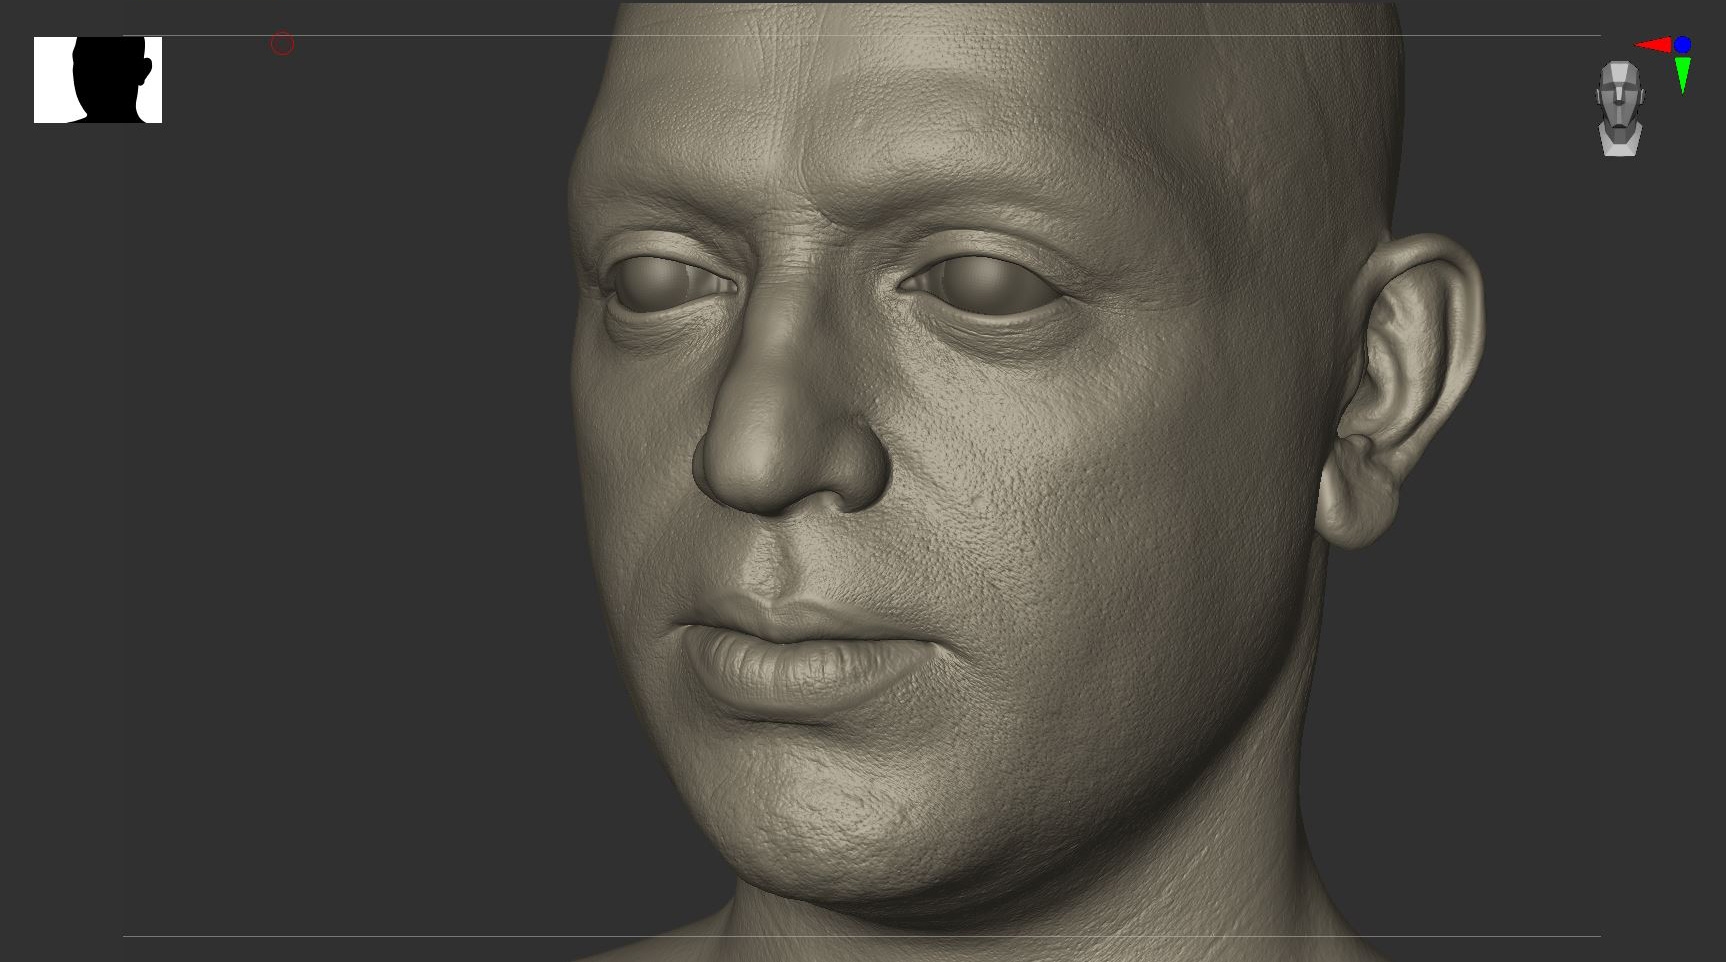
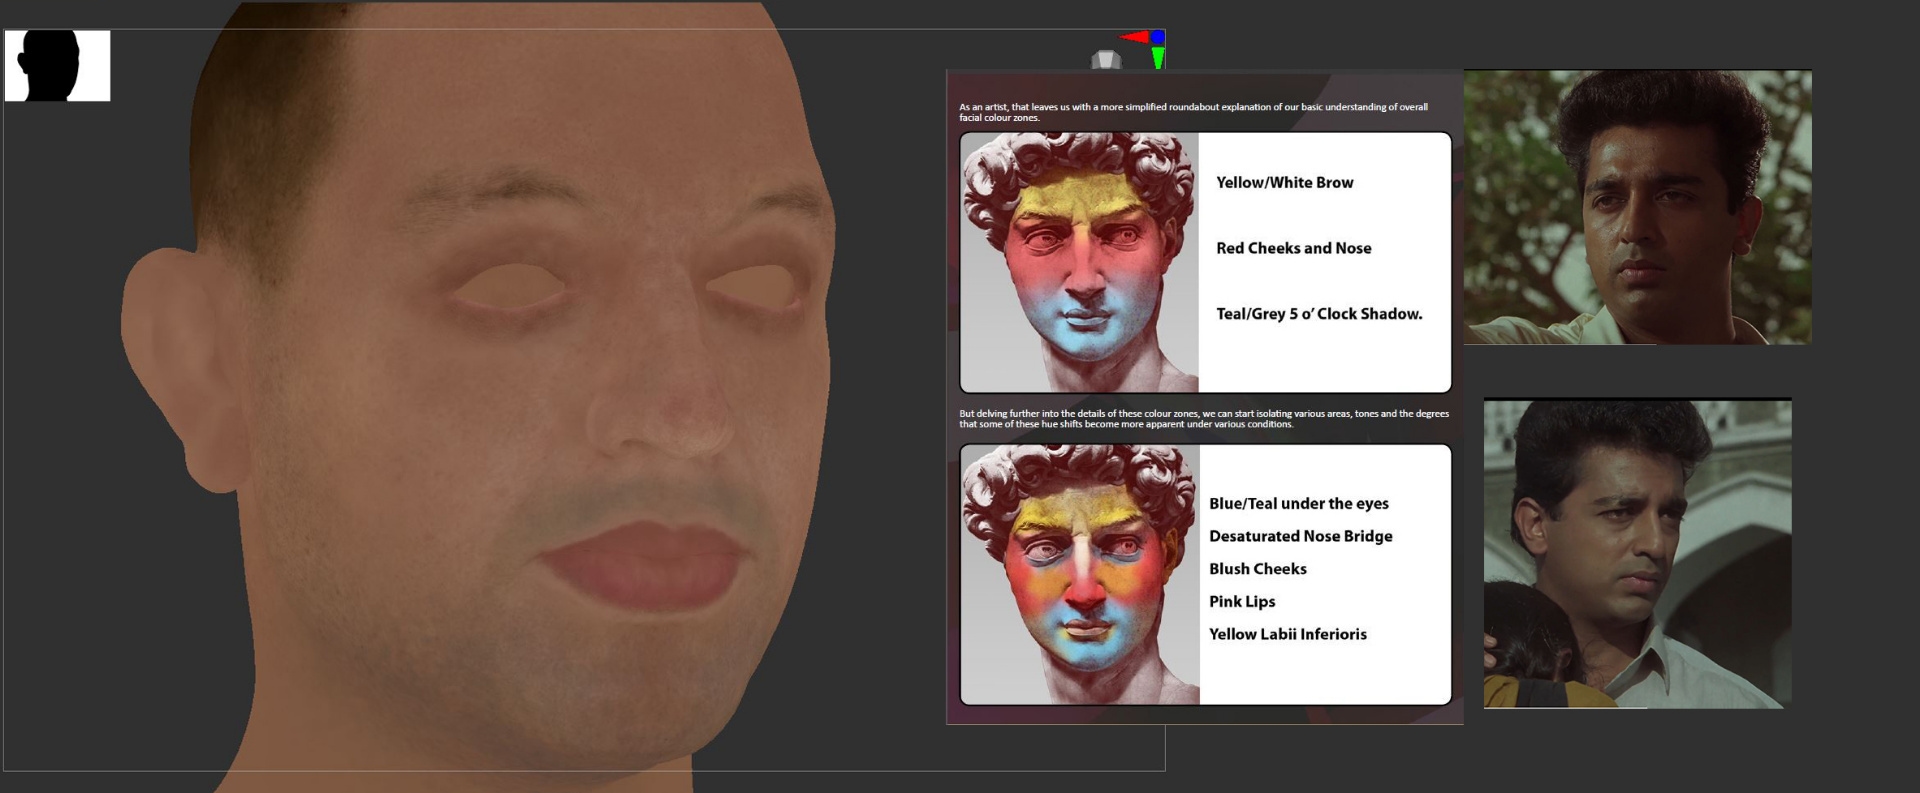
SKin Detailes on Zbrush/Arnold Shading
I tried to kept this quite simple and use only Zbrush and Maya for this project . modeled all the details by hand in Zbrush and also painted all the textures in Zbrush . The micro skin pores displacement maps used on all manual brushes and alpha Noise Maker.
Creating realistic skin shaders in Arnold can be a complex process, involving a variety of parameters and techniques. Begin by setting up your Arnold Standard Surface. This should include an albedo, a subsurface scattering amount, a subsurface color, and a specular color.Next, adjust the SSS parameters to achieve the desired look. This includes the scale, color, and weight. Finally, add a Fresnel layer to the Standard Surface. This will allow the skin to look more realistic by creating a gradual transition from a glossy specular highlight to a diffuse subsurface scattering. These steps should help you to create a realistic skin shader in Arnold.
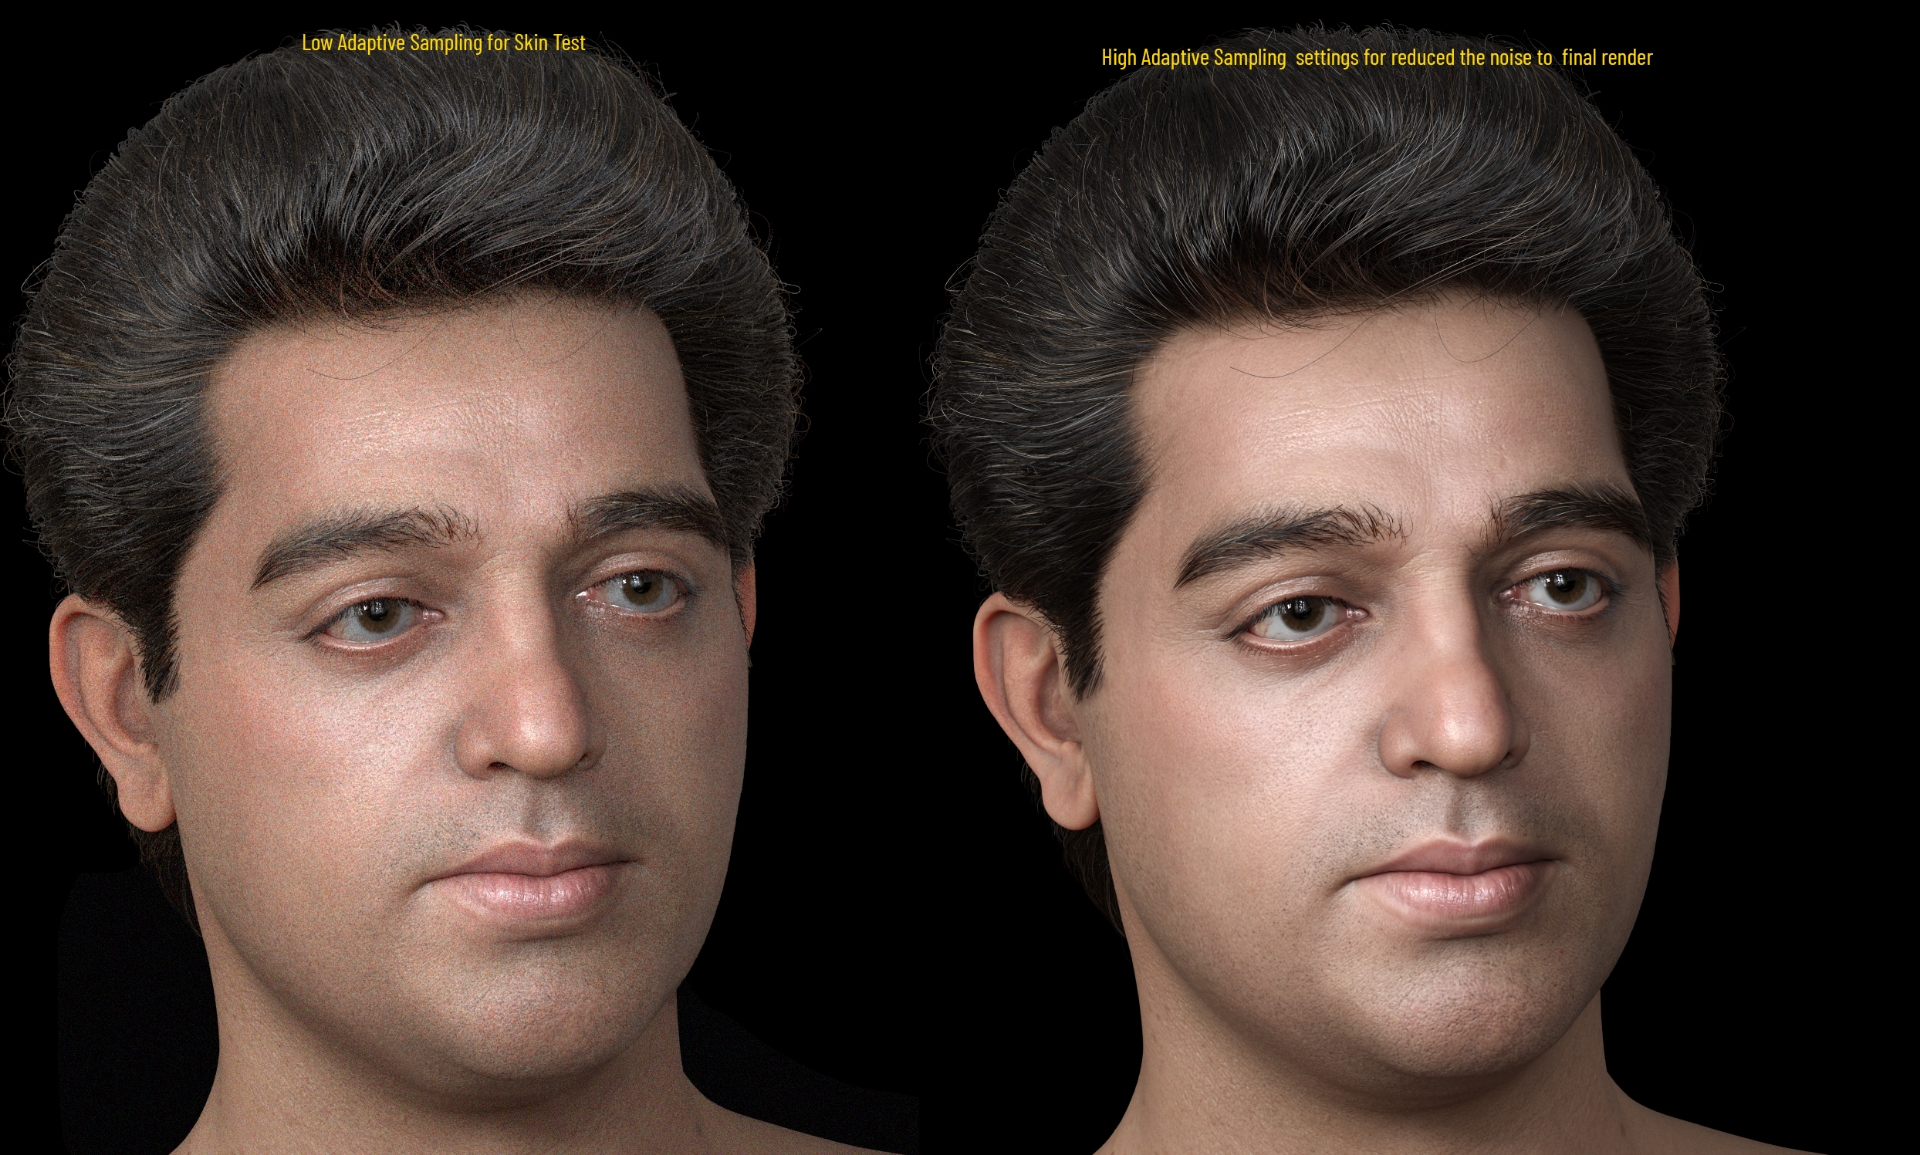
Lighting setup
For the final portrait, I used a three-point lighting setup with a main light at camera right, a fill light at camera left, and a backlight slightly higher than the subject’s head.
In post-production, I adjusted the exposure, white balance, contrast, highlights, shadows, clarity, and saturation to create the desired look. the portrait a more stylized look.
Main challenges when working on the portrait
The main challenge when working on a realistic portrait is to create a likeness of the subject without losing the character of the individual. This requires a lot of attention to the details, such as the eyes, nose, and mouth, as well as the overall shape of the face. It also requires a good understanding of color and light. Depending on the size and complexity of the portrait, it could take anywhere from a few hours to a few days to complete.
The best advice for artists working on realistic portraits is to take your time and focus on the details. Observe the subject closely and pay attention to the nuances and subtle differences in the features. Use references, such as photographs, to help you understand the structure and anatomy of the face. When painting, be mindful of the value, color, and light to create a realistic and believable image.