New Home: Modeling in Blender & Texturing with Substance Suite
Inka Sipola did a breakdown of her recent UE4 environment New Home and talked about modeling the buildings, texturing in Substance Painter, Designer, and Alchemist, and setting up final renders.
In case you missed it
You might find these articles interesting
Introduction
Hello! My name is Inka Sipola and I’m a 3D Environment Artist from Finland. The way I started my journey with 3D was actually a huge leap of faith not too long ago. I can’t remember what exactly kickstarted it, but I somehow realized that maybe a career in games and art was actually an option - contrary to how I had always been told that an artist is not a real job.
I decided to finally fully commit and go for my dream. It meant dropping out of university and moving back to my parents at the age of 23. I then started teaching myself 3D and art full time in January 2020, and I haven’t taken a day off since. I felt like waiting and going to a school to learn art would’ve just slowed me down and forced me to waste time on subjects that weren’t going to be relevant to me. From very early on, I knew I wanted to specialize in environments and world-building. So that’s what I set my target on. Those elements are what I've loved the most in games, all the interesting places, gorgeous landscapes, and the tiniest details that tell the player a whole story just by themselves. That’s what I wanted to contribute to.
I’m almost 5 months into learning at the time of writing, taking it 1 thing at a time, and putting together a solid portfolio.
New Home: Inspiration & Goals
The concept my project was based on was one of the options to recreate in 3D for Polycount’s bimonthly environment art challenge. I instantly fell in love with it and wanted to participate. I’m a huge fan of Dishonored, and this concept reminding me of it inspired me so much.
I saw it as a good opportunity to create a solid portfolio piece and really wanted to push the quality of it and give special attention to the detail. I spent approximately 3 weeks working on it every day and learning the things I needed to learn, as it was my first scene in Unreal. I had already studied a bit of theory and knew somewhat how UE4 works, and I wanted to use this project to put everything into practice.
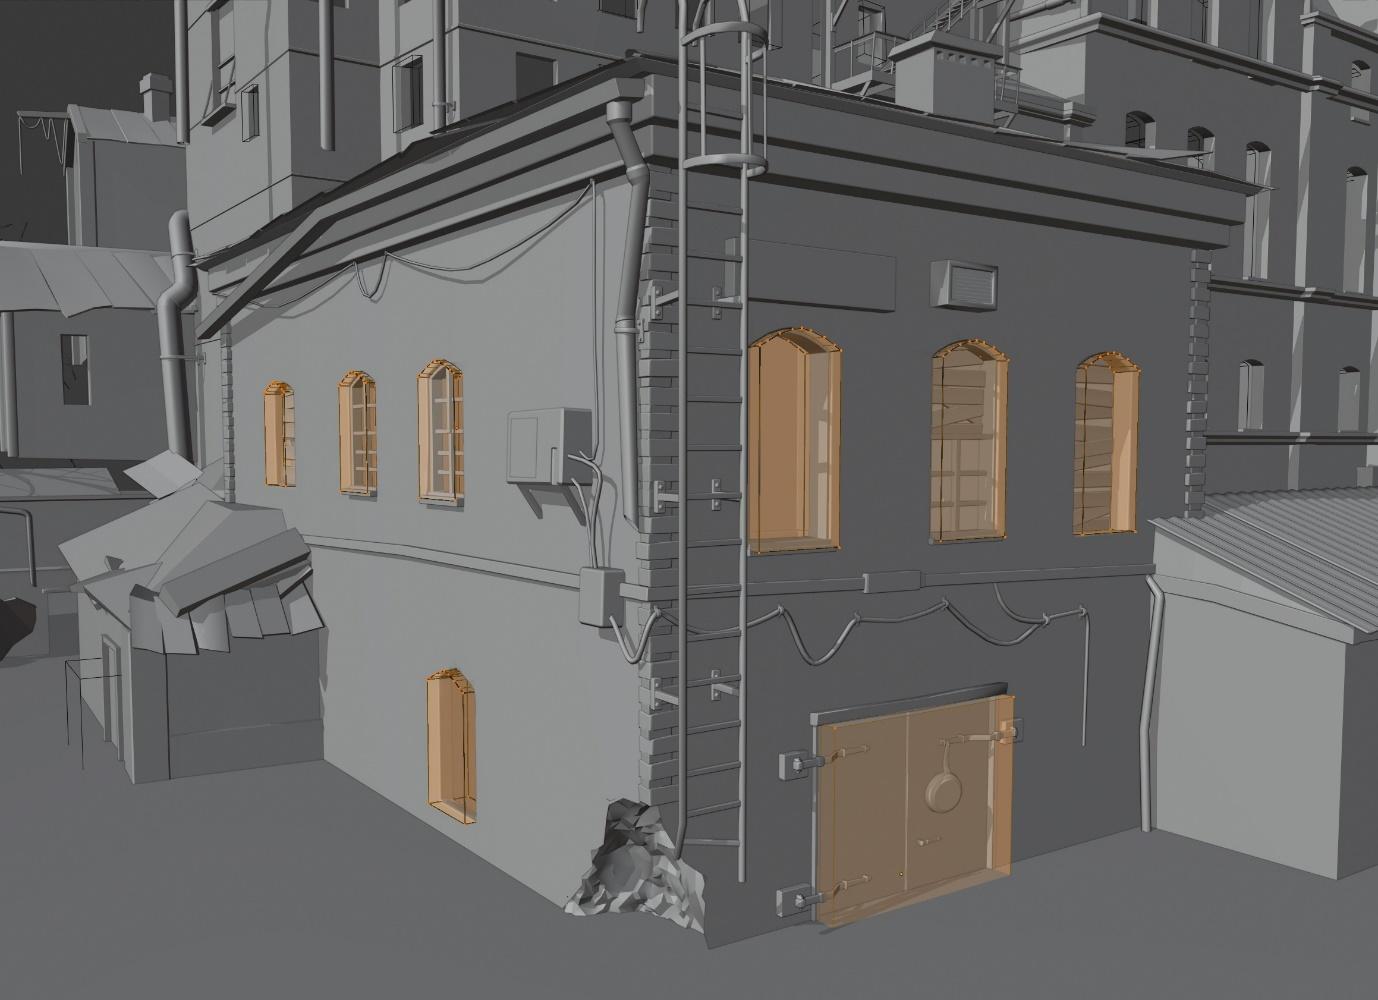
Blockout
I started by creating a quick basic blockout in Blender to get the proportions right, and then imported the whole thing into UE4 to establish an early mood and lighting. At this point, I wasn’t sure yet what I wanted to go for in the end, but I knew I didn’t really like the overcast sky with flat lighting.
I also started thinking about storytelling elements early on, considering if I needed to change the composition and what kind of lighting would be the best for the story I wanted to tell. I ended up going with a warm evening sun to get more contrast in the environment and set up a welcoming mood, telling the viewer that this once abandoned factory building had now been turned into a home by people. I also love plants and wanted to contrast the red building with bits of a complementary color.
Modeling Stage
All the modeling in this project was done in Blender and was fairly simple. I used the boolean and bevel modifier workflow, keeping everything (except for the base shape of the buildings) procedural until the end. HardOps and Boxcutter addons were what allowed me to work fast and smooth with the modifiers, cutting the holes for windows with just a few clicks and being able to change and move around the cutter meshes afterward. No destructive cuts. With the Boolean workflow there is some cleanup afterward once you apply all the modifiers, but not too much. Quickly merging vertices to get cleaner topology with just a press of a hotkey was really fast. I also removed all geometry that wasn’t going to be visible. For example, the buildings, window frames, etc. don’t have back faces. I tried to think of which parts I could reuse to reduce the workload and made a few different roof pieces I managed to use for almost all of the buildings. The distant buildings were just put together from the parts I had already made.
The red building tops are actually separate meshes, as I found they just made everything a lot easier. I didn’t want to deal with the UVs and tried to get a sharp broken edge with material blending.
I spent the most time getting the front building right since I wanted to take a close-up shot of it and felt like it had to be “perfect”. I made individual meshes by arraying some bricks to make the silhouette more interesting and realistic. With the broken corner, having just a flat plane with a hole would’ve looked really bad and broken the immersion, so I covered the edges with individual bricks, sculpted some rubble, and baked it down to a lower poly version. I tried to capture all of the detail that was in the concept and added some of my own storytelling elements as well, - small details like a slightly bent ladder, the broken corner I mentioned earlier, and small individual props.
I did very little high to low baking overall, and just had most of the objects with one segment bevels and a weighted normal modifier, which makes the edges look smooth and as if they had a lot of geometry.
I found a very helpful cloth simulation tutorial for creating a plastic bag on DiNusty Empire’s youtube channel, and with the help of it, I created the trashbag decorating the corners in my scene. I baked it down to low poly in Marmoset Toolbag.
UVs
I did the UVs for every object just before I started texturing that particular mesh. I didn’t use any special tools for that, just basic ones found in Blender. Marking seams, unwrapping, and packing them tightly. I had many tiling materials, and when, for example, unwrapping the brick buildings, I set up the material I had made for them in Blender, just to see that the lines were straight before exporting to UE4. I had a few small unique props share the same UVs and they were exported in one go for texturing in Substance Painter. I used UE4 to generate all the lightmap UVs for me and it worked out fine.
Texturing
- Substance Designer
Most of my materials were made in Substance Designer. I’m a big fan of the procedural workflow and find it faster and more flexible than manually texturing objects.
I added tons of parameters to my shaders in UE4 for more variation and control over the materials. For example, I made just one basic metal material for which I added parameters for color variation, normal strength, roughness, and tiling. I added the rust textures in the same shader as well, used a vertex color as a mask, and then painted the rust wherever I wanted it using the vertex painting tool in UE4.
I actually ended up making a custom horizontally tileable material for the red building parts in Substance Designer. I initially textured it in Substance Painter but couldn’t get the material to read well and just overall wasn’t happy with it. I got a slightly better result in SD but still felt it was not as good as it should be. It’s a distant object, however, and it’s fine when you don’t look too closely at it!
- Substance Painter
I used Substance Painter for small unique props and the big white building(s). I took a few small assets sharing the same UV at a time and gave them some special attention in SP.
Even though the white building was textured in SP I still managed to reuse it quite a bit. I reused the building side as the distant building on the far right, overlaid with a darker color in UE to make it look slightly different. I didn’t pay too much attention to it since it was not going to be very visible. The AC, the yellow lining on the front building, and the boat are all using the same material as well, just with a different color overlaid on top and a vertex color controlling the hue change.
- Substance Alchemist
I used Substance Alchemist for the foliage, and it’s a great tool for that purpose! Basically, I started by making a few branches in Blender, sculpted the biggest parts, and copy-pasted smaller twigs here and there. I then slapped my wood plank material on them, added a particle system on the branch, and with vertex weights determined where the leaves would go. The leaves were made from a texture found on textures.com.
Once I was happy with the branches, I rendered an image of them with a transparent background.
When you save the rendered image as a file that can contain alpha information (png), you already have an alpha mask for vegetation and can use the rendered image as a base color as well (if you want to).
Now on to Substance Alchemist! I simply imported this image into the software, and Alchemist generated the maps for it. It can do this for any image. It works well especially with foliage maps, and I got a normal map for it with little to no trouble.
I then put together a bush from the branch alpha cards with the textures and also made some small wood debris with the same method.
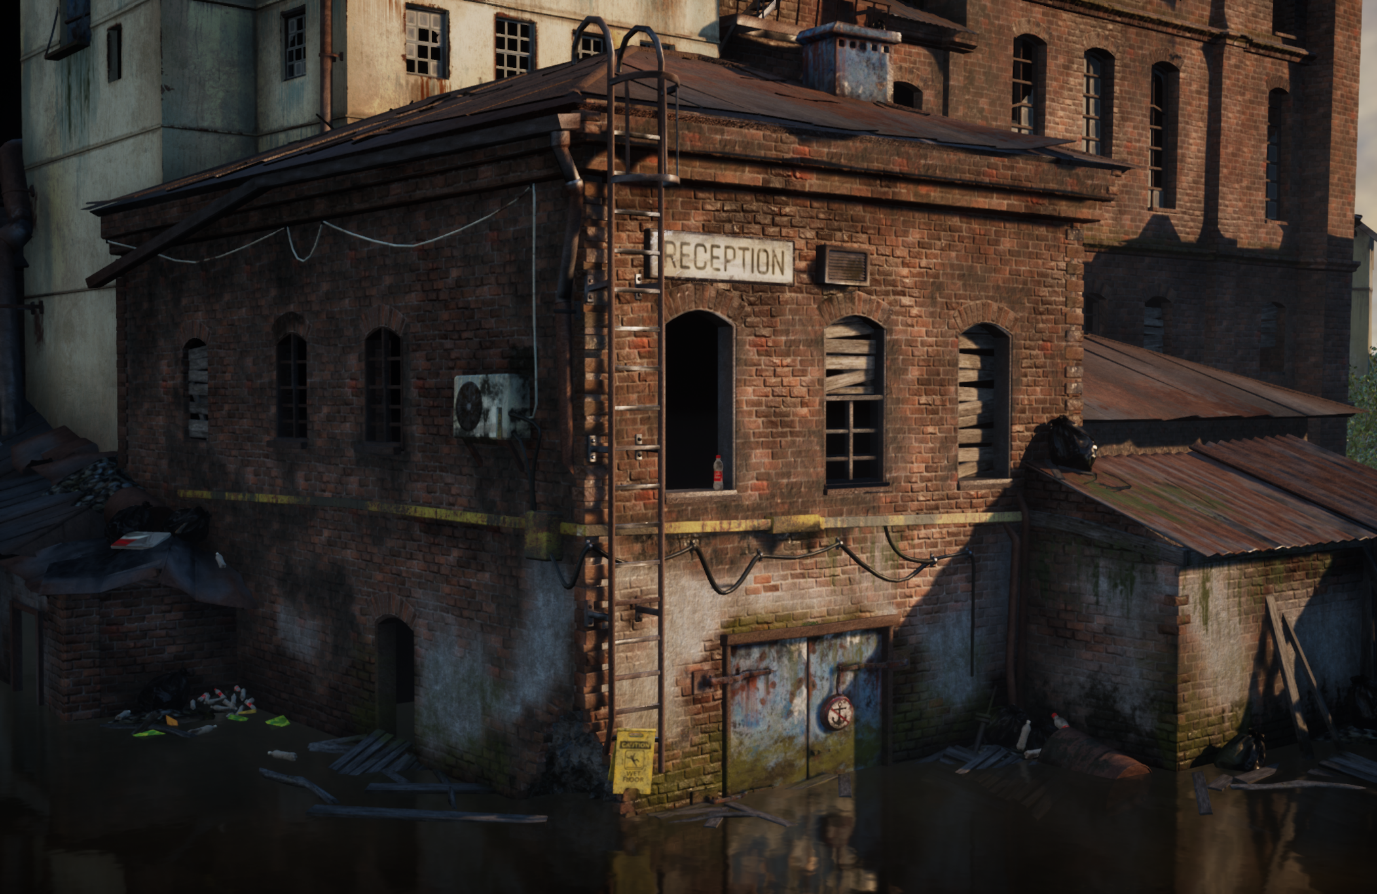
- Realistic Surfaces
This look of this brick building was brought to you by…
- Base materials made in Substance Designer based on solid, real-world references. PBR values on maps (you can find charts for metals, for example) and roughness variation are important.
- Vertex blending: The result of vertex blending relies heavily on the amount of geometry the mesh has since it uses the individual vertex’s color information and the mask is set up based on the color. I ended up subdividing this building to get sharper blending between the white grout and the brick. I also painted some darker areas and some dirt with a grunge map mask determining how it would blend. I didn’t want to use a mask for the grout since it’s not easy to control where exactly the material goes with it.
- Parallax Occlusion Mapping (POM): Set up in the shader. It creates fake bumps from a height map without needing tons of geometry like tessellation/displacement.
- Decals: I made these decals in Substance Designer and used them as opacity maps for UE4’s decal projection tool. With them, I added some dirt, algae/moss, and sharper rust on the buildings.
I could’ve used a mask for blending the rust, but I wanted more control over it and used just a few decals instead.
Preparing the Final Renders
Everything was put together in Unreal based on the blockout I made in the beginning by slowly replacing all the items with the final meshes. I ended up tweaking some things during the process however, like the placement of the buildings on the sides to better fit my main image. I also added more structural elements, like a few additional pipes, fire escape stairs, and some metal bars to bring in more detail and realism.
The shots I took were all high-resolution, and I rendered the short video clip with the engine’s animation sequencer.
My lighting setup was pretty basic: Skylight, Directional light, a few spotlights on the top buildings, and a few on the water to create variation on the surface and have the bottom shine through a bit. I used an HDRI sky from hdrihaven.com as the sky by just setting up a material for a skysphere. The only post-production settings I used were removing the auto-exposure UE4 has on by default and .1 contrast increase. Afterward, however, I also adjusted the brightness levels slightly in Gimp.
The water was probably the most tricky part to get somewhat right. I felt like I played with the settings for an eternity, watched many tutorials, and read the documentation. It’s still not perfect and doesn’t entirely match what it would look like in real life. The result I have at the moment was reached by using the base water normal maps from UE4 and flattening them a lot to create a calmer swampy-looking body of water. For the opacity, I used the Fresnel node and a parameter to tweak the amount to what looked nice. I wanted some of the ground at the bottom to show through and ended up putting in a dead leaf texture I had made as a test in Substance Alchemist, darkening it a lot, and making the roughness value very low. Together with the dark ground and color variation on the water plane masked by one of my noise maps, I got the muddy look on the water. Reflections were tricky, and I got the best result with UE4’s planar reflection actor. It’s not cost-efficient AT ALL but looked the best and that was the end goal as the project was a portfolio piece.
Inka Sipola, 3D Environment Artist
Interview conducted by Arti Sergeev
Keep reading
You may find this article interesting