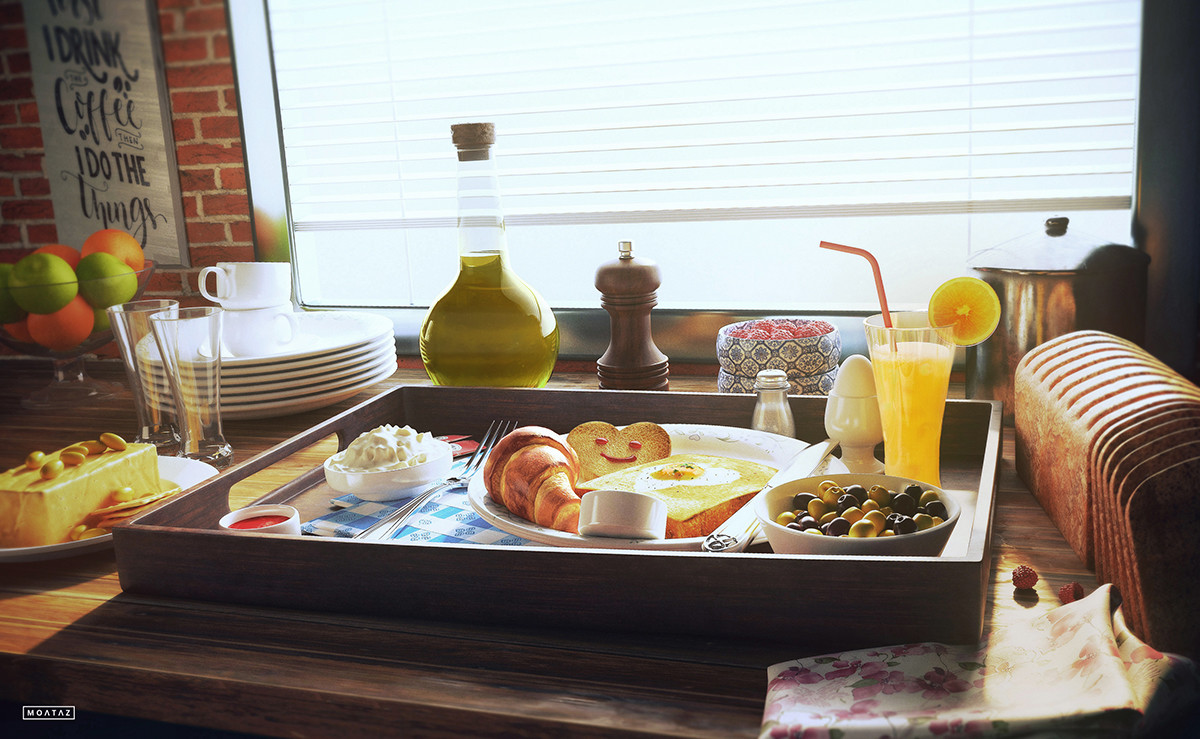
Preparing a Sunny Breakfast with V-Ray & Substance
Moataz El Sayed allowed us to repost his breakdown Sunny Breakfast created with the help of 3ds Max, ZBrush, V-Ray, and Substance Painter.
Moataz El Sayed allowed us to repost his breakdown Sunny Breakfast created with the help of 3ds Max, ZBrush, V-Ray, and Substance Painter.
Introduction
Hello, my name is Moataz El Sayed, I’m a Self-taught 3D Artist from Egypt. Last Seven years I’ve been studying 3D graphics and loved to do what I truly believe in. I currently work as a full-time 3D artist.
actually I am excited to show you my latest personal project called “Sunny Breakfast” .. I started working on this design 6 months ago in my free time and it was a challenge for me to do something interesting and different, I worked a lot on my lighting & texturing techniques so I hope you all like it.
References
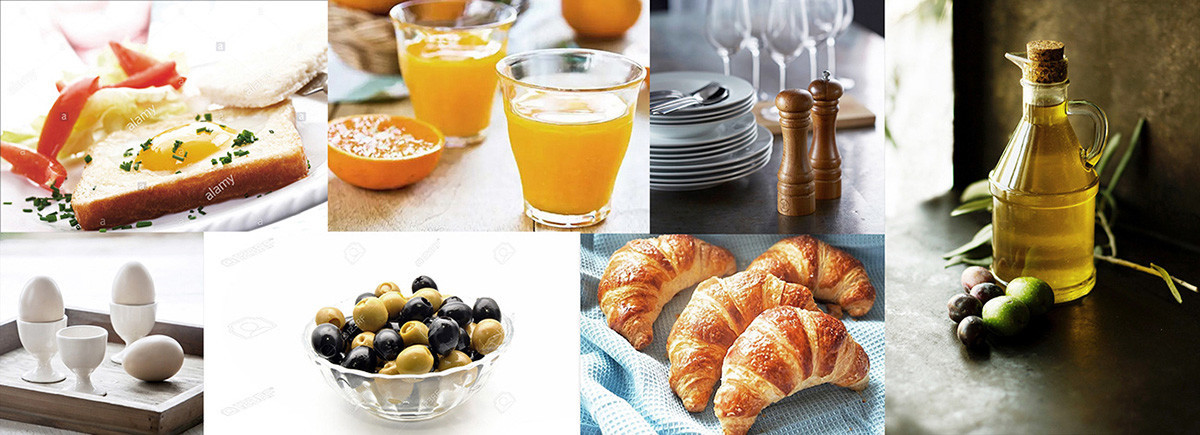
Before I start blocking, I’m looking for references. Having several real images of each element helps a lot in the whole process of doing shading, displacement, lighting, and rendering, therefore it’s best to keep to the proper scale.
As with any personal project, I was looking to do a piece that takes me out of my comfort zone and allows me to learn new software and techniques. I chose a Breakfast scene environment because it allowed me to learn more about creating some organic and new props for me, and to integrate ZBrush more in my environments.
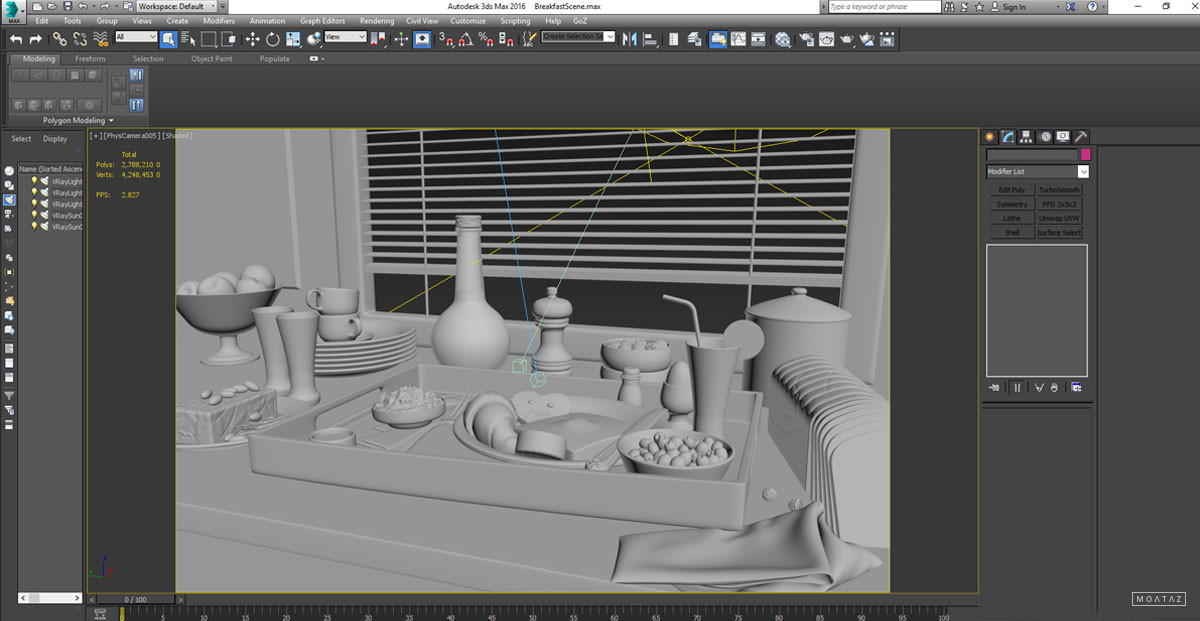
So Once I had found my inspiration I used 3ds Max for some basic blackout modeling, to figure out the proportions etc.
Modeling
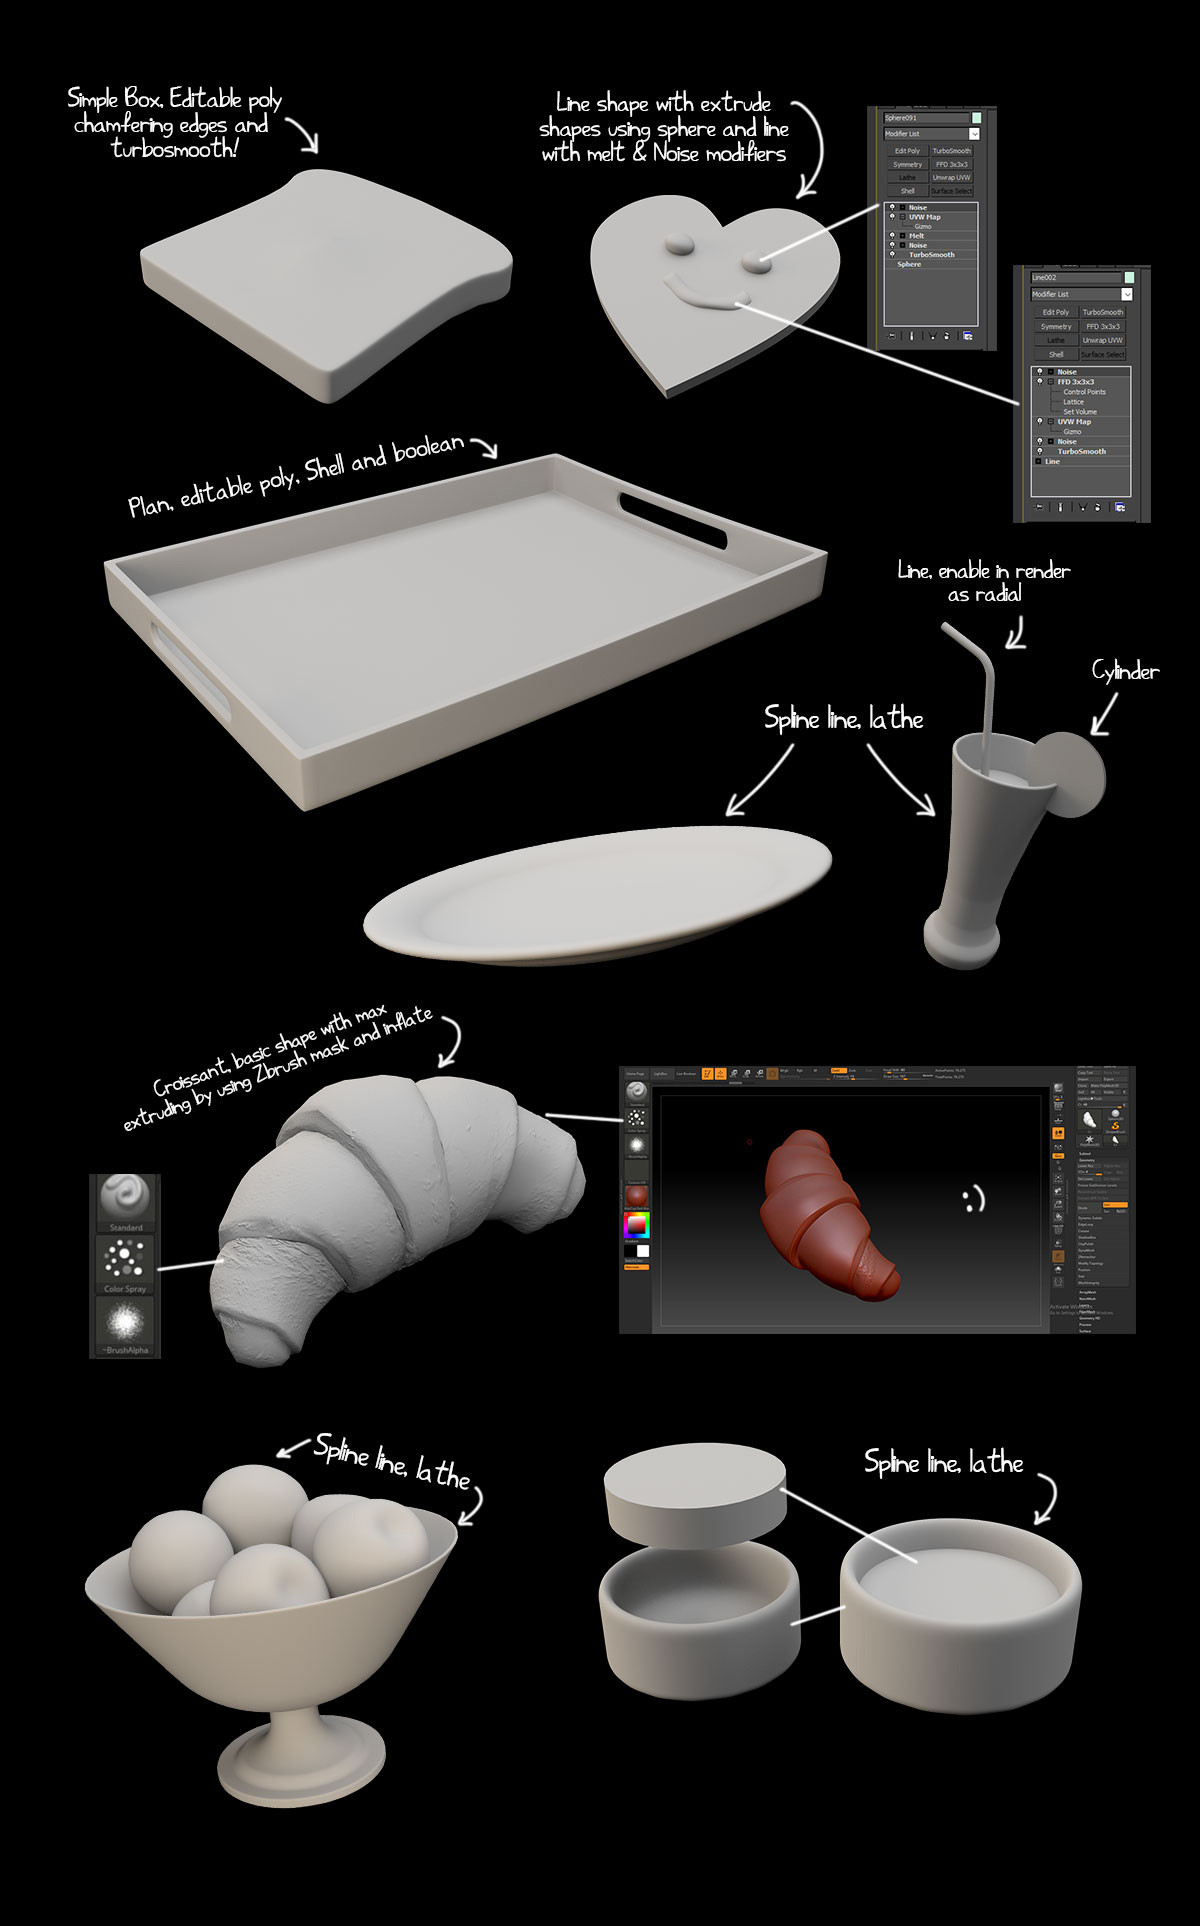
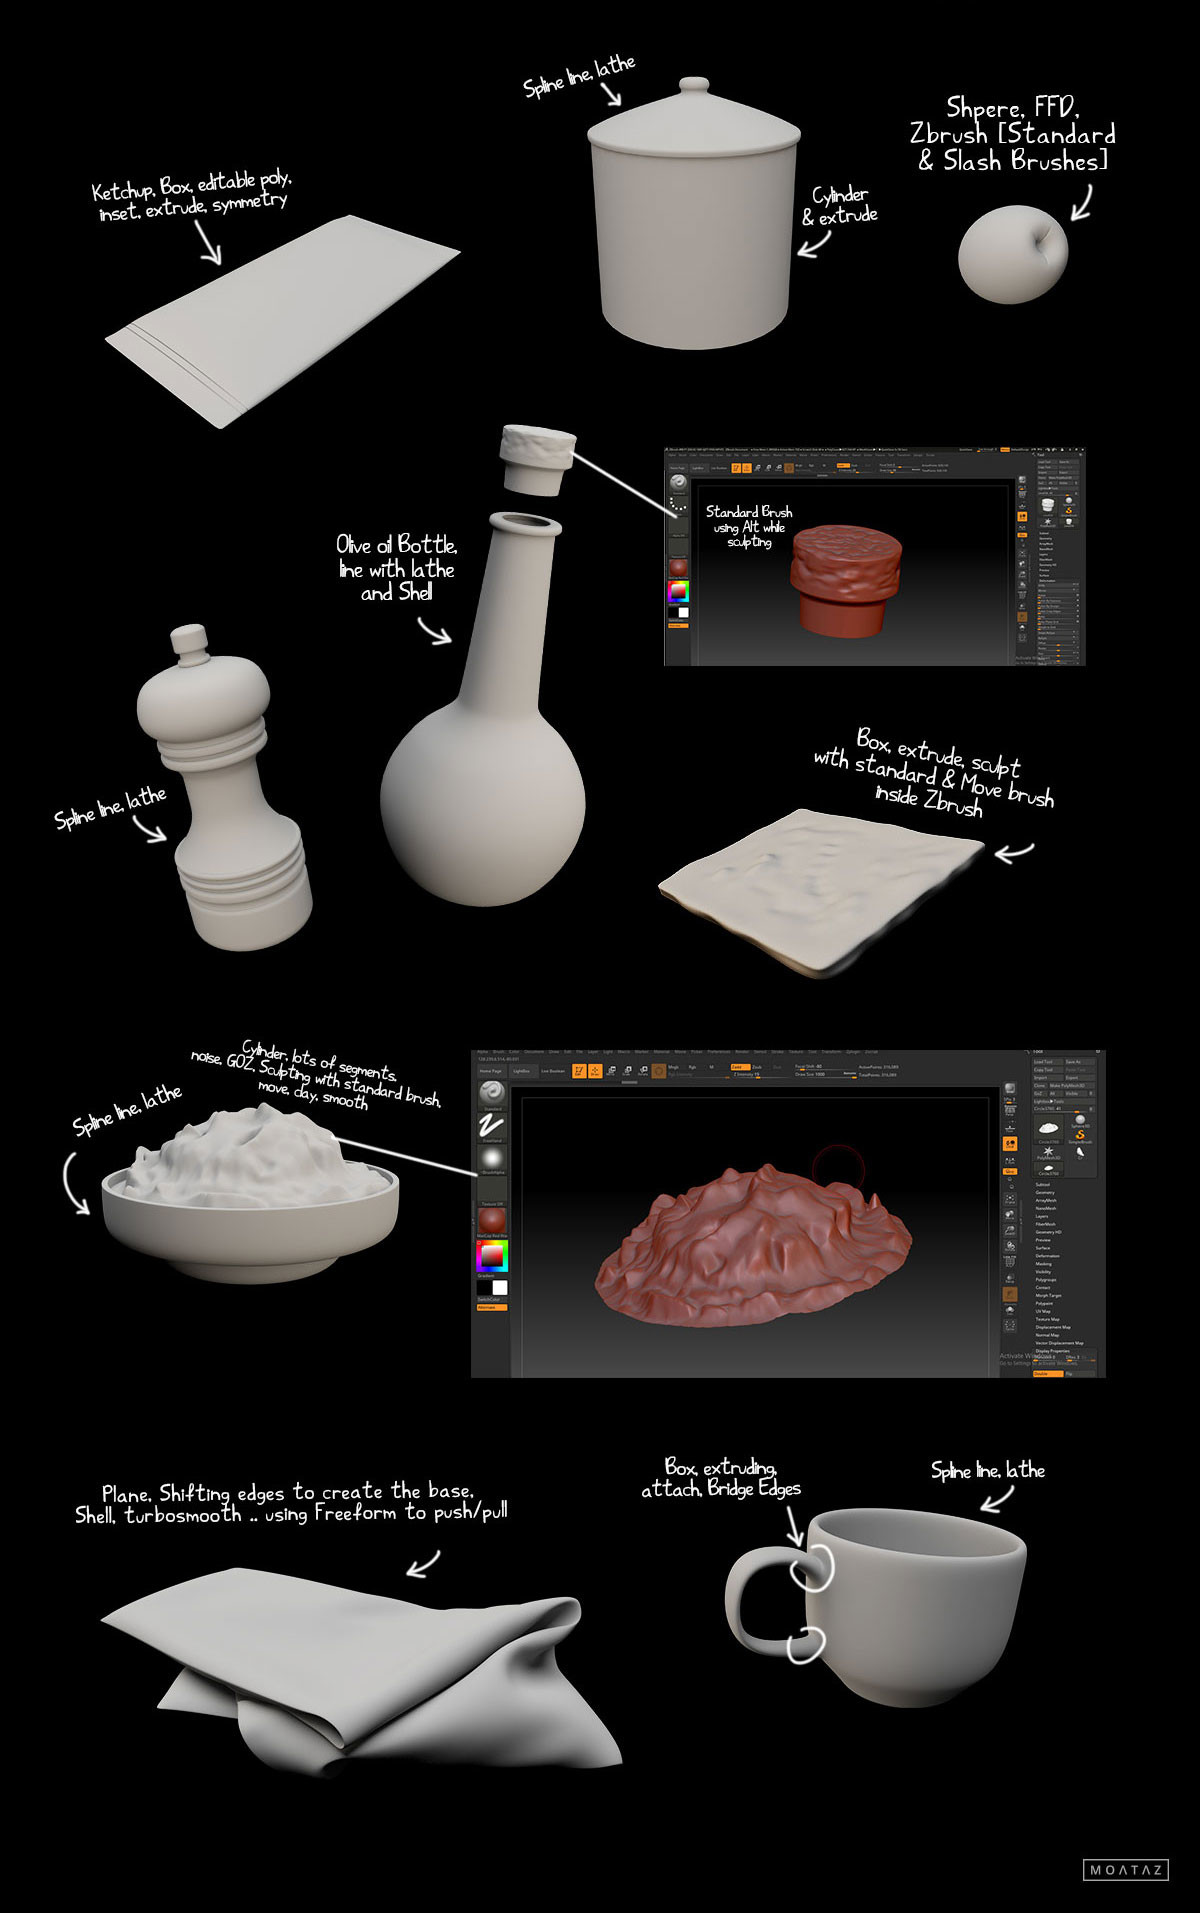
For modeling, I used 3ds Max. In most cases, I start the modeling process with a simple primitive object – like a box, cylinder, sphere, or plane, and after that, I convert them into Edit Poly and start to play with their forms. I like this polygonal modeling method because it allows you to control every point, edge or polygon on your object.
Also, I love to use Splines with converting to Editable spline and start playing with its point, edge or polygon with adding modifiers to it like lathe, it gives me such great results.
Also, I often use a hard surface modeling method using modifiers such as TurboSmooth or MeshSmooth that allow you to create more complex objects or more smooth and natural surface. As you can see, I work my pieces thinking that they will have a TurboSmooth modifier applied to them after, so I know I need to make connections near the borders to support the smooth effect.
Also I sculpted all additional details using Zbrush, I truly love to use its Alpha, doing mask by using Alpha & also playing with basic standard brushes to do anything I need, After doing my Sculpt, I duplicate the subtool and start decimating or using Zremesher to get a low poly version of my High one, then exporting to 3ds max using GOZ or exporting as obj file. also, I can export each High and low subtools then importing its “obj” inside Substance painter and baking all my details from the High poly file.
A good model also makes the texturing stage much easier. Once you know how your model is built you get a better idea of how to texture the different elements.
Direction
I was inspired a lot by food photography, so I looked at many photos to choose the most suitable direction I love to composite my models with, at first steps I did an initial composition test, I tried to play a lot with my Camera’s angle to do what I am aimed for according to some references, but at this stage I felt that there is something not good with what I imagined before working as I loved to do more rich and dramatic scene, So I decided to change all composition direction.
So sometimes it happens!, as I believe that it feels right to be in the wrong direction!
I loved to do a Sunny and Shiny atmosphere, So I decided to put all models on a table in front of a window After that started testing out my lighting before texturing to see how is my scene will be.
So this is the result of my new compositio:
Lighting
One of the most important stages of this work was in setting the lighting and positioning the camera. The lighting and camera both play a huge role throughout the whole work, and I think that the correct usage of these is the key to creating successful work. Light plays the role of creating the atmosphere and mood that artist is trying to express, and the camera fills this atmosphere with the depth of the artist’s feelings and is able to show emotions up close and reveal the deeper details.
Usually, I set the light in the early stages of my work when I only have a primitive idea of the scene. This allows me to see the atmosphere in general, the depth of the light sources, their shadows, how the light rays bounce of the surfaces of objects and their distribution across the stage and the interaction of all of these parameters with each other.
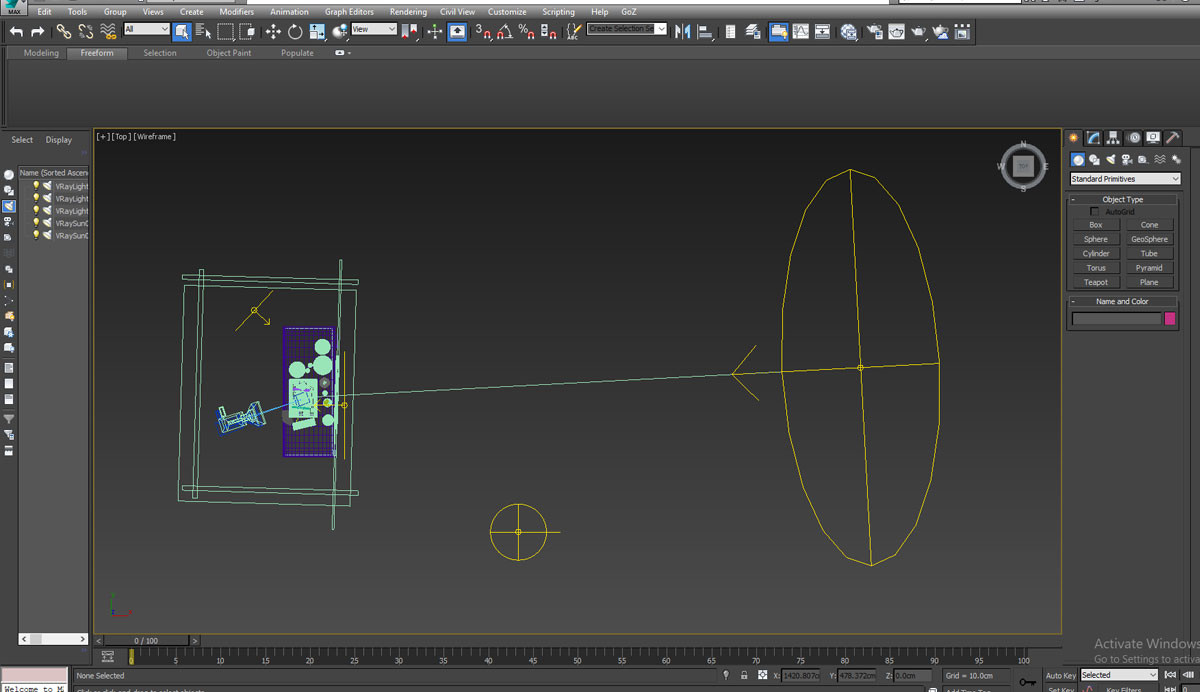
As for the Lighting of the scene. I did some boxes around the scene to place my lights without any external effects, I used V-ray Sun light instanced in the environment map, Two V-ray plan lights (one in front of the window and another one inside room as a fill light), dome light with HDRI vray map.
Texturing
Applying materials and textures is one of the most important stages in my workflow. It’s much simpler, faster and efficient to use high-quality textures, rather than spending a lot of time on routine modeling. usually, I take them from cgtextures.com, I fix some textures in Photoshop by making them brighter, more contrasting, or sharper and so on, or in cases when I need seamless textures.
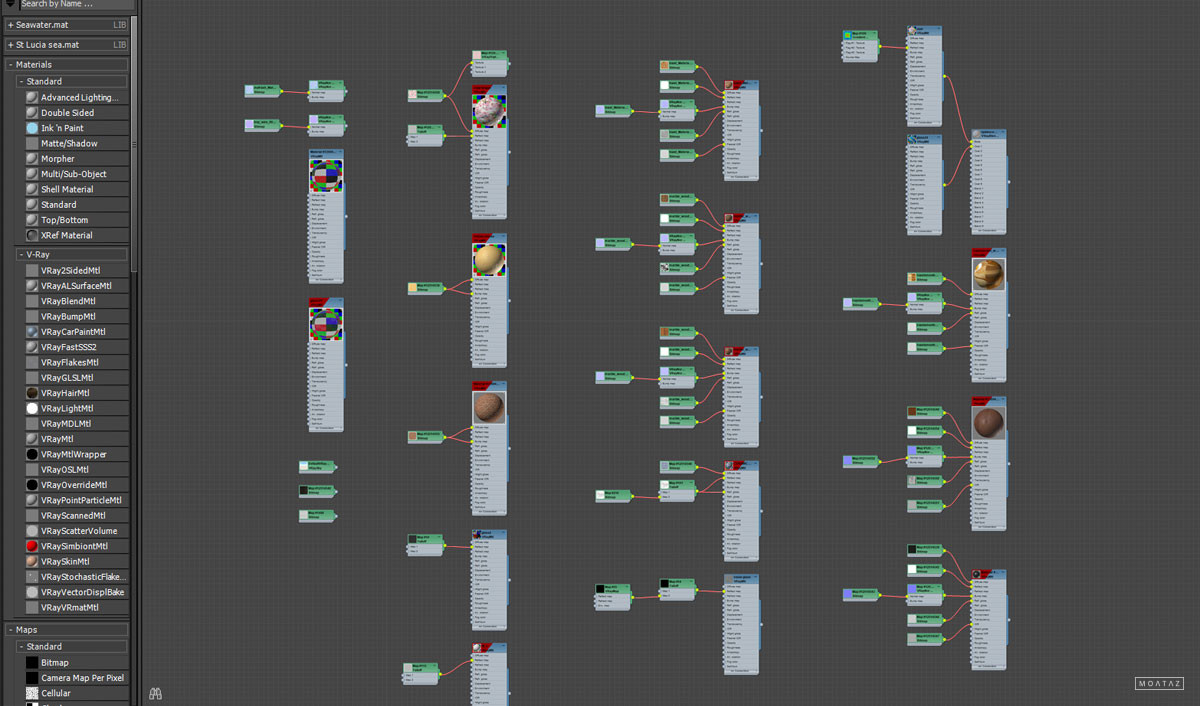
I used both Substance Painter & V-ray materials. For Substance Painter, I unwrapped all props which I need to texture by and played around with doing base colors/material and adding another layer of procedural effects, also it was really nice to try some generators, filters, alpha & paint, This is a really great software with many tools that make your life much easier.
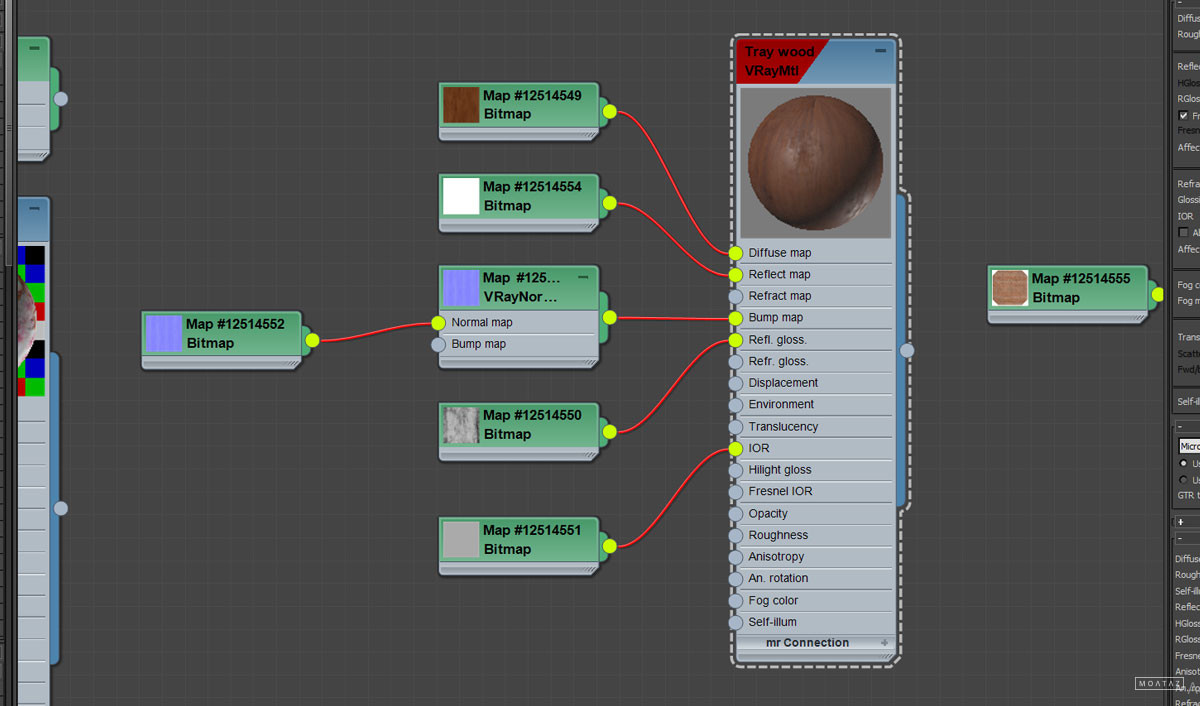
I also did some models texture using V-ray materials. I tried to make everything as real as possible, Almost every material in the scene has the same structure. I always use the Diffuse map plus Reflection, Refraction, Normal and Bump maps, which help create a more realistic result.
Also, it’s very important to use Displacement in your scenes. It will give a more realistic effect on your objects and in the scene in general. Usually, I use VRayDisplacementMod as I work with the V-Ray renderer. To avoid waiting for the long render time, I use Displacement in 2D mode.
Camera Setting
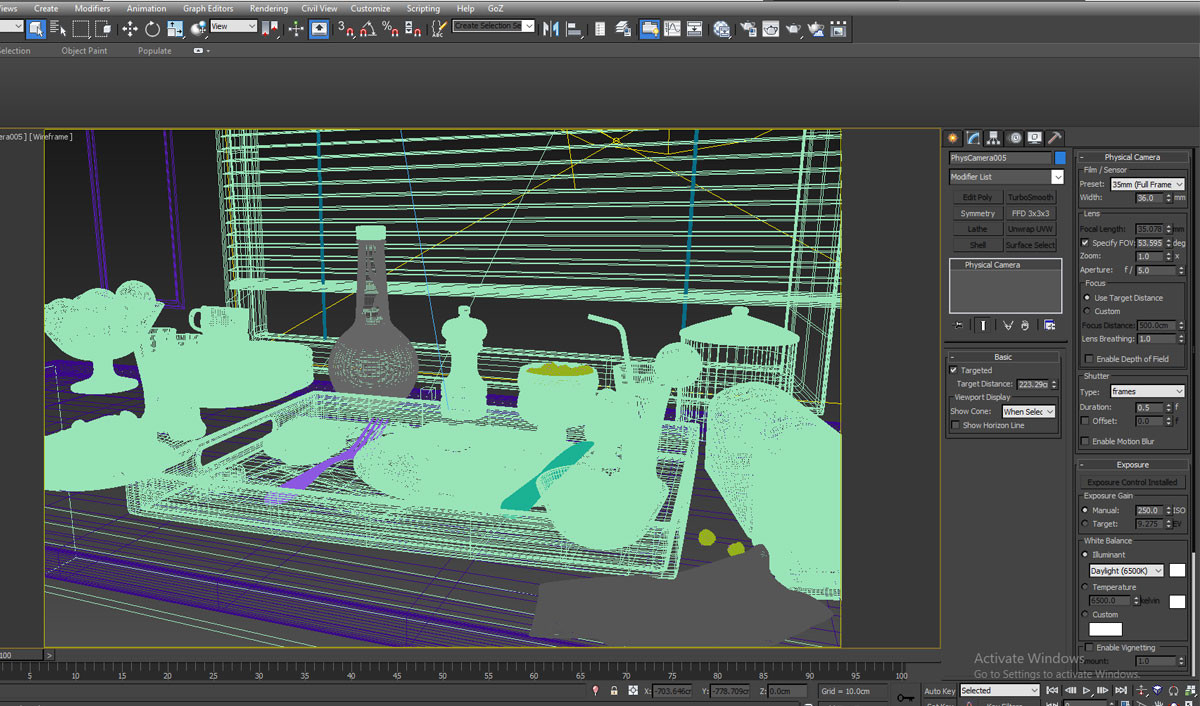
Positioning the camera this way is very useful when you want to show all the moments of the scene in detail and at the same time focus on individual objects by placing them closer to the camera. I used Vray physical camera, Changed the ISO and aperture values.
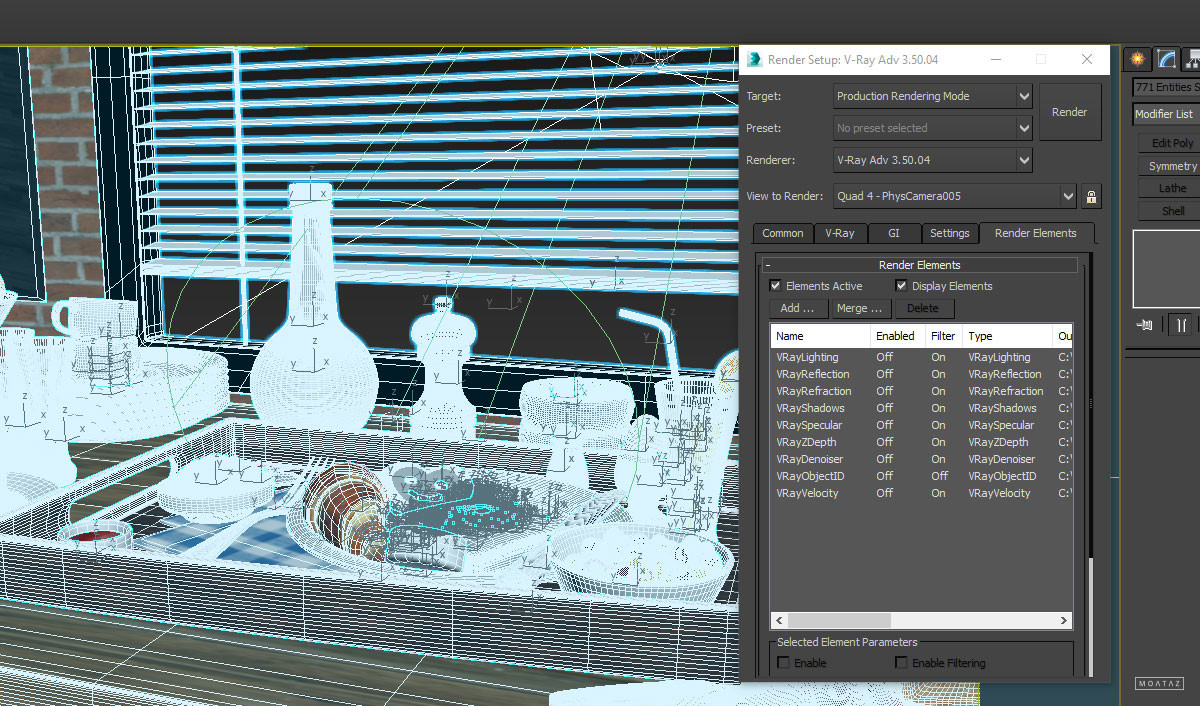
Rendering
I decided to render the picture with V-Ray, with a large resolution. I did this because first, it is easier to work with images in high resolution, paying attention even to the smallest details, and secondly, for any printing needs.
I assigned each element with an ID number to create a colored mask, It ‘s a great way to select any part inside Photoshop easily, Also added needed V-ray element passes to composite in the Post-production process. So I added Vray lighting, Reflection, Refraction, Shadows, Specular, ZDepth, Denoiser, Object ID, Velocity.
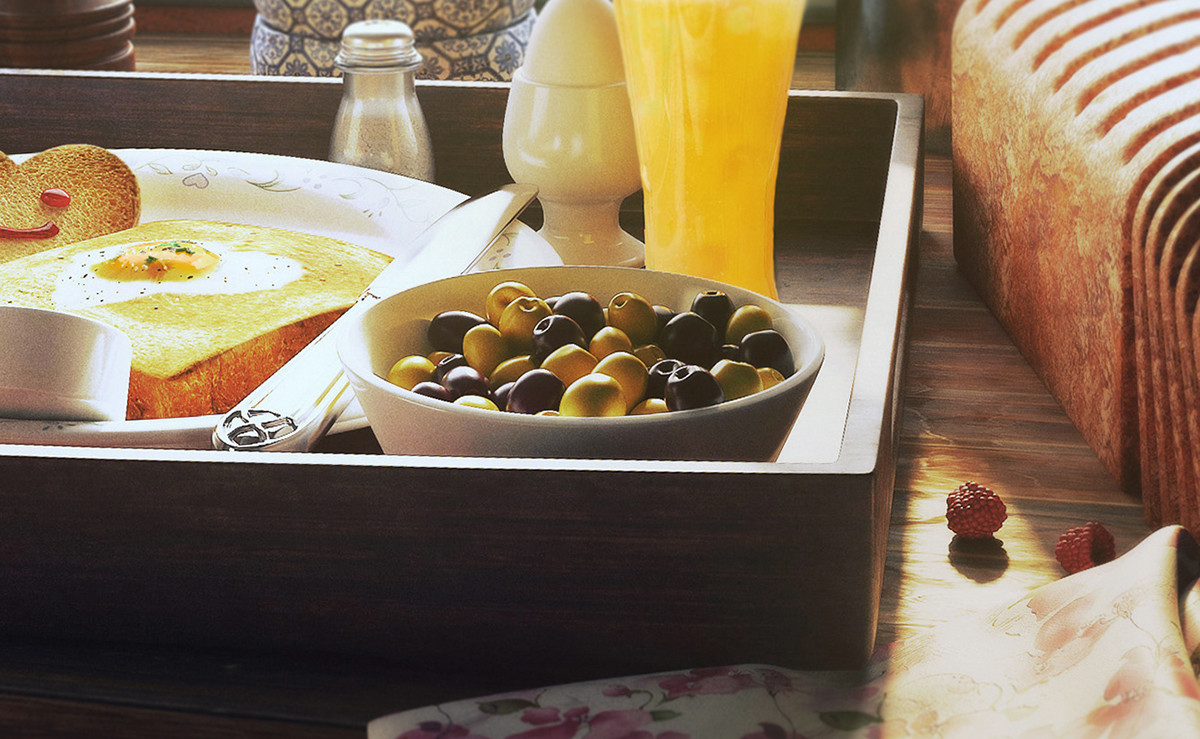
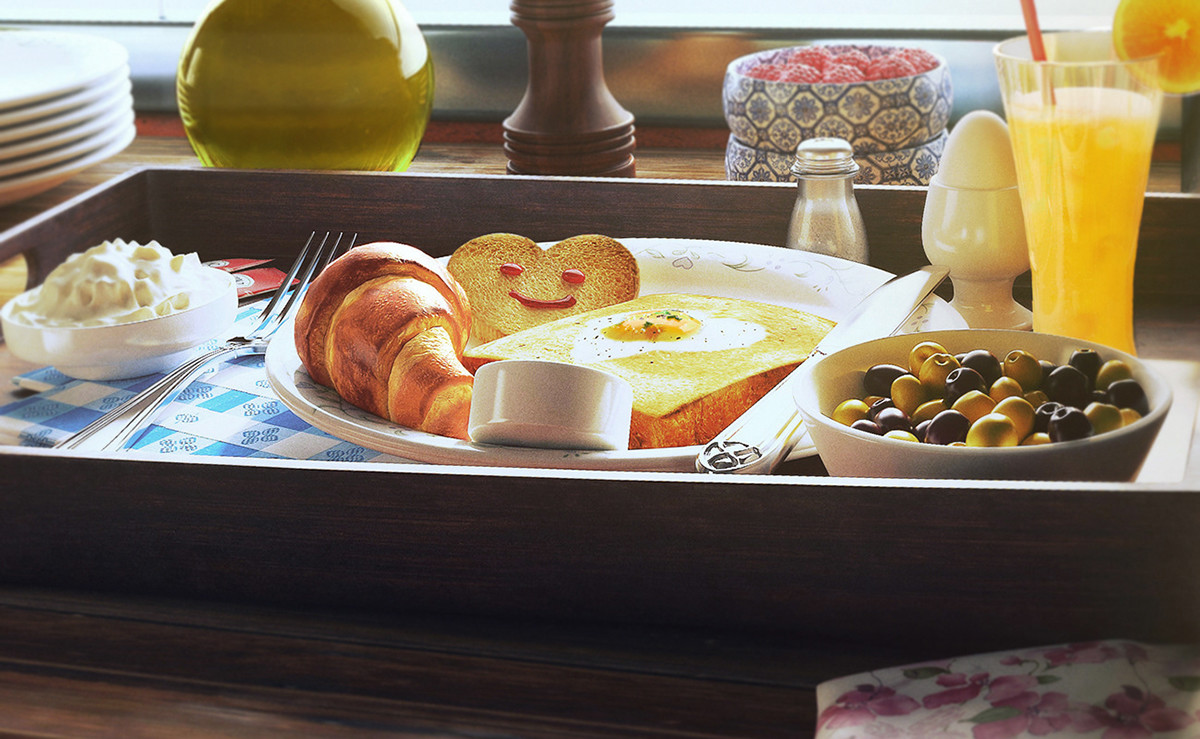
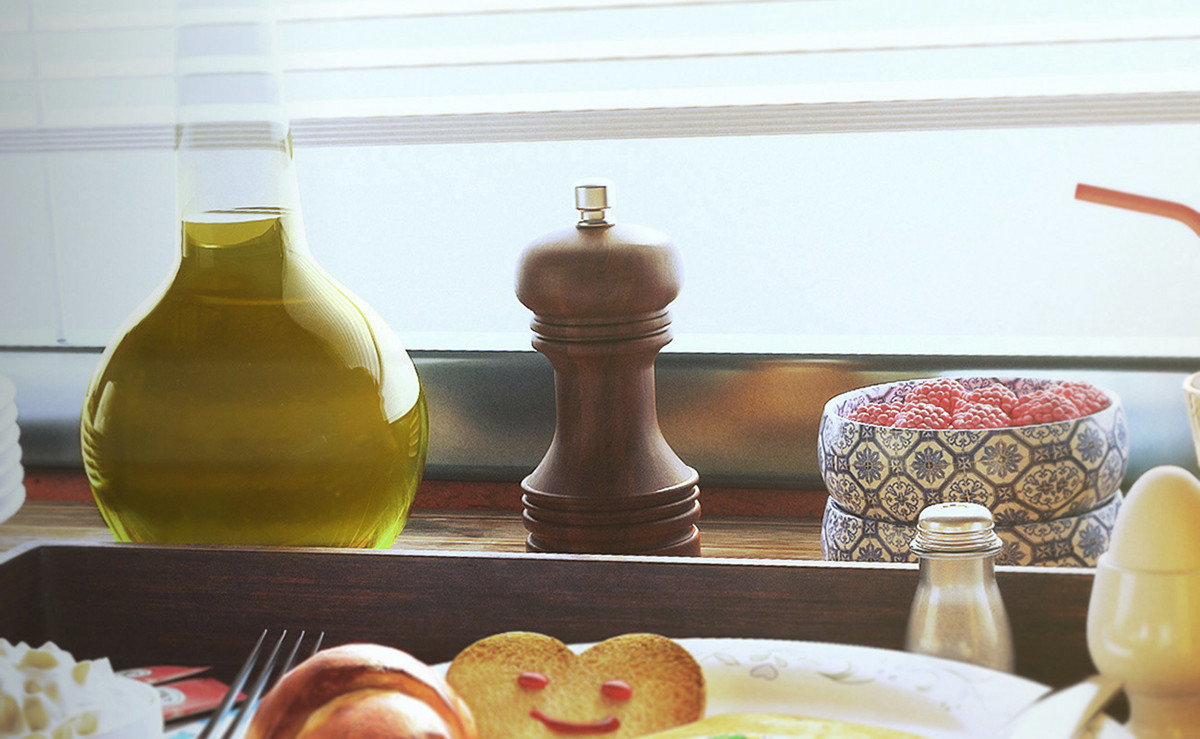
Post Production
Compositing rendered passes of (reflection, refraction, shadows, specular, z-depth, etc) layers with some color correction, camera raw values, and ensure that I did a nice color harmony & composition in the whole scene.
Also, Love to thank a lot My awesome friend & Artist Karim Abou Shousha for his help and support during the post-production process.
So this is the final!
This was the final scene after compositing and adjusting in Photoshop.