Daniel Swing has recently shared a quick tutorial on the way he’s working on concrete and glass surfaces in Substance Designer.
The basic color
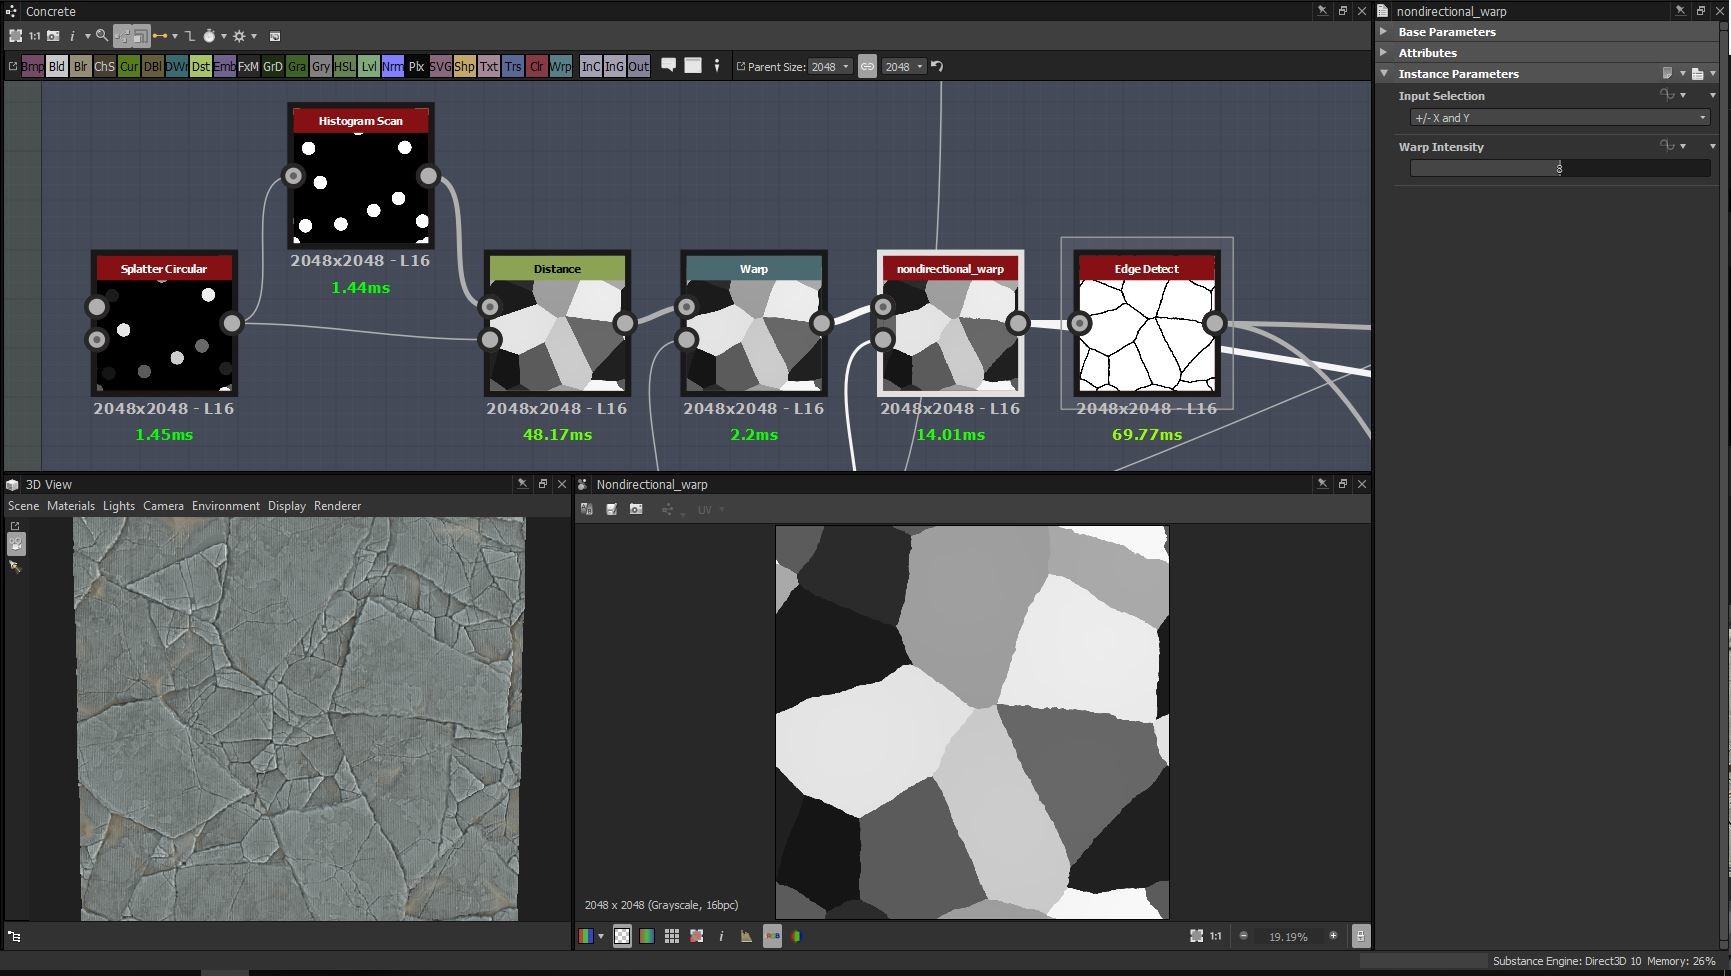
Here you can see the very basic way I create the largest crack-flakes in the pattern I warp it with a small ‘Perlin Noise’ and then with a ‘Cloud2’. I use a ‘nondirectional_warp’-node that I got from Daniel Thiger’s Gumroad (I don’t know who else to give credit to) – but a directional warp or even a slope blur could render a similar result.
Major credit to Daniel Thiger, I’ve studied a lot of his graphs, this method is greatly inspired by his work:
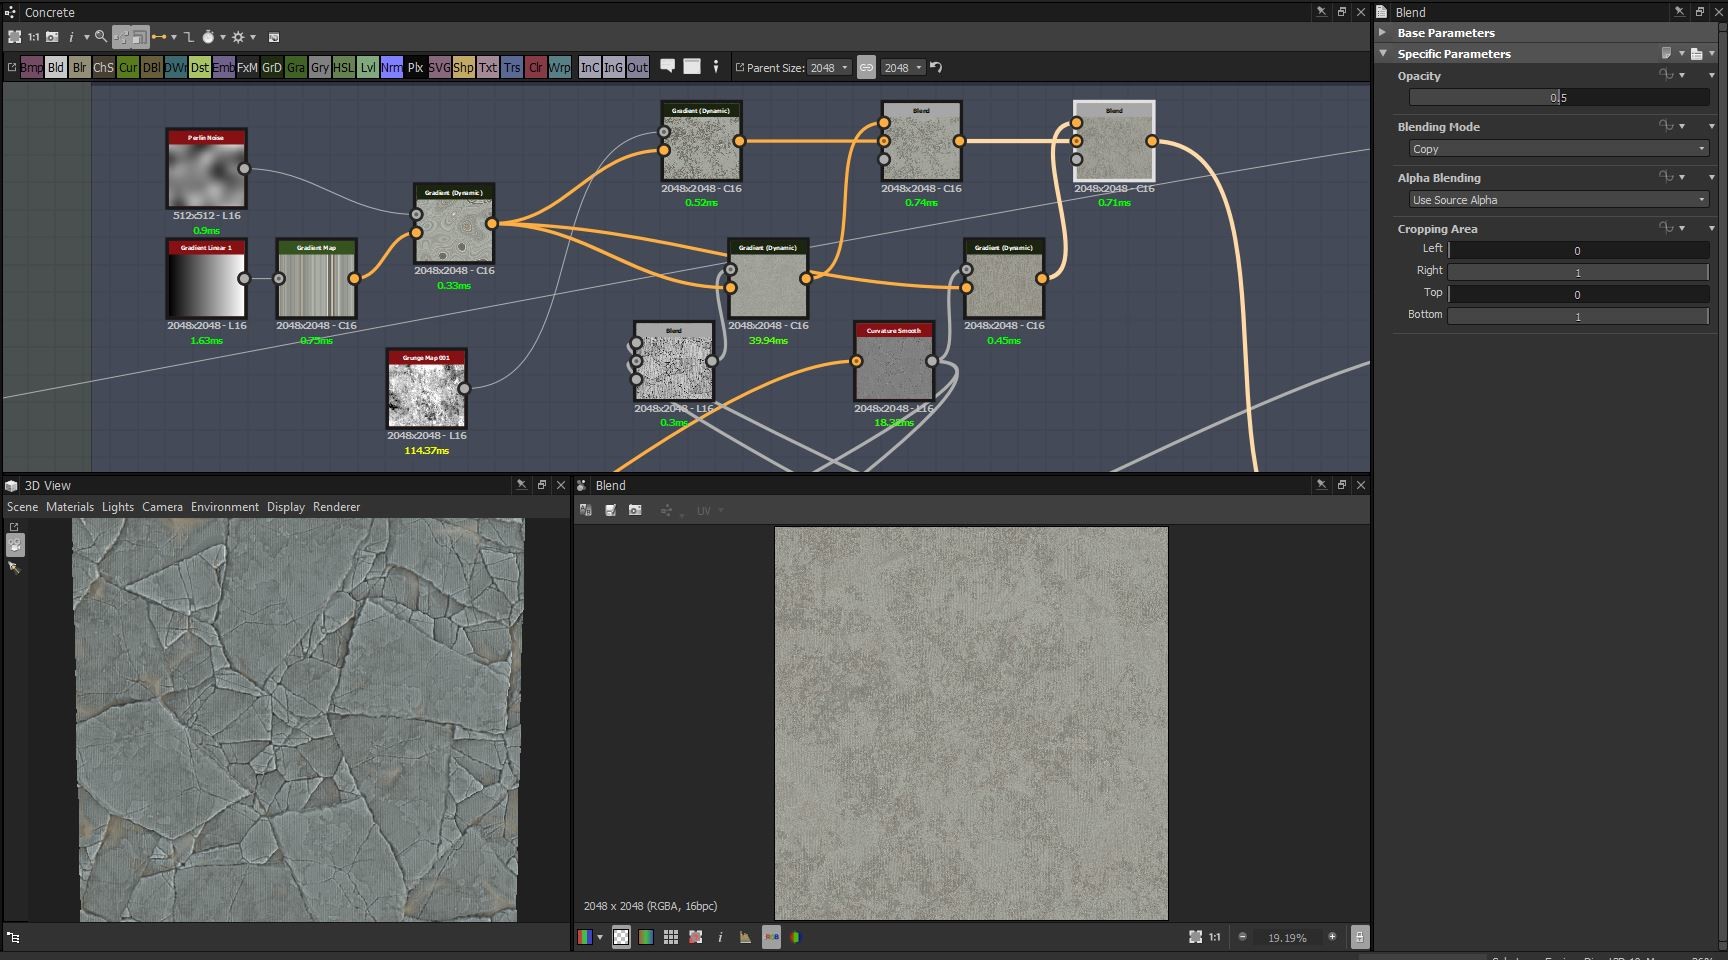
I then feed the pattern into a ‘FloodFill’ to create gradients of the same shapes. I use the ‘Dilation’-node to tighten up the gaps between the gradients. I blend in a mix of ‘Cloud2’ and a small ‘Perlin Noise’ (to add some noise and un-even-ness in the gradients) and then pull it through a ‘Histogram Scan’ – I will use this as a mask for where I will put my smaller cracks later on. As you can see, the histogram has the position parameter exposed: That’s because I want to be able to tweak it as I go, masking out a larger or smaller part of the largest flakes.